Family favorites
These muffins were not only easy to make but delicious! Taste of Home recipes never disappoint! I made one very small change by using pecans instead of walnuts. Not only did we enjoy these but I shared some with my neighbors and they were just as happy with them as I was! I will make these muffins again soon. I used a mini muffin tin but full size works just fine just adjust the oven time.
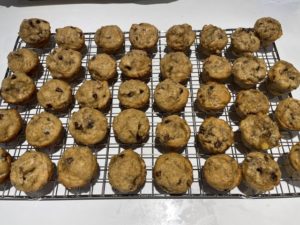
INGREDIENTS
1/2 cup of butter, softened
1/2 cup of sugar
1/2 cup packed brown sugar
2 large eggs
1 1/2 cups mashed banana’s, about 3 large
3 teaspoons vanilla extract
2 cups all purpose flour
3 teaspoons baking soda
1 cup chopped walnuts or pecan
1 cup semi sweet chocolate chips.
DIRECTIONS
Pre heat oven to 350 degrees. Cream butter and sugars. Beat in eggs, banana’s and vanilla. In another bowl combine flour and baking soda, add to creamed mixture and mix until just combined. Stir in walnuts and chocolate chips. Fill greased muffin cups 2/3 full.
Bake until a toothpick comes out clean, 20-25 minutes. Cool for five minutes before removing muffins to a wire rack.
Enjoy!

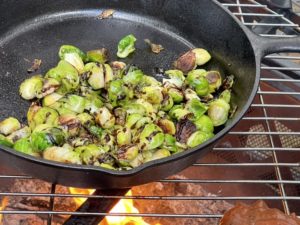
We have been doing a lot of cooking over our fire pit as it has an adjustable cooking grate. We have made pizza’s, chicken and these Brussel sprouts to just name a few things. The cooking time may differ depending on how hot your fire is. These can also be roasted in the oven!
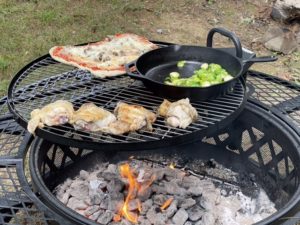
INGREDIENTS
1 pound of Brussel sprouts, cleaned and halved
2 Tablespoons of vegetable oil
Pinch of salt
Pinch of pepper
Reduced balsamic vinegar, I buy the already reduced vinegar in the small bottles but you can easily reduce your own.
DIRECTIONS
Light the coals in the fire pit about 25-30 minutes before cooking.
Place the cleaned and halved Brussel sprouts in a cast iron pan. Drizzle with oil and sprinkle with salt and pepper. Mix to combine.
Add the pan to the grate on the fire pit and roast, stirring occasionally for 25-30 minutes or until desired doneness. Just before taking off the fire drizzle with reduced balsamic vinegar.
Serve warm.
Enjoy!


I came across this recipe on Pinterest from “The gluten free gathering” and I’m so glad I did! This bread is not only easy to make but it’s absolutely delicious! Jim, Robby and I devoured this bread. It was delicious warm from the oven or room temperature with a cup of coffee or tea!
I made this in 3 mini loaf tins as I usually share with friends and neighbors but no way did we share this, after one bite we all knew this lemon strawberry loaf was all ours!
INGREDIENTS
1/2 cup vegetable oil
1 cup granulated sugar
1 lemon , zested
1/4 cup fresh lemon juice, 1 large lemon
2 eggs
1/2 cup milk, I used fare life
2 cups gluten free flour, I used 1 for 1 that includes xanthan gum
2 teaspoons baking powder
1/4 teaspoon salt
1 cup of chopped strawberries
Sprinkle of raw sugar on the top if desired
Note-this would be great with a lemon drizzle on top. Powdered sugar mixed with lemon juice
DIRECTIONS
Pre heat oven to 350 degrees. Spray or line a 9×5 loaf pan or 3 mini loaf pans and set aside.
Zest the lemon into a large bowl, juice the lemon also adding it into the bowl. Add the oil and sugar to the bowl the. Add eggs one at a time and mix until smooth.
Add the milk and mix.
Add the gluten free flour, baking powder and salt mix until combined.
Add the chopped strawberries into a bowl with 1 teaspoon of gluten free flour, mix to coat the strawberries. This will keep the strawberries from going to the bottom of the loaf.
Fold the berries into the batter.
Pour the batter into your prepared loaf pan or pans.
Top with turbinado/raw sugar if desired.
Bake in the middle rack for 65-75 minutes if using a large loaf pan or 30 minutes if using the mini loaf pans. If you are making the larger loaf and the top starts getting to brown you can cover the loaf with tin foil.
Allow loaf to cool in pan for 30 minutes if using larger pan or 10 minutes using mini loaf pans.
Remove from pan and let cool on a wire rack.
Enjoy!

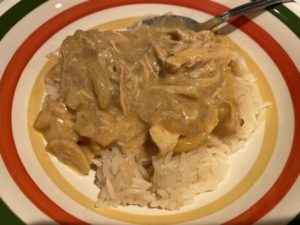
I wanted a quick and easy recipe using a rotisserie chicken that I picked up at the store and this recipe was perfect. I made this gluten free by using rice flour but you can use all purpose flour. This recipe turned out to be VERY forgiving as in my rush I added all of the broth into the pan instead of adding a small amount then the flour to thicken the sauce BUT to my surprise the sauce thickened nicely! That was a very happy surprise! I served this over rice but pasta would be delicious as well. Jim, Robby and I really enjoyed this dish. This will become a regular on my menu!
INGREDIENTS
1 rotisserie chicken, shed the chicken into pieces. Don’t add the skin
1 onion, chopped
1 Tablespoon olive oil
2 cups chicken stock
1/2 cup dairy free sour cream or regular
1 Tablespoon sweet paprika
1 teaspoon mustard powder
1/4 cup rice flour or all purpose
2 cloves of crushed garlic
Salt to taste
Pepper to taste
Cooked rice for serving/or pasta
DIRECTIONS
In a large skillet over medium heat add the olive oil, garlic and chopped onion. Cook until the garlic and onion have softened, about 5-6 minutes. Add the chicken stock into the pan along with the flour and let cook until you get the desired thickness, if it gets too thick simply add more stock. Add 3 cups of your cooked, shredded chicken. Add paprika, mustard powder and sour cream. Mix well. Add salt and pepper to taste. Once the chicken is warmed through remove from heat and serve warm.
Can be served over cooked rice as we did or over cooked pasta.
Enjoy!

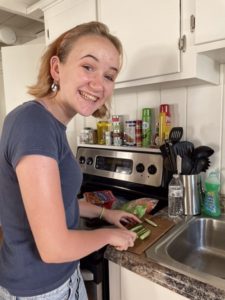
Say Hello to Samantha everyone! Samantha is the beautiful daughter of our dear friends Rick and Ann Marie. You may remember Rick and Ann Marie from an earlier post I wrote about Brunch at the Bedford Village Inn.
Rick and Ann Marie along with all three of their kids, Samantha, Nick and Shaun rented a beach home in Wells, Maine a couple weeks ago. Jim and I crashed their vacation for a couple of days as we were staying about a mile away in our motorhome.
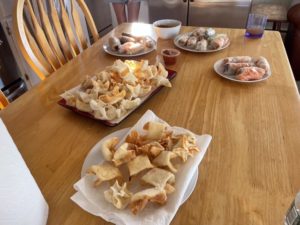
While spending a little bit of time with Samantha last summer, I learned that she loves being in the kitchen and learning new recipes. She was telling me that she had been learning to make spring rolls and crab Rangoon’s from one of her friends Mom. When I said I love crab Rangoon’s but have never made them, That’s when we started planning a day and Sam would be teaching me how to make some of the things she had been learning! Needless to say I was thrilled to be in the kitchen with Samantha and another one of her friends Ashley!
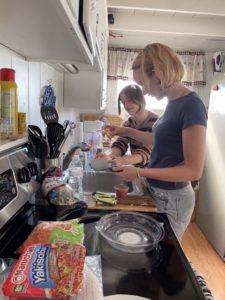
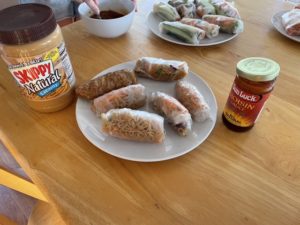
Samantha and Ashley were terrific in the kitchen together, they worked tirelessly chopping, rolling and pinching making these delicious dishes together! I was right there next to them learning, watching and laughing with them in the kitchen! The first dish the girls made were the spring rolls. They used cucumbers, carrots, Asian slaw mix, cooked shrimp, cooked shredded pork (found in Asian markets) and some of them had cooked teriyaki noodles in them for a fun twist. They mixed and matched the filling ingredients and rolled them in rice paper wrappers that were softened in warm water.
The girls were free spirits in the kitchen, adding whatever they wanted using however much they wanted, no measurements were used! The spring rolls were terrific and having each one made a little different made an exciting bite!
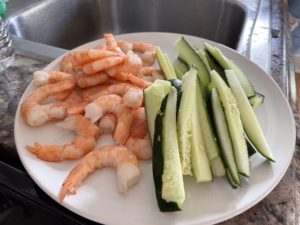
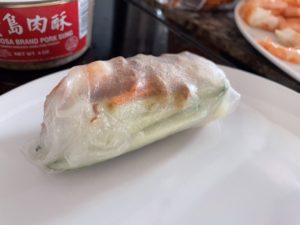
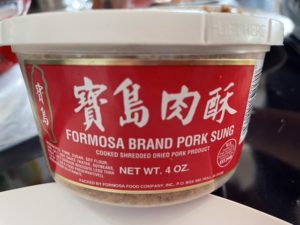
One of the things Samantha did that I thought was brilliant was to buy a ring of shrimp cocktail and use how ever many of the shrimp she needed and her family could still enjoy the shrimp ring and cocktail sauce at another meal! All of the work was done for her by doing this, no peeling ,deveining or cooking the shrimp it was all done!
Next up we made the Crab Rangoon’s! This dish just like the last there was no measuring involved but I’ll give an approximate amounts! We made easily 4 dozen Rangoon’s, you can half the recipe but feeding this group we definitely needed that many! Samantha used wonton wrappers, 2 blocks of softened cream cheese and about 3/4 to a cup of onion, celery and imitation crab meat(diced).
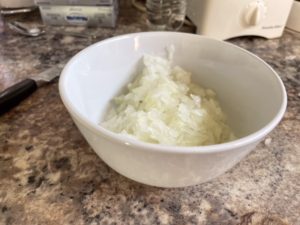
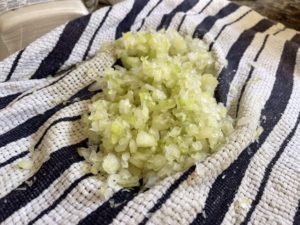
One of the biggest tips I took away from Samantha was after she diced the celery she put it in a dish towel and squeezed as much of the liquid out of it she could, I was amazed at how much really came out! I think that may have been Sam’s workout for the day as she get every last drop out of the celery she could! Once the diced, onion, celery and imitation crab were well incorporated into the softened cream cheese it was time to make the Rangoon’s! This is where many hands come in handy! Sam showed each of us how to pinch the filled wontons together just right but she also joked that when her brothers help they make them in all kinds of weird shapes!
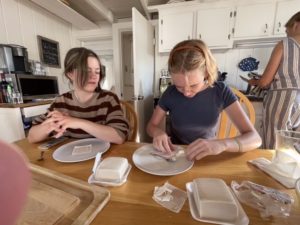
While Samantha, Ashley , myself and even Jim made the Rangoon’s Sam’s Mother Ann Marie heated about 3-4 inches of oil (peanut oil or vegetable oil work well) in a large pot, the oil should be heated to just under 350 degrees. These can also be baked or air fried!
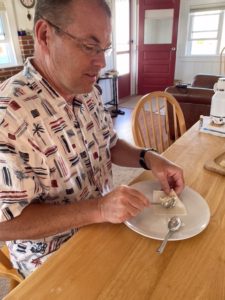
As we made them Ann Marie fried them in Batches just until the crab Rangoon’s turned golden brown on the edges.
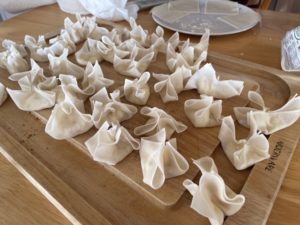
While the Rangoon’s were frying up Samantha and Ashley made the dipping sauce. Again no measurements, Sam did this all by sight and taste! Hoisin sauce and about 2 dollops of Peanut butter mixed well!
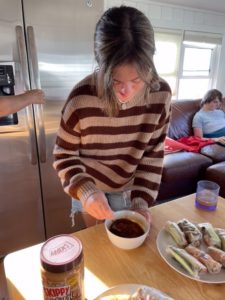
Everything that Samantha and Ashley made was phenomenal! Everyone was quick to get to the table and just like that dinner was devoured and loved by all!
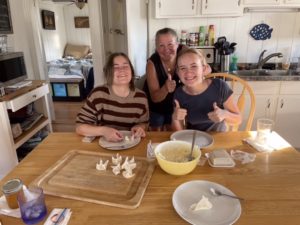
A HUGE Thank You to Samantha , Rick, Ann Marie, Shaun, Nick and Ashley for letting us crash your vacation and make some delicious food!


