Family favorites
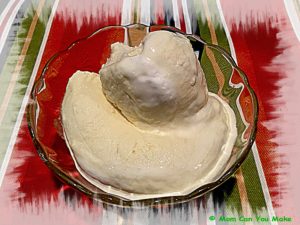 A two ingredient delicious recipe? Yes! And it’s so good on a hot summer day! It is a gluten free recipe but it really makes no difference as this is so tasty gluten or not! It’s also crazy easy. It just takes some time in the freezer. Everyone in the house enjoyed this cold pineapple whip! I think this would also work well with frozen strawberries or any other frozen fruit. I think the method used here is the important part. It does take a little bit of time to incorporate the fluff into the mixed fruit, but give it a little bit of time it does come together!
INGREDIENTS
16 ounces frozen pineapple pieces
14 ounce tub of store bought marshmallow fluff
DIRECTIONS
Divide the pineapple pieces into two equal portions. Leave one portion frozen and defrost the other half either by allowing it to sit at room temperature or placing it in the microwave on low power until cold, but not frozen. Place the defrosted portion in a blender or food processor and process until smooth. Add about 1/4 cup of marshmallow fluff and the frozen pineapple to the blender and process until the pineapple is smooth. If necessary add a little more fluff and continue to process.
Transfer the pineapple mixture to a large bowl, add the remaining marshmallow fluff and mix to combine. The mixture will turn to a light yellow color.
FOR A SCOOPABLE CONSISTENCY
Transfer the mixture into a freezer safe container with a tight fitting lid and place in the freezer for at least 6 hours or overnight. If frozen for longer than 12 hours, leave the container out for about ten minutes until scoopable.
FOR SOFT SERVE CONSISTENCY
Transfer the mixture to a large Ziploc bag, fill with the mixture and close the top, place the bag in the freezer for about 4 hours or until mostly firm. Snip off the bottom corner of the bag and pipe into bowls.
Serve immediately. It will melt quick!
Enjoy!

This recipe can be found at www.glutenfreeonashoestring.com


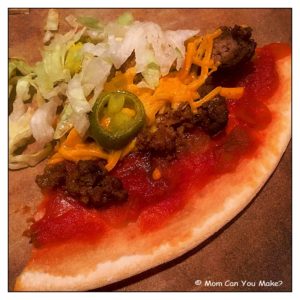
One of our favorite pizza places in Portsmouth, NH has our favorite Mexican pizza but we don’t always have time to go into Portsmouth so what’s a girl to do? Make my own version right? Well, this is not exactly like the restaurant version and it is definitely a little spicier, but the cool lettuce and tomato slaw on top cools it right down. You can also change the spice level by using mild salsa and leaving the jalapeño’s off. I made this one Saturday afternoon and shortly after I made it we had some neighbors pop over so I was thrilled to see how they liked it. I did not tell them it was my creation before they ate it so I was thrilled when they both cleaned their plates and said how much they liked it! I knew Jim and I liked it but it’s nice to have some additional feedback. I also made a gluten free version for Robby using gluten free crust and gluten free taco seasoning. Robby loved his pizza too! If you want to keep it dairy free, don’t use the sour cream and use dairy free cheese.
INGREDIENTS
Pizza crust of your choice, store bought, home made or dough from your favorite pizza place
1/2 pound ground beef
2 Tablespoons of taco seasoning, I use low sodium
3 Tablspoons water
1/2 cup of salsa, I used medium spice
1/2 cup shredded Monterey Jack cheese
1/2 cup shredded cheddar cheese
1/4 – 1/2 cup jarred sliced pickled jalapeños, depending on how much you want
TOPPING ingredients
1 cup shredded lettuce
1 cup cherry tomatoes, halved
1 cup sour cream
FOR A GLUTEN FREE PIZZA – like this one
Use a gluten free crust and gluten free taco seasoning. To make this dairy free leave out the sour cream and use dairy free cheese.
DIRECTIONS
Preheat oven to 450 degrees. Lightly spray sheet pan with non-stick spray. Flatten the dough forming your crust. Prebake the crust for 3-4 minutes partially baking it. Remove from oven. In the meantime, heat a skillet to medium heat and add your ground beef. Cook ground beef breaking into crumbs as it cooks, drain excess liquid from the pan and add the taco seasoning and water, mix to combine and finish cooking. When cooked through, remove from heat.
To assemble, add your salsa to the top of your pizza crust and spread to about 1/4 of and inch to the edges, add the ground beef mixture and cover the salsa, add the cheeses spreading over the beef. If desired add the sliced jalapeños. Place back in the oven and bake an additional 8 minutes.
While the pizza is baking combine all of the topping ingredients together and set aside. When pizza is cooked through remove from oven, let rest for just a couple minutes, slice and add a spoonful or so of the topping. Serve warm.
Enjoy!
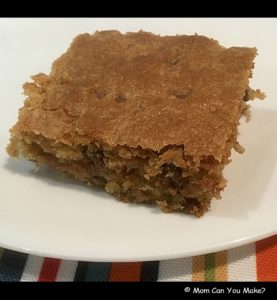
These cookie bars are addicting! So good, especially warm out of the oven! Sadly, Robby can’t eat these due to some gut issues but his friends had no problem diving into them. This makes a 13 x 9 baking dish so it’s great for a party or a bunch of hungry boys! I’m thankful Robby’s friends took these out of my hands as these were really, really good and I did not want to eat them all myself! These would also be good with some chopped pecans or walnuts. Next time I know I have a few extra growing boys around I will make another batch with the nuts!
INGREDIENTS
1 cup of unsalted butter
1 cup brown sugar
2/3 cup white sugar
2 eggs
1 1/2 tsp. Vanilla
2 2/3 cup flour
2 tsp. Baking soda
1/2 tsp. Salt
1 1/2 cups semi-sweet chocolate chips
1 (8 ounce) package health English toffee bits
DIRECTIONS
Preheat the oven to 375 degrees. In your mixer, or a large bowl and hand mixer, cream the butter and both sugars until fluffy. Add the eggs and vanilla and mix to combine. Add the flour, baking soda and salt mix again until just combined. Fold in the chocolate chips and toffee bits.
Press the batter into a greased 9 x 13 glass baking dish and bake for 30 minutes or until the top is golden brown. Remove from the oven and let cool for 20 minutes and serve if eating them warm, otherwise let cool completely at room temperature before cutting. This will serve between 18 and 24 depending on how big you slice them.
Enjoy!
This recipe can be found at www.cozycountryliving.com

I have seen this cake floating around on Pinterest for sometime now. I pinned it a couple weeks ago and decided to make it as it looked like the perfect summer cake with the mandarin oranges and the pineapple. This cake goes together very simply. This is perfect for any summer gathering you may be having. I shared this with my parents as well as a couple neighbors and we were all in agreement that this is a delicious cake. I think Jim liked it the best! You all know that I’m not a baker and it’s my least favorite thing to do in the kitchen but I will make this cake again! If I can make it, I know all of you can too!
INGREDIENTS
1 package yellow cake mix
1/2 cup vegetable oil
1 can (11 ounce) mandarin oranges, NOT DRAINED
3 large eggs
1/2 cup sour cream
FROSTING
1 can crushed pineapple (8 ounce), NOT DRAINED
1 package (3.5 ounce) instant vanilla pudding
2 cups heavy whipping cream
3 Tablespoons powdered sugar
INSTRUCTIONS
Preheat oven to 350 degrees. Grease and flour 3 (8 or 9 inch) round cake pans.
In a large bowl beat the cake mix, oil, oranges-not drained, eggs and sour cream until well blended.
Evenly divide the batter into the 3 prepared pans. Bake for 16-20 minutes or until toothpick inserted in center comes out clean. Mine took about 18 minutes. Let cool in the cake pans for 20 minutes, then turn the cake pans upside down onto a cooling rack and let the cakes cool completely.
To make the frosting beat the heavy whipping cream and powdered sugar in a bowl of a stand mixer or handheld blender until stiff peaks form. In a separate bowl combine the crushed pineapple, not drained, and the instant pudding powder, mix until combined. Add the whipped cream into the pineapple/pudding mixture and stir to combine.
Place the first cake layer down on your serving platter frost the top of the fiRst cake, add the second frosting on top and finally add the third and final cake layer and frost the cake completely on the top and sides. Serve right away or store in the fridge until ready to serve.
Enjoy!

We loved these jalapeño bites! Spicy from the jalapeño and the “hot” sausage cooled slightly with the cheese…with a crisp bite from the bacon! I made two versions, one being bacon wrapped with two kinds of cheese and the second version was gluten and dairy free without the bacon. Robby did not want the bacon on them. But for Robby’s version I used a gluten and dairy free cheese. I made 20 bites (10 jalapeños) and let me tell you both plates were empty in record time. We liked them so much I went to the store the next day and bought more jalapeños. The sausage makes a lot so I had plenty of the filling and bacon left. The filling is also great on nachos or even on pizza. This will be on made many times at my house, even when we hit the road camping! The filling can be made ahead and I would crisp and crumble the bacon and just put the crumbles on top for a camping version. All you would need to do is assemble them, place on a baking sheet and grill until they are heated through! Our family likes spicy food so I use the hot sausage, but you can use the regular sausage as well.
NOTE – one jalapeno will give you two stuffed portions. I made them twice buying 20 jalapeños in total. Depending on how many you want you can purchase as many jalapeños as needed using all of the filling or using the filling for other yummy things!

INGREDIENTS
jalapeños
1 package Jimmy Dean HOT sausage
1/2 cup shredded cheddar cheese
1/2 cup shredded Monterey Jack cheese
Bacon- I used a half slice bacon per sliced jalapeños
NOTE – If making them dairy free/gluten free use dairy free, gluten free cheese. I used Daiya brand.
DIRECTIONS
Preheat oven to 400 degrees. Line a baking sheet with foil and place a baking rack on top of the baking sheet, set aside. In a large frying pan fry the sausage over medium heat until fully cooked, crumbling the sausage as it cooks through. Drain any fat from the pan and add both cheeses, cook melting the cheese and mixing it into the sausage making cheeses goodness! Remove from heat and set aside.
Slice the jalapeños in half, using a spoon remove the ribs and seeds from the middle of the jalapeño, do this for each one. To fill, simply fill each jalapeño half with a spoonful of the sausage mixture and wrap 1/2 of a bacon slice around the jalapeño. Do this for each one and place on your prepared baking sheet with the baking rack. When all of the jalapeños are filled and wrapped bake in the preheated oven for 25 minutes or until bacon is cooked through and lightly crisped. Remove from oven and serve warm.
Enjoy!
Stay In Touch


Follow me!


