Dessert
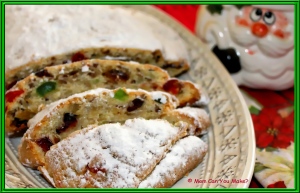
This cherry stollen is delicious and one of my favorite things to have over the Holidays ! My Mom makes this and it is great with a cup of coffee or for a sweet dessert at the end of the day! When my Mom brings this over, I have been known to “hide” it in the kitchen so only I know where it is! Yup, that good! This is also a great gift to give!
INGREDIENTS
- 2 1/4 cup(s) all-purpose flour
- 1/2 cup sugar
- 1 1/2 teaspoon baking powder
- 1/4 teaspoon salt
- 1/2 cup (1 stick) butter or margarine, cold (I use Smart Balance stick)
- 1 cup whole-milk ricotta cheese ( I used part-skim)
- 1/2 cup red candied cherries, coarsely chopped (or mix w/green candied cherries)
- 1/2 cup dried tart cherries, coarsely chopped (I use dried cranberries or cherry flavored dried cranberries)
- 1/4 cup dried pineapple
- 1/4 cup golden raisins
- 1/3 cup pecans, toasted and chopped
- 1 teaspoon vanilla extract
- 1/2 teaspoon grated fresh lemon peel
- 1 large egg
- 1 large egg yolk
- Confectioners’ sugar, (optional)
DIRECTIONS
- Preheat oven to 325 degrees F. Grease large cookie sheet. In large bowl, stir together flour, sugar, baking powder, and salt. With pastry blender or 2 knives used scissor-fashion, cut in butter until mixture resembles fine crumbs. With spoon, stir in ricotta until moistened. Stir in candied cherries, dried cherries, pecans, vanilla, lemon peel, egg, and egg yolk until well combined.
- Turn dough onto lightly floured surface; gently knead dough 2 or 3 times to blend. With floured rolling pin, roll dough into 10″ by 8″ oval. Fold lengthwise almost in half, letting bottom dough extend about 1 inch beyond edge of top dough. (I usually make two of these by dividing dough in half)
- Place stollen on prepared cookie sheet. Bake stollen 1 hour or until toothpick inserted (or less if making two instead of one) in center comes out clean. Remove stollen from cookie sheet to wire rack; cool completely. Sprinkle with confectioners’ sugar to serve, if you like. (I Like!)
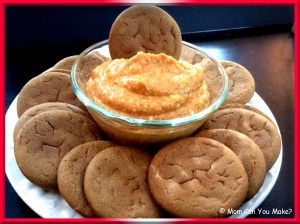
This is another one of those recipes that has been around for awhile but it is a favorite each and every time. If you have not had the chance to make it this is your time to do it! It makes a great sweet appetizer or a dessert for any holiday gathering you may be having. It also looks terrific served in a small hollowed out pumpkin! I like to serve gingersnaps with this.
INGREDIENTS
1 (8 ounce) package of cream cheese
2 cups confectioners sugar
1 (15 ounce) can of solid pumpkin
1 Tablespoon ground cinnamon
1 Tablespoon pumpkin pie spice
1 teaspoon frozen orange juice concentrate
DIRECTIONS
In a medium bowl blend cream cheese and confectioners sugar until smooth. Gradually mix in the pumpkin, stir in the cinnamon, pumpkin pie spice and the orange juice until smooth and well blended. Chill until serving . Serve with gingersnap cookies.
Enjoy,

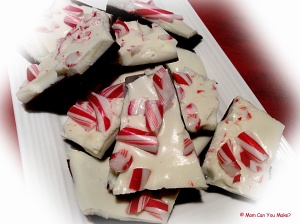
Peppermint Christmas bark is not really new, but it is certainly delicious and makes a great holiday gift! So since we are in the full holiday swing of things, here is a sweet dessert to share with your family or give as a gift !
INGREDIENTS
1 bag of chocolate Ghirardelli melting chips
1 bag of white Ghiradelli melting chips
1/2 teaspoon of peppermint extract
Candy canes, crushed into bits
DIRECTIONS
Prepare a sheet pan with a slight amount of non- stick baking spray, set aside. Melt the bag of chocolate melting chips in the microwave according to package directions, mine takes a little less than two minutes. When the chips are melted and smooth spread the chocolate on the prepared baking sheet being careful not to spread the chocolate too thin. Place the baking sheet into the refrigerator for twenty minutes to set. After the twenty minutes melt the white baking chips according to directions and when melted and smooth add the peppermint extract and mix well. Take the baking sheet out of the fridge and pour the white chocolate over the chocolate keeping it as even as you can and add the crushed candy canes. Place the baking sheet back in the refrigerator for another 20 minutes or until the chocolate is firm. Once the chocolate is set remove from fridge and break into pieces. store in an airtight container or package up to give as a gift.
Enjoy,

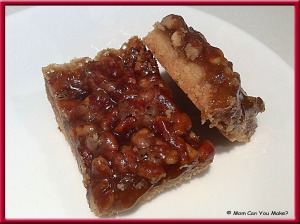
These pecan bars were delicious! I don’t like pecan pie but I loved these bars! I don’t like to keep this stuff around the house so I cut these bars up into small bite size pieces and put my taste tester’s at my day job to work! These were a huge hit and I was asked MANY times for the recipe that day! These would be a terrific addition to your holiday dessert table or a great gift to give around the holidays! I am not a baker, but I will be making these again!
INGREDIENTS
Crust
2 sticks of butter, softened
2/3 cup packed brown sugar
2 2/3 cups all purpose flour
1/2 teaspoon salt
Topping
1 stick unsalted butter
1 cup packed light brown sugar
1/3 cup honey
2 Tablespoons heavy cream
2 cups chopped pecans
DIRECTIONS
Preheat the oven to 350 degrees and line a 9 x13 inch pan with foil leaving a two inch over hang on all sides. Spray foil with non stick baking spray or use non-stick foil. First make the crust by creaming together the butter and brown sugar until fluffy using a stand mixer fitted with a paddle attachment. Add the flour and salt mixing until crumbly. Press the crust into your prepared pan and bake for 20 minutes or until golden brown.
While the crust bakes prepare the filling by combining the butter, brown sugar, honey and heavy cream in a saucepan stirring over medium heat . Simmer the mixture for one minute then stir in chopped pecans.Remove the crust from the oven and immediately pour the pecan filling over the hot crust spreading it over the crust covering the entire surface. Return the pan into the oven and bake an additional 20 minutes. Remove the pan from oven and allow the bars to fully cool in the pan. When cool, using the foil over hang, lift the bars out of the pan and transfer them to a cutting board. Removing them from the foil, slice into bars and serve.
Enjoy,

This recipe came from www.justataste.com
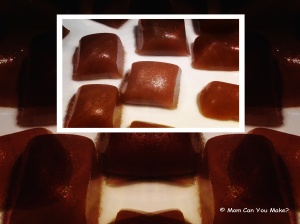 Fall is an amazing time of year in New England. It is filled with the best flavors! Apple cider being one of my most favorite! I received a bottle of King Arthur’s boiled cider that I had initially intended on making apple cider baked donuts with, but when I saw this recipe on the King Arthur website for Apple Cider Caramels, I knew this would be a fall treat to make that everyone would enjoy and boy was I right! I have a number of taste tester’s at my day job (our local high school). I handed out MANY of these little caramels and heard MANY compliments. I heard OUTSTANDING more than once , along with WOW and ” those are so good” ! So I think that sums it all up! These were so easy and I know I will be making these again! These will make great gifts to give at the holidays as well! These are very sweet, so I cut them in small pieces which is nice as it makes a lot and the best part is they will stay shelf stable for a long time. I did store mine in the refrigerator. The hardest part and the longest part of this was cutting them and individually wrapping in wax paper. For that job I recruited my two favorite boys, Jim and Robby. It took them both about one hour to cut and wrap each piece! They did an AWESOME job!
INGREDIENTS
2 cups (1 pint) heavy cream
1 cup light corn syrup
2 cups sugar
6 Tablespoons butter (I used unsalted but you could use salted)
1/2 cup boiled King Arthur Cider
1/2 teaspoon salt
1 teaspoon apple pie spice
DIRECTIONS
Lightly grease an 8 x 8 baking dish and line with parchment paper leaving an over hang on opposite sides. Combine the cream, corn syrup, sugar, butter and boiled cider in a heavy bottom DEEP saucepan. Bring to a boil over high heat, stirring to dissolve the sugar. Reduce heat to medium high heat and cook until the mixture reaches 242 degrees – 245 degrees using a candy thermometer. ( I used the directions for a soft caramel). This takes about 20 minutes depending on your stove. Remove pan from heat stir in salt and spice. Pour the mixture into prepared pan . Let it sit for 12-18 hours at room temperature before cutting into small squares. To wrap the caramels use six inch squares of wax paper. Place one caramel in the center of each square wrapping the caramel and twisting the edges.
Enjoy,

