Dessert
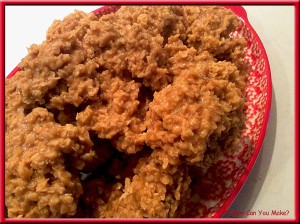 We have all seen and made the no bake chocolate cookies but have you tried the peanut butter version? The recipe is basically the same as the chocolate version and just as sweet as well! They are a little too sweet for me, but the kids certainly enjoy them!!
INGREDIENTS
1/2 cup butter
1/2 cup milk
2 cups sugar
2 teaspoons vanilla
1/2 cup creamy peanut butter
4 cups quick cooking oats
DIRECTIONS
Place butter, milk, sugar, vanilla and peanut butter into a saucepan. Being all of the ingredients to a rolling boil. Let boil two minutes, remove from heat. Stir in the quick oats and drop by tablespoon onto wax paper. Let sit to firm up. Store in fridge when cooled and firm.
Enjoy!

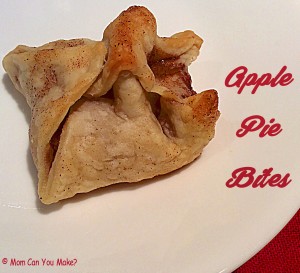
My family loves apple pie, especially this time of year when the apples are ready to pick!! I also enjoy apple pie but making an apple pie takes me a lot of time and there are times I just don’t have that time or really might not be in the mood to take it on! So, I found the next best things thanks to Clinton Kelly and the show The Chew! Have I mentioned how much I love that show! This recipe was super simple, quick and Jim said he could eat these everyday!! Robby had a friend over so they also loved them!! These became a family favorite after one bite!
INGREDIENTS
1 store bought pie crust
1 Granny Smith apple, peeled and diced
2 Tablespoons of melted butter
1/4 cup sugar
1 teaspoon cinnamon
DIRECTIONS
Preheat oven to 425 degrees. In a small bowl, add the sugar and cinnamon and mix until well combined. Reserve one teaspoon of the cinnamon sugar to use later. Add the diced apples to the cinnamon sugar mixing and coating all of the apples with the sugar. On a lightly floured surface, unwrap the pie crust and lay flat using a knife or pizza cutter cut the crust into three inch squares. Using a pastry brush or a spoon, brush the pie crust with half of the melted butter. Working with one square at a time place a couple teaspoons of the apple cinnamon mixture into the center of each square, bring the corners of each square together to form a pyramid shaped dumpling, and press the edges together to seal. Brush the outside if the pastry with butter and sprinkle with the reserved cinnamon sugar. Do this for each square. When they are all ready, place them in the oven for 8-10 minutes or until pastry is cooked through, the tops will be a little browned. Let cool before serving.
Enjoy!

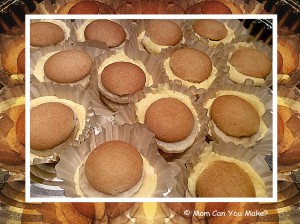
These little bites are so easy, no bake and would be a terrific after school snack for the kids! These also make about 36 mini pies so you will have plenty for the kids to share with their friends! Jim really enjoyed these little bites. He even had them for breakfast one day!! This recipe called for 3-4 bananas but depending on how thick you slice them will depend on how many you need, I only used three.
INGREDIENTS
8 ounces cream cheese
3.4 ounce box of instant vanilla pudding
1/2 cup of milk
3 Tablespoons sugar
3-4 bananas
1 box mini vanilla wafers
DIRECTIONS
Place 36 mini muffin liners in your mini muffin pans. Place one mini vanilla wafer in the bottom of each liner.
Using an electric mixer beat the cream cheese with the sugar. Slowly add the milk and beat until smooth. Add the instant pudding powder a little bit at a time, beating until combined and smooth. 2-3 minutes. Scoop the vanilla pudding into a pastry bag or a large Ziploc bag with the a cut in the corner making your own piping bag. Peel and cut the banana’s into thin rounds. Pipe a dollop of pudding mixture on top of the mini vanilla wafer and top with a slice of banana pushing the pudding mixture down slightly. Pipe more pudding mixture on top of the banana, add another slice of banana on top. Lastly add one mini vanilla wafer to the top of each mini pie. Refrigerate at least two hours to set.
Enjoy!

This recipe can be found on Pinterest and at www.aspicyperspective.com
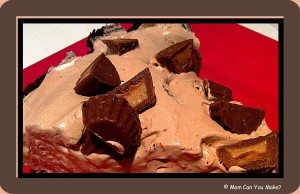
There is nothing better or easier than a no-bake pie! This recipe comes from Taste of Home Magazine and one that we really enjoyed! This recipe needs to stay in your freezer for 6 hours before serving… so plan ahead! I took mine out after five hours and it was not quite set up yet but I had some very impatient people ready to eat it! This is one I would certainly make again.
INGREDIENTS
1 1/2 cups cold milk
1 package (3.9 ounce) instant chocolate pudding mix
1 cup, plus 2 Tablespoons, chopped peanut butter cups, divided
1 carton (8 ounce) frozen whipped topping, thawed
1 chocolate crumb crust (8-9 inches)
DIRECTIONS
In a large bowl, whisk milk and pudding mix for two minutes and let stand for two minutes or until soft set.
Fold in 1 cup chopped peanut butter cups. Fold in whipped topping. Spoon into crust, cover and freeze for 6 hours or overnight. Remove from freezer 15-20 minutes before serving and garnish with remaining chopped peanut butter cups.
Enjoy!

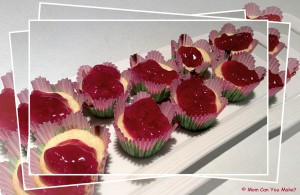
I could not let this recipe go by with out posting it! I know summer is coming to a close but these little bites are so tasty! You can also make these using blueberry pie filling but don’t even think about taking out the lemon juice or zest as it adds so much flavor and such a brightness to the recipe!!
I have really been loving all of these Pinterest recipes lately!!
INGREDIENTS
2 (8 ounce) packages cream cheese at room temp.
3/4 cup sugar
3 large eggs
1 teaspoon vanilla extract
1 Tablespoon fresh squeezed lemon juice
Dash of lemon zest
Mini vanilla wafers
1 can of strawberry pie filling (or blueberry)
DIRECTIONS
Preheat oven to 350 degrees. Fill a mini cupcake tin with mini cupcake liners and out one mini vanilla wafer in each liner with the flat side on the bottom. Mix the remaining ingredients together except for the pie filling. Cream together until week incorporated and smooth. Fill your cupcake liners about 3/4 of the way up. Bake for 18-20 minutes or until the center is set. Remove from oven and let cool before adding the topping. When completely cool add the pie filling to the top and serve. Store in the refrigerator .
Enjoy!


