Party food
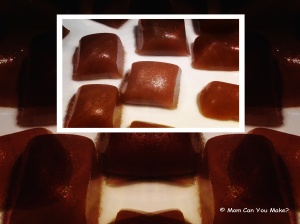 Fall is an amazing time of year in New England. It is filled with the best flavors! Apple cider being one of my most favorite! I received a bottle of King Arthur’s boiled cider that I had initially intended on making apple cider baked donuts with, but when I saw this recipe on the King Arthur website for Apple Cider Caramels, I knew this would be a fall treat to make that everyone would enjoy and boy was I right! I have a number of taste tester’s at my day job (our local high school). I handed out MANY of these little caramels and heard MANY compliments. I heard OUTSTANDING more than once , along with WOW and ” those are so good” ! So I think that sums it all up! These were so easy and I know I will be making these again! These will make great gifts to give at the holidays as well! These are very sweet, so I cut them in small pieces which is nice as it makes a lot and the best part is they will stay shelf stable for a long time. I did store mine in the refrigerator. The hardest part and the longest part of this was cutting them and individually wrapping in wax paper. For that job I recruited my two favorite boys, Jim and Robby. It took them both about one hour to cut and wrap each piece! They did an AWESOME job!
INGREDIENTS
2 cups (1 pint) heavy cream
1 cup light corn syrup
2 cups sugar
6 Tablespoons butter (I used unsalted but you could use salted)
1/2 cup boiled King Arthur Cider
1/2 teaspoon salt
1 teaspoon apple pie spice
DIRECTIONS
Lightly grease an 8 x 8 baking dish and line with parchment paper leaving an over hang on opposite sides. Combine the cream, corn syrup, sugar, butter and boiled cider in a heavy bottom DEEP saucepan. Bring to a boil over high heat, stirring to dissolve the sugar. Reduce heat to medium high heat and cook until the mixture reaches 242 degrees – 245 degrees using a candy thermometer. ( I used the directions for a soft caramel). This takes about 20 minutes depending on your stove. Remove pan from heat stir in salt and spice. Pour the mixture into prepared pan . Let it sit for 12-18 hours at room temperature before cutting into small squares. To wrap the caramels use six inch squares of wax paper. Place one caramel in the center of each square wrapping the caramel and twisting the edges.
Enjoy,


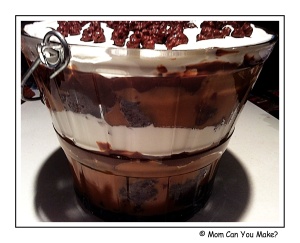
This is one of my absolute favorite desserts! I have been making this recipe for a long time for family, friends and co-workers. Last week I made this for one of Jim’s co-workers and friends for her birthday! The bowl came back spotless so I know everyone enjoyed it! I start this dessert with my chocolate cake and build from there, it does take some time and there are a few steps, but if you like peanut butter and chocolate, you will be thrilled with this dessert! I also like that it is best made ahead of time.
INGREDIENTS
For the cake
1 box devils food cake
1 small box instant chocolate pudding
1 cup sour cream
1 cup vegetable oil
4 eggs (beaten)
1/2 cup warm water
2 cups mini chocolate chips
Preheat the oven to 350 degrees. In a large bowl mix together all of the ingredients except the chocolate chips. When everything is combined, then add the chocolate chips, mix until chips are evenly distributed through the batter. Pour cake mixture in a greased bundt pan and bake for 50-55 minutes. (until a wooden toothpick inserted into the cake comes out clean). Cool cake in pan for at least 1 1/2 hours before inverting on a plate.
Peanut Butter Sauce
2 (10 ounce) packages of peanut butter chips
1 cup heavy whipping cream
1/4 teaspoon vanilla
In a heavy sauce pan, combine peanut butter chips and heavy cream. Cook and stir over low heat until chips are melted and sauce is creamy. Remove from heat and add vanilla. Cool to room temperature.
Pudding Layer
2 packages (5.9 ounce) instant chocolate pudding mix
4 cups milk (I used 1%)
Combine the pudding mix and milk. whisk until well combined. Place in fridge to “set up”
OTHER INGREDIENTS NEEDED
1 carton of frozen whipped topping (I buy the large container)
Candy of your choice (crumbled) I have used Nestle Crunch bars as well as toffee bits, both work very well.
TO ASSEMBLE
Crumble half of the cake into a 4 qt. trifle bowl. Layer half of the peanut butter sauce covering the cake, add half of the pudding covering the peanut butter. Add the whipped topping covering the pudding. Add the crumbled candy bars or toffee bits. Repeat layers cover and refrigerate for at least three hours before serving.
Serves 12-15 (or your local fire department)!
Enjoy,
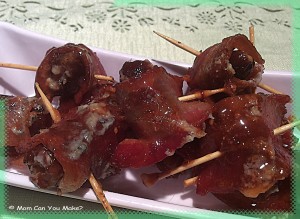
These dates were made and gone in the same instant! I only made a handful of these as it was just Mr. MCYM , Robby and myself so I did not want many left over. I did not need to worry about leftovers as they disappeared as quick as I put them out ! These are sweet from the dates and tangy from the blue cheese and then more sweet from the maple syrup! If you like blue cheese this is a must make! They are excellent! I am not putting measurement in the recipe as it really depends on how many you make. The dates also vary in size so I tend to par cook my bacon a little longer (but still bendable) and cut them in half instead of thirds, like some recipes have done. You be the judge with your ingredients.
INGREDIENTS
Pitted dates
Bacon (I used center cut bacon)
Blue cheese crumbles
Maple Syrup (the real stuff)
DIRECTIONS
Preheat your oven to 300 degrees. Cut your bacon in half and partially pan fry it. You want the bacon to be partially cooked through but still able to bend around the date. Remove from heat when done. Split the dates in half and fill with blue cheese crumbles, not too much, as you need to be able to close the date. Wrap your partially cooked bacon around the filled dates and secure with a toothpick. Do this for each date and place on a baking sheet that has been sprayed with non-stick spray. When all of the dates have been wrapped, place the baking sheet in the oven and cook until the bacon in crisp. Mine took about ten minutes. Then drizzle with maple syrup and bake for just one to two minutes longer…enough to warm through.
Serve warm.
Enjoy,
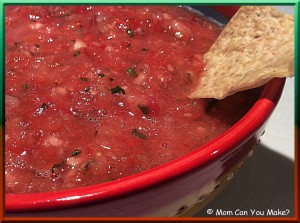
Some like it HOT! This is very, very HOT! BUT…You can use jalepeno’s or any other milder pepper in place of the ghost pepper! My family likes heat. Robby likes it a little too much! My friend’s of ours grow an amazing garden and part of their garden is a variety of hot peppers. This includes ghost peppers! If you are not familiar with ghost peppers they are CRAZY HOT! I will tell you a story about Robby and a couple of his friends that happened a couple years ago. Robby and his friends got their hands on a ghost pepper (I have no idea where it came from) but it ended up becoming a dare on who was going to eat it ! Oh my! This all came about during a sleep over at MY house and after Jim and I went to bed. Well…needless to say the poor soul that lost the bet spent a portion of the night throwing up as it was so hot! Hmmmm….SORRY! Not a good way to start a post about food is it?! Well, what can I say…teenage boys! I still love them!
INGREDIENTS
2 ghost peppers (I took the seeds out)
4 tomatoes, seeded and chopped
handful of cilantro
6 cloves of garlic
1 onion
salt to taste
pepper to taste
juice of two limes
DIRECTIONS
Place all ingredients in a blender or food processor and pulse until you get your desired consistency.
Note: This gets hotter the longer it sits, you can add a 1/2 tsp. of sugar if needed!
Store in the refrigerator.
Enjoy,
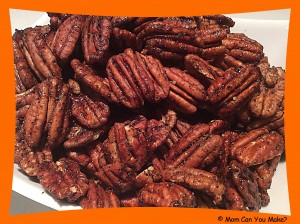
I just finished making these spiced pecans and can I just tell you, they are incredible! I have made the sugared pecans and those are great but these take the grand prize! They are sweet from maple syrup, warm from pumpkin pie spice and a touch spicy from the chili powder! I am making them for a fall salad I will be making later. I am not sure these will last long enough to see it on the salad! Mr. MCYM walked in the kitchen took a couple popped them in his mouth and did a quick turn around for another handful! This is a recipe you are going to want to double!!! This would also be a great item to give as gifts during the holiday season!
INGREDIENTS
2 cups pecan halves
1 teaspoon pumpkin pie spice
1 teaspoon chili powder
1 teaspoon sea salt
3 Tablespoons pure maple syrup
1 Tablespoon olive oil
DIRECTIONS
Preheat oven to 350 degrees. Line a baking sheet with parchment paper. Add pecans to your prepared baking sheet, sprinkle with pie spice, chili powder and sea salt. Drizzle with olive oil and maple syrup. Mix well to coat all of the pecans. Bake for 15 minutes stirring every five minutes until they reach a deep golden brown color. Store in air tight container.
Enjoy,
this recipe comes from www.cafesucrefarne.com


