Party food

I absolutely love this little “gem of a shop” in Durham, NH. The Candy Bar and Creamery has everything you can possibly imagine when it comes to handmade chocolates and candies, but that’s just the beginning they have so much packed into this one store. I think I walked around the store ten times and found so many new things each time through! They have an array of chocolate candies, chocolate covered strawberries, pretzels, Oreos and everything in between. One 0f the more interesting items they have is the microbrew beer truffles. What a great gift for the beer lover in your life!
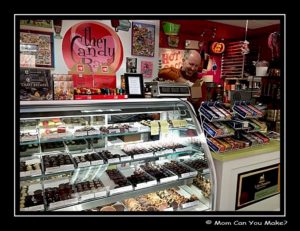 Chocolate is not the only thing you will find here. How about some handmade caramels or homemade marshmallows in various flavors. Those marshmallows will really step up the s’more game this summer! Or maybe macaroons are your thing. They have those too, and of course in various flavors along with several types of fudge. Recently they were featured on Chronicle highlighting the best hot chocolate in the state, but the Candy Bar and Creamery does not just offer one kind of hot chocolate…they offer 14 different hot chocolate flavors. Yes, 14! Think hot chocolate with one of those homemade marshmallows! Yes, please!
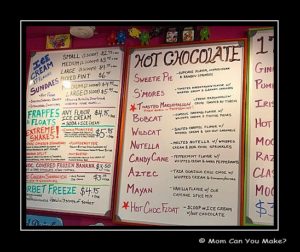 On to my favorite part of the store…the locally made ice cream and the insane shakes they made with it! They have lots of shakes filled with all the yummy goodness you could possibly want. A s’more shake with toasted marshmallow, a salted caramel shake or maybe you want a cupcake flavored shake, they have that too. For Valentine’s Day, they offered a chocolate covered strawberry shake with 2 chocolate covered strawberries, shortcake, fudge and more. This is just the beginning of the shakes they offer. Or maybe you would like a Fluffernutter Shake, a Cookie Monster Bomb Shake, a Killer Clown Shake or my favorite, a Peanut Butter Blast Shake! Yes! So many choices. Here is a little-known secret… they have a super secret “off the menu shake list” so when you go, ask them what they have and you will not be disappointed!
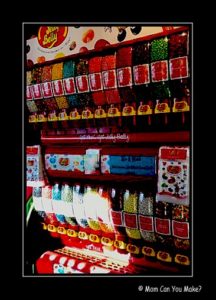
The Candy Bar and Creamery specialize in sweets for parties, special occasions, wedding, events and party favors. If you need a gift basket they can do that too. Big or small they can do it and do it well! The Candy Bar is a veteran owned and operated business that is open 7 days a week until 7 pm.
They are located at 44 Main Street in Durham NH.
While we were there speaking with the owner, he said they will be opening a new location in Dover in the mill building downtown! Stay tuned…Dover friends! You can find out more information about the Candy Bar and Creamery on Facebook. Be sure to give them a like as well. Their small webpage is still being worked on! Be sure to check them out!
https://www.facebook.com/thecandybarnh/
Enjoy!

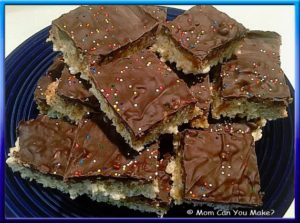
I don’t know anyone who does not love Rice Krispies treats, but how about kicking them up with some salted caramel, pecans, and chocolate?! What? oh yes! These are easy, delicious and can be decorated for any holiday you might be serving them for. I sent these in with my husband for He and his co-workers to enjoy and needless to say none of them came home! These would be great for any party or school bake sale!
INGREDIENTS
5 1/2 cups Rice Krispies cereal
4 1/2 cups mini marshmallows
1/4 cup butter
11-ounce package caramel bits
1/2 cup pecan chips
1/2 Tablespoon sea salt
10-ounce package melting wafers
Decorations or sprinkles of your choice
DIRECTIONS
In a large pot, melt the butter over medium heat. Once melted, add the marshmallows and stir often until the marshmallows have melted and turned creamy being careful not to burn the bottom. Once melted remove from heat and stir in the Rice Krispies cereal and mix well to combine. Spray a 9 x 13 baking dish with non-stick spray and pour the Rice Krispies mixture into the prepared pan and evenly flatten the cereal mixture into the pan. Set aside and let this cool and set up. Once cooled down place the caramel bits into a microwave-safe bowl with 2 tablespoons of water and microwave for one minute. After one minute, stir the caramel and microwave another 30 seconds and stir again. Depending on your microwave the caramel may need another 30 seconds. You want the caramel nice and smooth. When smooth remove from microwave and pour over the Rice Krispies covering all of the cereal mixture. Sprinkle with the sea salt and pecan pieces. Let this rest for 30 minutes or so until the caramel is cooled.
Place the melting chips in the microwave and microwave according to the package. Once melted and creamy add this layer on top of the caramel layer covering all of the caramel. Add sprinkles or decorations of your choice. Set aside and let the chocolate cool and set up. Once set cut into squares and serve.
Enjoy!

I’m BACK! Wow, what a crazy couple of months we have had. After recovering from my broken leg and helping my Mom after her surgery we were ready to tackle Christmas. However, two days before Christmas our small dog Zelda slipped a disk in her back leaving her unable to walk. Not the best way to start the holiday, but after two emergency vet visits, 6 weeks worth of medicine and two months of her resting, (the best a dog can rest) I am happy to report that Zelda is now walking unassisted and is back to her playful self. Although she still is unable to tackle stairs she has done amazing!
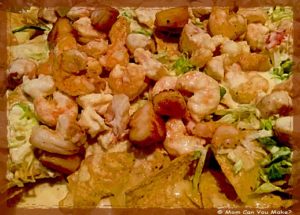
I have still been tracking all my recipes and pictures so I have so many to share with you! The first recipe I am sharing is Seafood Nachos. These were delicious! I have been wanting to make this dish for a while now as each summer we do a lot of camping with friends and family and always have a huge lobster/clam bake. So I thought it would be fun to have a seafood nacho dish one night! This recipe will be made a number times this summer! I used lobster meat, scallops, and shrimp so this can be an expensive dish BUT also a very impressive dish. You can make a couple of shortcuts with this recipe by purchasing already cooked lobster meat as well as cooked, deveined and tails off shrimp if you wanted to. I chose to roast the shrimp myself and pan sear the scallops adding a beautiful color and texture to the scallops. For the lobster, I simply cooked two lobster tails according to the package instructions as they were frozen tails. This recipe is enough for 4-6 hungry people as an appetizer.
INGREDIENTS
1 large bag of tortilla chips
2 cups sharp cheddar cheese
2 cups shredded pepper jack cheese
1 Tablespoon Of butter
2 teaspoons roasted garlic
1 pound large shrimp, peeled and deveined, tails off
2 lobster tails, cooked and meat removed and chopped (not too small)
1/2 pound scallops, muscle removed
1 cup heavy cream
1 cup grated parmesan
1 cup grated asiago cheese
Pinch of pepper
Pinch of salt
1 cup shredded iceberg lettuce
SERVE WITH
Sour cream
Pico de gallo
Pickled jalapeño
DIRECTIONS
For the shrimp – place the shrimp on a baking sheet drizzle with olive oil, add a pinch of salt and pepper and mix to combine. Place in a 400-degree oven for 6-8 minutes or until the shrimp turn pink and are cooked through. Remove from oven and set aside.
For the scallops – place a tablespoon Of butter in a frying pan, let the butter melt and pan heat up. Add the scallops to the hot pan and let sear until turning a golden brown, turn the scallops and do the same for the second side. Remove from pan and set aside.
For the lobster – I bought frozen lobster tail and followed directions on package. Remove cooked meat from shells and set aside. Or purchase already cooked and shelled meat.
In a large sauté pan add the heavy cream, Parmesan and Asiago cheeses, roasted garlic, salt, and pepper. Allow the cheese to melt. When the cheese has melted and is creamy add the lobster meat to the sauce, cut the scallops in half and add to the sauce, add the shrimp cutting in half if they are large shrimp. Stir to combine and warm the seafood through.
Meanwhile, on a large baking sheet spread the tortilla chips over the pan, add the cheddar and pepper jack cheese covering the chips and bake in a 350-degree oven for 2-4 minutes until the cheese is melted. Remove from oven, add a layer of the shredded lettuce over the cheese and top with the seafood sauce.
Serve warm with sour cream, pico de gallo and pickled jalapeño.
Enjoy!

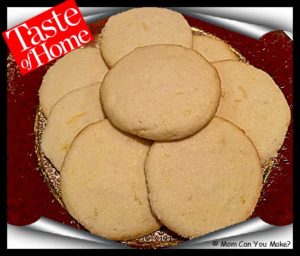
We all know what time of year it is and that means making some cookies to share with all your family and friends! Although I do bake it’s not my favorite thing to do but these sugar cookies from Taste Of Home made it simple. After reading some of the reviews of this recipe I made a few small changes. The original recipe calls for vanilla extract. I wanted something just a little different so I used lemon extract and I also added lemon zest to the batter. This recipe can be made as a drop cookie or rolled into balls. Flatten with the bottom of a glass that has sugar on the bottom of it so it leaves a nice light coating of sugar on top of the cookies. Needless to say, this recipe is easily adaptable and it makes a lot. This made almost five dozen!

Because it made so many I was able to send some with my husband while he was flying with the Army National Guard. During his travels, he stopped at an Air Force base where our dear friend Adam (our niece Becky’s significant other, who we love) was working and could come out and enjoy a cookie or two! Needless to say, there were some happy military people today!
INGREDIENTS
1 cup of butter, softened
1 cup of vegetable oil
1 cup of sugar
1 cup of confectioners sugar
2 large eggs
1 teaspoon vanilla extract (or if making lemon, I used 1 1/2 teaspoons lemon extract)
4 1/2 cups flour
1 teaspoon baking soda
1 teaspoon cream of tartar
NOTE– if making the lemon version you will need 3 small lemons. I zested two of the lemons into the batter and zested 1 lemon into 1/2 cup of granulated sugar I used for the top.
DIRECTIONS
Preheat oven to 375 degrees. In a large bowl beat the butter, oil, and sugars. Beat in the eggs until well blended. Add the vanilla or lemon extract. In another large bowl, add the flour, baking soda, and cream of tartar. Gradually add the flour mixture into the butter/sugar mixture and mix to combine. If making the lemon version add the zest of two lemons and mix until combined.
If making drop cookies simply drop about a tablespoon of the dough on an ungreased baking sheet and bake for 8-10 minutes until they are lightly browned. Mine took 8 minutes.
If you want to flatten them and add the sugar on the top, place about 1/2 cup of granulated sugar onto a plate, add the zest of one lemon into the sugar and mix. Roll the dough into balls about a tablespoon or so and place on an ungreased baking sheet. Using the bottom of a drinking glass coat the bottom of the glass lightly with the sugar mixture and lightly press the dough balls down to your desired thickness. This will leave a light coating of sugar on the top of the cookie. Bake for 8 – 10 minutes.
Enjoy!

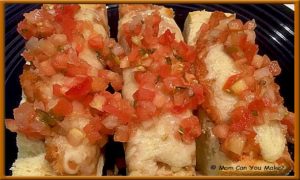
This is a super simple five-ingredient dish! Jim loves anything with a Mexican or Tex Mex flavor so he loved this dish! I, on the other hand, am not a huge fan of refried beans so this was not a huge favorite for me. Jim and I both agreed this would make a great party appetizer. I would slice them a little smaller than shown in the picture here.
INGREDIENTS
1 crusty Italian loaf
1 can (16 oz.) refried beans – I used the spicy version
1 cup sharp cheddar cheese, shredded
1 cup Monterey Jack cheese, shredded
1 1/2 cup homemade or store-bought pico de gallo
DIRECTIONS
Preheat oven to 350 degrees. Slice bread in half lengthwise and then in half widthwise and place cut side up on a baking sheet. Spread about 1/4 of the can of refried beans on each slice of the cut side of the bread. Top each slice with both kinds of cheese.
Bake for 15 minutes or until cheese is melted. Cut into 1/2 inch slices and top each slice with a spoon full of pico de gallo. Serve warm.
Enjoy!


