Main Dish
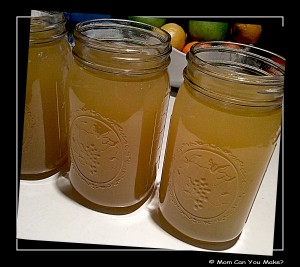
 Happy New Year! My holiday decorations are put away and I am ready to start the new year! One of the things I did after cooking my turkey this year was to make turkey broth in the crockpot! You can use chicken, beef and even fish to make broth. We have all heard about the benefits of broth and how it helps in digestion and gives our immune system a boost, but it has become so popular there is even a take out window in NYC that serves just broth. It is also a main staple in the LA Lakers diet!
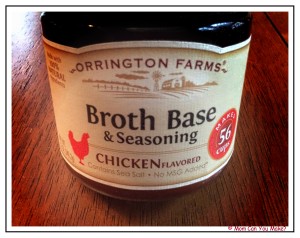
I have never made broth in a crockpot and could not wait to give this a try. Let’s face it throwing everything in the crockpot and letting it go for 18-24 hours does not get much easier. I started this in the evening and by morning my house smelled fabulous. Anyone walking by the crockpot that day was drawn to the slow cooker…it smelled just so good! I did add some chicken base to my broth to boost the flavor a little more. Adding this is certainly up to you and the amount you add is totally up to you as the flavor of the broth will not always be the samel I add this by taste at the end of my cooking time. I also added roasted garlic paste to my broth at the end of the cooking time. If you use the chicken base be careful adding salt as the base has salt in it already.
I also added 1-2 tablespoons of apple cider vinegar, why you ask? Well the vinegar allows the minerals to be extracted from the bones and using apple cider vinegar has many of its own health benefits. You could also use freshly squeezed lemon juice. The recipe below is what I used, but you can add any root vegetables and seasoning you like.
NOTE
When the broth has been stored in the refrigerator it will be almost jello like, that is what you want this means that you have gotten a significant amount of nutrients in your broth. This is a great base for any soup or stew you might be making!
INGREDIENTS
1 turkey carcass, most of the meat cleaned off
1 onion, quartered
3 carrots, roughly chopped
3 celery, roughly chopped
3-4 garlic (or garlic paste added at the end of cooking time)
2 bay leaves
1-2 Tablespoons of apple cider vinegar
Cold water
Chicken or turkey base to taste, added at the end of cooking time
DIRECTIONS
Using a large slow cooker turned on low, add all ingredients except the chicken base. Fill the crockpot to the top with the cold water to the top. Cover and let cook on low for 18 to 24 hours. In the last hour of cooking add the chicken base and roasted garlic if you are using that and/or any other herbs or seasoning you would like. Cover, let cook another hour and check for seasoning, adjust if needed. Shut slow cooker off, remove top and let cool. When it is cool enough to handle strain the broth. I used a colander that I lined with cheesecloth and store in mason jars in the refrigerator.
Enjoy!

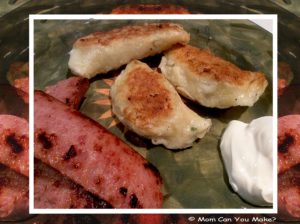
 My entire family loves pierogies! I usually make them using left over mashed potatoes after the holidays but this year I saw a recipe from Chef Michael Symon using a sausage/apple stuffing that was stuffed into the pierogies! Well since I make my Thanksgiving and Christmas stuffing with all of the same ingredients this was the perfect way to use up leftover stuffing.
You can certainly use almost any stuffing you like but the addition of maple sausage, apples, bread crumbs works really well with this recipe. Feel free to check out my stuffing recipe on website.
NOTE – Chef Symon suggested serving with some pan fried kielbasa, who am I to argue with Chef Symon.
INGREDIENTS
PIEROGI DOUGH
3 large eggs, divided
3/4 cup sour cream
8 Tablespoon unsalted butter
1 Tablespoon chopped chives
1 teaspoon salt
2 cups all purpose flour
2 Tablespoons water
Salt and pepper to taste
FOR SERVING WITH
4 Tablespoons butter
1 medium onion peeled and sliced
1 pound kielbasa, cut lengthwise
Sour cream
DIRECTIONS
For the pierogi dough- In a large bowl add one egg, sour cream, butter, chives and salt. Mix by hand to form a batter. Place flour on a work surface and form a well in the center. Add the sour cream batter to the center of the well and mix by hand until a light dough forms. Wrap in plastic wrap and place in the fridge to rest for at least two hours. To assemble, bring a large pot of salted water to a boil. In a small bowl add the remaining two eggs and two tablespoons of water and whisk to combine and set aside.
Remove the dough from the fridge along with your leftover stuffing and place the dough on a lightly floured surface. Roll dough to about 1/8 inch thickness and cut into 3 inch rounds. Brush each round with egg wash. Spoon 2 tablespoons of the stuffing into each round. Fold the dough over into a half moon shape, pressing the edges with a fork to seal. At this point you can refrigerate or freeze until ready to use.
Add the pierogi to the boiling water in batches, cooking for 3-4 minutes after they float.
Meanwhile preheat a griddle to medium heat. Place the kielbasa on the griddle cooking until browned. 8-10 minutes. Remove to a platter.
In another sauté pan over medium high heat, add butter and onions, cook onions until they are soft. Add the pierogi in batches and cook until golden brown. Transfer to a platter with kielbasa. Serve with sour cream.
Serve warm.
Enjoy!


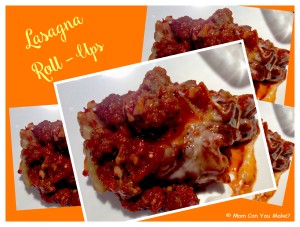
This would be another great dish to serve for holiday get togethers. This makes two large baking dishes. You can prepare the dish ahead and pop it in the oven just before guests arrive. You can also change up the type of sausage you use, spicy, italian or even sweet sausage would all be great! Add a salad and garlic bread and youl will have some happy people!! My family really enjoyed this dish and it is already on my dinner rotation!
INGREDIENTS
12 lasagna noodles
1 pound bulk sausage
2 jars spaghetti sauce (26 ounces)
1 carton ricotta cheese (15 ounces)
2 cups shredded mozzarella cheese, divided
3/4 cup shredded Parmesan cheese, divided
1 egg
2 Tablespoons fresh minced parsley or 2 teaspoons dried
2 1/2 teaspoon fresh rosemary, minced
2 teaspoons lemon juice
1 1/2 teaspoons fresh thyme or 1/2 teaspoon dry
1 teaspoon grated lemon peel
1 teaspoon pepper
1/2 teaspoon salt
DIRECTIONS
Preheat oven to 350 degrees. Cook noodles according to package directions. Meanwhile in a large skillet cook sausage over medium heat or until no longer pink, drain and stir in spaghetti sauce. In a large bowl combine ricotta, one cup mozzarella, 1/4 cup Parmesan, egg, parsley, rosemary, lemon juice, thyme, lemon peel, pepper and salt.
Drain noodles and spread two tablspoons of cheese mixture on each noodle, carefully roll up. Spread 2/3 cup meat sauce mixture into each of two greased 1 1x 7 baking dishes. Place roll ups seam side down on the sauce. Top with remaining meat sauce. Sprinkle with remaining mozzarella and parmesan. Cover and bake 45-50 minutes or until bubbly.
Freezer option– Cover and freeze unbaked casseroles for up to 3 months . When you are ready to bake, thaw in the refrigerator overnight, remove from fridge 30 minutes before baking. Preheat oven to 350 degrees, cover and bake 50-60 minutes or until bubbly.
Serve warm.
Enjoy!

Another great recipe from Taste of Home Magazine!

A few weeks ago I had a call from my neighbor Mary Ann who said the knife guy was on his way over to her house and asked if I’d had any knives to be sharpened. Knife guy? Who has a knife guy? I had never heard of such a thing! Needless to say ,  I gathered all my knives…steak knives, cutting knives, paring knives and of course my carving knives and over I went!
Sure enough a van pulls up and out comes Ron! Ron Roemer is the knife guy! He is also the scissor guy and the garden tool guy! You guessed it, if it’s dull he can sharpen it. Ron pulled out a couple tools from the back of his van and went to work! All of my knives were sharpened in about 30 minutes and ready to carve those holiday turkeys. Mary Ann had her garden tools done in no time too!
 Ron travels from his home in Gilmanton NH and can be reached at his home office at 603-527-8688. If you need a knife or tool sharpened , this is the man to contact!
Thanks Ron!


