Main Dish
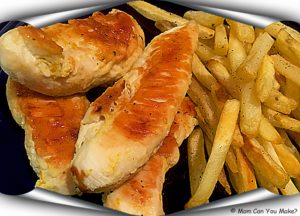
While I was still recovering with my broken leg, I was looking for a fast simple dinner to get on the table and this was it. I had all the ingredients on hand and I baked up some fries and added a salad to go alongside the chicken. Dinner was on the table in no time. I made these using chicken tenders as that’s what I had, but you can certainly use chicken breasts as well. These can be simply fried in the pan as I did or baked at 350 degrees until fully cooked through.
INGREDIENTS
4 chicken breasts or 1 package of chicken tenders
1 orange
2 Tablespoons maple syrup
2 Tablespoons low sodium soy sauce
DIRECTIONS
Squeeze the juice of the orange into a bowl and add the maple syrup and soy sauce. Add the chicken, coating all of the pieces. I fried my tenders in a large pan over medium heat until cooked through and turning halfway. If baking, preheat the oven to 350 degrees and bake uncovered for 30-35 minutes or until cooked through. Serve warm.
Enjoy!

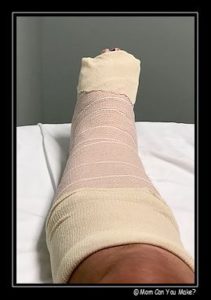
Well, it’s been a rough few weeks. I told you I would check in and post when I could …well, I feel like my last post of taking a little break turned into reality! I don’t always share some of the most personal things happening but let me give you a recap of our last year!
One year ago, our daughter and her love Steve (who we love)  had twins (a boy and a girl). We were told a number of years ago that Amanda would never be able to carry a child due to her ligament disorder…well, Amanda always pushes the odds and she had twins that were born three months early and spent almost three months in the hospital in Manchester, NH. We were so thankful, happy and scared all at the same time. We have hit the one year mark and Amanda, Steve and the babies are doing amazing. All thriving! But also just moved to the land of nowhere in NY! Cornfields, soybeans, vineyards and etc! It’s a ten hour trip for us to see them. Although we were sad to see them leave we are thrilled for them and the new life they have started.
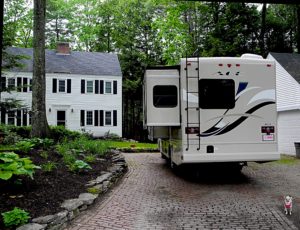
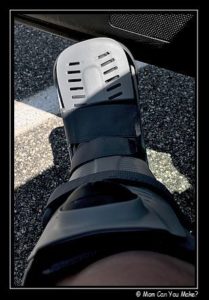
 With this being said, Jim and I have been looking for a lake home for a few years and could never find the right house but when the kids moved we knew what we wanted, and that was a motor home! We purchased the motor home the first weekend they left and have not looked back! We were able to spend ten days with the twins and family. While in the middle of no where, or the many cornfields I had a slight (?) injury or so I thought. I broke my fib bone and separated my ankle. Yup, back to my last post of “just a small break”! Well, sadly not as small as I would like. I’m not in the kitchen at all. I can do small things in small increments. With that being said I will be out of the kitchen longer than expected. I have four more weeks of the “boot” then a re-check and whatever physical therapy to get me back to normal.
I will be back, but just not as soon as I would like! Thank you for all the support and understanding!


As I have mentioned in prior posts, our son Robby has had a very angry belly. Sadly this has brought us to many doctor visits as well as two emergency room visits and many sleepless nights. His diet has changed significantly from eating like most people to a gluten free, dairy free diet to the Fodmap Diet. Not an easy task for anyone, not to mention a young man just starting out.
I’m going to take some time off to get Robby back on track and feeling better, as well as taking some family time.
Summer is here, enjoy your family…and have a safe and wonderful summer. I won’t be gone too long and may pop in from time to time with recipes we love. Stay tuned and thank you all so much!
Enjoy!

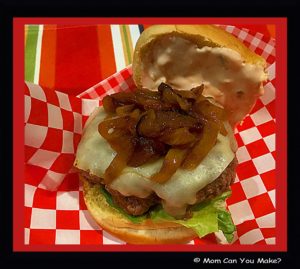
I made these burgers over the 4th of July weekend. Let’s face it no 4th of July is complete without a good burger! I picked this burger to make as I knew it was going to have lots of flavor and I could also caramelize the onions ahead of time as well as mixing up that special sauce leaving me a little more time for other things! Anytime I entertain I do as much in advance as possible and that includes prepping some of the food! We enjoyed these burgers, the caramelized onions and the sauce gave the burger lots of great flavor. I will say next time I make them I will be adding some pickled jalapeño slices on top of my burger to add a little extra punch of flavor! This burger is one of my top three favorites! I will be making these several more times this summer.
INGREDIENTS
2 Tablespoons vegetable oil, and more for brushing the griddle
2 large onions, chopped
Salt
1/4 cup mayonnaise
2 Tablespoons ketchup
1 Tablespoon sweet pickle relish
1/2 teaspoon white vinegar
1 1/2 teaspoon mustard
2 lbs. ground chuck (60%)
8 hamburger buns
Pickles
Shredded lettuce
4-8 slices of tomato (I left off)
Pepper
8 slices of American cheese
DIRECTIONS
Heat oil in pan and add the chopped onions. Cook onions covered over medium heat for 30 minutes or until onions begin to turn golden brown and caramelize. Watch not to burn and stir occasionally. Remove lid add 1/2 cup of water. Allow water to evaporate. Remove onions from heat and set aside. Can be made ahead and kept in fridge.
For the sauce – mix together mayo, ketchup, relish and vinegar, mix well and set aside. This can also be done the day before.
Form the meat into 8 patties about 4 inches wide and 1/2 inch thick. Heat griddle and lightly brush with vegetable oil. Toast buns on the griddle, split side down (or can be done under the broiler watching carefully to not burn.) Remove buns from skillet when lightly browned and set aside. Salt and pepper both sides of your hamburger patties and cook on the griddle 3-5 minutes.
Spread the top of the patties with the mustard and flip. Continue cooking on the second side for an additional 3-5 minutes. Top burger with a slice of cheese to melt. When cooked to your desired doneness remove from pan and place lettuce on the bottom bun, add the burger on top of the lettuce, add the caramelized onions and spread the sauce on the split end of the top bun and top of the burger with the bun!
Enjoy!

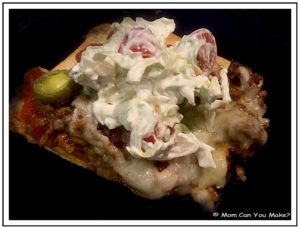
One of our favorite pizza places in Portsmouth, NH has our favorite Mexican pizza but we don’t always have time to go into Portsmouth so what’s a girl to do? Make my own version right? Well, this is not exactly like the restaurant version and it is definitely a little spicier, but the cool lettuce and tomato slaw on top cools it right down. You can also change the spice level by using mild salsa and leaving the jalapeño’s off. I made this one Saturday afternoon and shortly after I made it we had some neighbors pop over so I was thrilled to see how they liked it. I did not tell them it was my creation before they ate it so I was thrilled when they both cleaned their plates and said how much they liked it! I knew Jim and I liked it but it’s nice to have some additional feedback. I also made a gluten free version for Robby using gluten free crust and gluten free taco seasoning. Robby loved his pizza too! If you want to keep it dairy free, don’t use the sour cream and use dairy free cheese.
INGREDIENTS
Pizza crust of your choice, store bought, home made or dough from your favorite pizza place
1/2 pound ground beef
2 Tablespoons of taco seasoning, I use low sodium
3 Tablspoons water
1/2 cup of salsa, I used medium spice
1/2 cup shredded Monterey Jack cheese
1/2 cup shredded cheddar cheese
1/4 – 1/2 cup jarred sliced pickled jalapeños, depending on how much you want
TOPPING ingredients
1 cup shredded lettuce
1 cup cherry tomatoes, halved
1 cup sour cream
FOR A GLUTEN FREE PIZZA – like this one
Use a gluten free crust and gluten free taco seasoning. To make this dairy free leave out the sour cream and use dairy free cheese.
DIRECTIONS
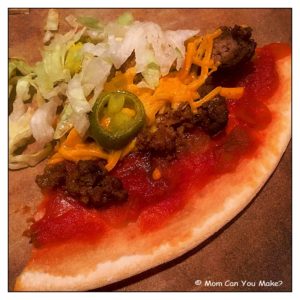
Preheat oven to 450 degrees. Lightly spray sheet pan with non-stick spray. Flatten the dough forming your crust. Prebake the crust for 3-4 minutes partially baking it. Remove from oven. In the meantime, heat a skillet to medium heat and add your ground beef. Cook ground beef breaking into crumbs as it cooks, drain excess liquid from the pan and add the taco seasoning and water, mix to combine and finish cooking. When cooked through, remove from heat.
To assemble, add your salsa to the top of your pizza crust and spread to about 1/4 of and inch to the edges, add the ground beef mixture and cover the salsa, add the cheeses spreading over the beef. If desired add the sliced jalapeños. Place back in the oven and bake an additional 8 minutes.
While the pizza is baking combine all of the topping ingredients together and set aside. When pizza is cooked through remove from oven, let rest for just a couple minutes, slice and add a spoonful or so of the topping. Serve warm.
Enjoy!


