Main Dish
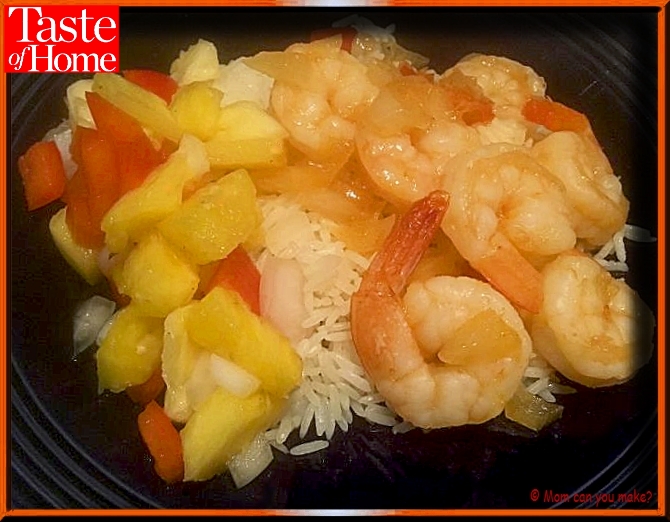
This was delicious! We devoured this dish. I absolutely loved the fresh pineapple salsa. The original recipe called for 3/4 cup black beans that are rinsed and drained. I left that out as not everyone in my family can have beans.
INGREDIENTS
- 1 1/2 cups uncooked basmati rice
- 3/4 cup canned black beans, rinsed and drained-optional
- 2 teaspoons canola oil
- 1/2 cup finely chopped onion
- 1 1/2 cups unsweetened pineapple juice
- 1/2 cup packed brown sugar
- 1 Tablespoon sriracha chili sauce
- 3 cups cubed fresh pineapple
- 1/4 cup diced red onion
- 1 medium sweet red pepper, diced
- 1 cup chopped fresh cilantro-I left out
- 2 Tablespoons lime juice
- 1/4 teaspoon salt
- 1/4 teaspoon pepper
- 1 1/2 pounds peeled and deveined shrimp
DIRECTIONS
Cook rice according to package instructions, stir in beans. Cover and keep warm.
While rice cooks, heat oil in a large skillet over medium-high heat. Sauté onion until tender, 3-4 minutes. Stir in pineapple juice, brown sugar and chili sauce, bring to a boil. Cook uncovered on high until the liquid is reduced to a 1/2 cup, 10-12 minutes.
For the salsa, toss pineapple with red pepper, cilantro, red onion, lime juice, salt, and pepper.
Once the sauce has reduced, stir in the shrimp and return to boil. Reduce heat and simmer uncovered until shrimp turns pink. 2-3 minutes. Serve warm with rice and salsa.
Enjoy!

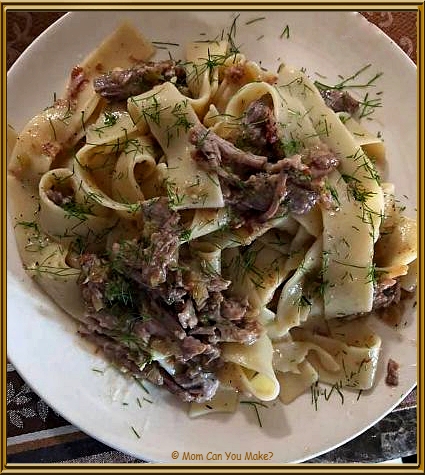
This recipe comes to you from a good friend of mine who is an amazing chef! Ann said this recipe is one of the best recipes she has tried in some time. Now that says a lot as Ann makes some amazing dishes. This recipe does take a little bit of time but it’s most definitely worth it!
Serves 4-6 Total cooking time 2 3/4 hours
INGREDIENTS
- 4 ounces pancetta, chopped
- 1 large onion, chopped fine
- 1 large fennel bulb, 2 Tablespoons finely chopped, stalks discarded, bulb halved, cored and chopped fine
- 4 cloves garlic, minced
- 1 1/2 teaspoons salt or kosher salt as Ann used (plus salt for pasta water)
- 1 teaspoon pepper
- 2 teaspoons minced thyme
- 1/3 cup heavy cream
- 1 (1 1/2 pound) boneless pork butt roast, well-trimmed and cut in half across the grain. You can have your butcher do this if you are unsure how.
- 1 1/2 teaspoons grated lemon zest plus 1/4 cup juice, 2 lemons
- 12 ounces pappardelle
- 2 ounces pecorino Romano cheese, grated, plus extra for serving
DIRECTIONS
Adjust oven rack to middle position and heat oven to 350 degrees. Cook pancetta and 3/4 cup water in a Dutch oven over medium-high heat, stirring occasionally until water has evaporated and dark fond forms on the bottom of the pot, 8-10 minutes. Add onion and fennel bulb, cook stirring occasionally until vegetables are softened and start to brown 5-7 minutes. Stir in garlic, salt, thyme, and pepper. Cook until fragrant, about 30 seconds.
Stir in cream and 2 cups water scraping up any brown bits on the bottom of the pan. Add pork and bring to a boil over high heat, cover and transfer to your oven and cook until the pork is tender. About 1 1/2 hours.
Transfer pork to a large plate and let cool for 15 minutes. Cover pot so fond will steam and softened. Using spatula scrape brown bits from sides of the pot and stir into sauce. Stir in lemon zest and juice.
While pork cools, bring 4 quarts of water to a boil in a large pot. Using two forks shred pork into bite-size pieces discarding any large pieces of fat or connective tissue. Return pork and any juices to Dutch oven.
Add pasta and one Tablespoon of salt to boiling water cook stirring occasionally until cooked al Dante. Reserve two cups of cooking water then drain pasta and add to the Dutch oven. Add pecorino and 3/4 cup of the reserved cooking water and stir until the sauce is slightly thickened and cheese is fully melted – 2-3 minutes. If desired stir in remaining reserved cooking water 1/4 cup at a time to adjust the sauce consistency. Season with salt and pepper to taste and sprinkle with fennel fronds. Serve warm.
Enjoy!

This recipe comes from Cooks Illustrated.
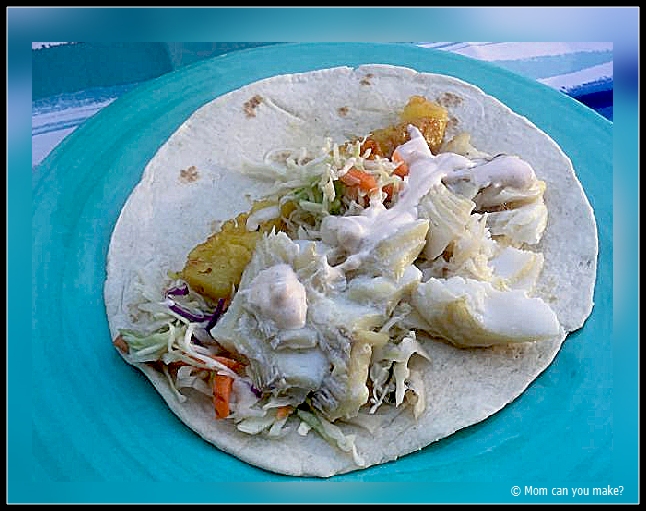
I often ask Jim what he wants for dinner. When I asked a few weeks ago what he wanted for an upcoming trip we were taking, he said fish taco’s. I don’t make fish taco’s typically but order it out often so I went on the hunt for a good grilled fish taco recipe. This is a combination of two recipes that I came across. We loved this dish. Jim said it was one of the best things we have ever grilled. Now that says something! Jim added some grilled pineapple to his as you can see in the picture, it was a great addition.
This does have some prep work so be sure to read through the instructions before starting. The cedar planks can be found at your local grocery store at the fish counter.
INGREDIENTS
FOR THE FISH
- 2 pounds white fish, I used haddock
- 2 Tablespoons lime juice
- 1 teaspoon ground cumin
- pinch of salt
- pinch of pepper
- 8 flour or corn tortillas
- 2 cedar planks
FOR THE SLAW
- 1 bag of coleslaw
- 2 teaspoons of honey
- 1 Tablespoon lime juice
- 2 teaspoons jalapeño, diced
- 1/2 Tablespoon minced garlic
- pinch of salt
- pinch of pepper
FOR THE BAJA SAUCE
- 3/4 cup sour cream
- 1/2 cup real mayonnaise
- 3 Tablespoons lime juice
- 1 teaspoon garlic powder
- 2 teaspoons sriracha sauce
- pinch of salt
- pinch of pepper
- 1/2 teaspoon ground cumin
- 1/4 teaspoon cayenne pepper
- 1 1/2 teaspoons adobo sauce
DIRECTIONS
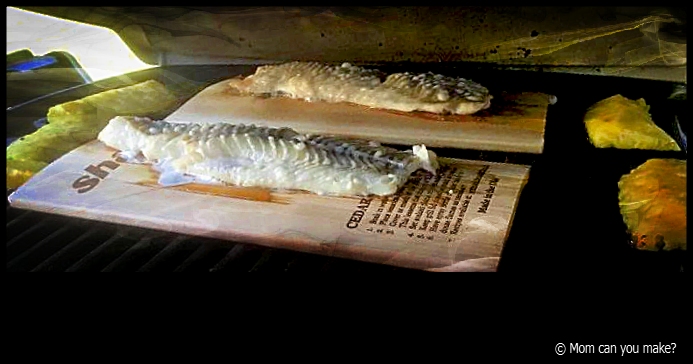
Soak the cedar planks for grilling overnight, just before grilling take them out of the water and dry the planks off.
Combine slaw ingredients in a large bowl, cover and refrigerate for 30 minutes.
To make the Baja sauce place ingredients in a small bowl and whisk until fully blended. Cover and refrigerate 1-2 hours. I did it the day before.
When you are ready to make the taco’s pat each piece of fish dry with a paper towel. Season both sides of the fish with lime juice, cumin, salt, and pepper.
Heat your grill to medium heat and place the cedar planks on the grill to heat for 5 minutes. When your planks are heated, place the fish on the planks and close the lid of the grill. Grill until the fish flakes easily. It took about 15 minutes on our grill. Warm your tortillas just before serving. We warmed them right on the grill.
To assemble the taco’s place a warm tortilla on your plate, add about 2 tablespoons of your prepared slaw, place some of your grilled fish on top of the slaw. Lastly, spoon some of the Baja sauce on top of the fish. Serve warm.
Enjoy!

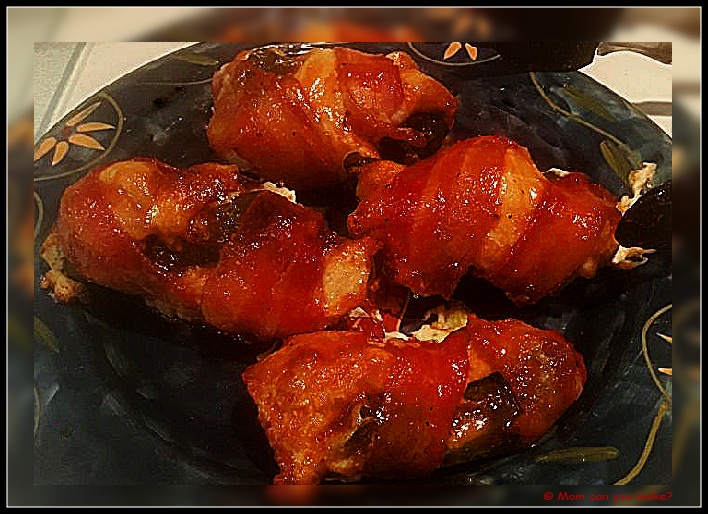
This recipe was a Pinterest find. Although it takes a bit of time to put together we enjoyed these as an afternoon snack! I air fried them but these could easily be baked or even grilled. The salty bacon with the heat of the jalapeño and the cream cheese topped with a sweet BBQ sauce….what could be better? I know I’ll be making them again soon.
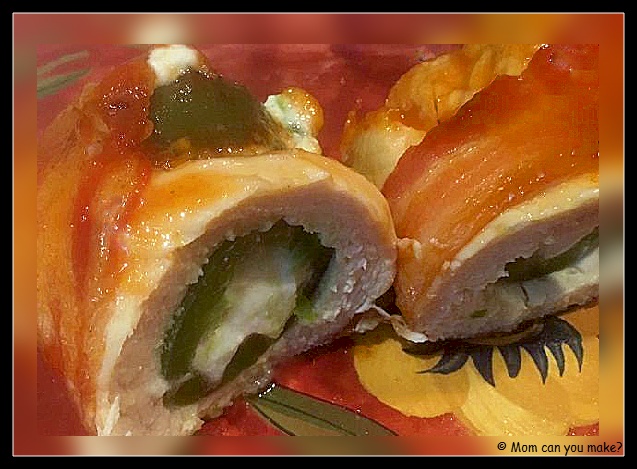
INGREDIENTS
- 8 jalapeño’s, top cut off and seeds inside removed
- 3/4 cup cream cheese
- 3/4 cup Monterey Jack cheese, shredded
- 1 scallion, diced
- 2 boneless, skinless chicken breast, pounded thin
- 8 slices of bacon
- 1/2 cup of your favorite BBQ sauce, we used a sweet sauce/ extra for serving if desired
DIRECTIONS
Slice the tops of the jalapeños off. Make a slit in each jalapeño along one side and carefully remove the seeds. Mix together cream cheese, cheese and scallions, and stuff the jalapeños with this mixture, trying not to overfill.
Pound the chicken so it is thin. Depending on the size of the chicken, slice into 8 strips. Season chicken with salt and pepper. Wrap one chicken strip around each jalapeño popper. Wrap one slice of bacon around each chicken jalapeño trying to seal the top opening with the chicken and bacon so the cheese does not ooze out. Secure with a toothpick or two.
Place the poppers in the air fryer and air fry at 350 for 20 minutes. After the 20 minutes, brush the bacon wrapped chicken with the barbecue sauce and cook at 400 degrees for 2 minutes. Remove from the fryer, remove toothpicks and serve warm with additional BBQ sauce if desired.
Enjoy!

