Holidays

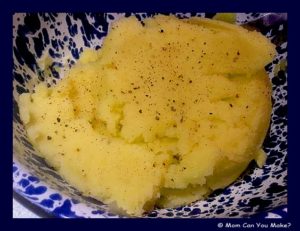
As you know having a family member that has to be gluten free and dairy free can be difficult. This is more difficult during the holidays when the food is a little more extravagant. More filled with heavy cream, cheese and so much more. The usual potatoes I make are filled with butter, heavy cream and cream cheese! Robby cannot have any of that so I wanted to find a mashed potato recipe that not only he could eat but also taste really good. I found a couple of recipes on Pinterest and combined both things I liked with the two recipes and the outcome was delicious. Not just for Robby, but for us too and not filled with all the fat my usual holiday potatoes have! I use a potato ricer to get the potatoes super creamy, no lumps in my potatoes!
INGREDIENTS
3 pounds of yellow flesh potatoes, peeled and cut into two-inch pieces
1 cup of potato cooking water- don’t forget to save it before you drain potatoes.
2 teaspoon salt
Fresh ground pepper to taste
A drizzle of garlic infused olive oil
DIRECTIONS
Place peeled and cut potatoes in a large pot and cover with cold water by a couple inches. Add two teaspoons of salt to the water. Bring to a boil and cook for 12-15 minutes or until potatoes are tender enough for a knife to easily slide in and out.
Save a cup of the cooking water before draining. Drain potatoes and return them to the cooking pot over medium heat tossing them for a minute or so until they are dry. Mash the potatoes or remove them from the heat and use a potato ricer. Add 6 tablespoons of good olive oil and stir through. Thin potatoes with water a little bit at a time until you are happy with the consistency. Season to taste with salt and pepper and lightly drizzle with garlic infused olive oil. Use this sparingly as it packs a lot of flavors. Serve warm.
Enjoy!

 Are you looking for a new dessert for your holiday table? I have mentioned in the past baking is not really my thing. Well, it’s not our daughter Amanda’s either, but she was looking for a cherry pie recipe that was delicious and easy. Needless to say, I turned to the tried and true recipes from Taste of Home magazine. You can find them online through Facebook and Pinterest as well. I am a volunteer Field Editor for them. I sent Amanda this recipe knowing that it would be easy for her to make and still have great flavor. Amanda, her husband Steve, the twins and extended family enjoyed the pie after their Thanksgiving dinner. I heard not a crumb could be found!

INGREDIENTS
1 1/2 cups flour
1/2 teaspoon salt
1/2 cup shortening
1/4 cup ice water
2 cans (16 ounces each) tart cherries
1 cup of sugar
3 Tablespoons quick cooking tapioca
1/4 teaspoon almond extract
1/4 teaspoon salt
Red food coloring-optional
1 Tablespoon butter
DIRECTIONS
In a large bowl combine flour and salt. Cut in the shortening until crumbly. Gradually add water tossing with a fork until dough forms a ball. Divide dough in half. Roll out one portion. Line a 9-inch pie plate with bottom crust and trim pastry even with the top edge of pie plate.
Drain cherries, reserving 1/4 cup of the juice. In a large bowl combine the sugar, tapioca, extract, salt, food coloring if desired and reserved juice. Gently stir in the cherries. Let stand for 15 minutes.
Pour into crust. Dot with butter. Roll out the remaining pastry. Make a lattice crust, seal and flute edges. Bake at 375 degrees for 55-60 minutes. Cool on a wire rack.
Enjoy!

 I hope everyone had a wonderful Thanksgiving! Time seems to be going much too fast these days. We had a really nice Thanksgiving at our house with family, friends and some delicious food from start to finish. Needless to say, I went to bed tired and stuffed from the day but that was okay with me as I could take the next couple days off! No Black Friday shopping for me but watch out cyber Monday!
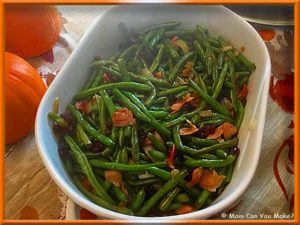
So this is another Taste of Home recipe that has been gaining a lot of attention and I can see why! Although this recipe calls for steaming the fresh green beans I turned it into a one-pot dish by using the frozen green beans in the steam bags and putting my microwave into action. I did not put the bourbon in just because I did not have any. This is a simple tasty dish, great for any holiday side dish. It will be making a second presence on my table at Christmas. This dish is perfect to make while the turkey rests!
INGREDIENTS
3 cups fresh green beans or 2 bags of frozen green beans in the steamable bags
1 large onion chopped
4 bacon strips cut into 1-inch strips
1/2 cup dried cranberries
1/4 cup maple syrup
1/4 teaspoon salt
1/4 teaspoon pepper
1 Tablespoon bourbon-optional
DIRECTIONS
In a large saucepan, place steamer basket over 1 inch of water. Place beans in the basket. Bring water to a boil. Reduce heat to maintain a low boil, steam, covered until crisp-tender. 4-5 minutes. Or do what I did and buy the frozen bags, steam according to the package.
Meanwhile, in a large skillet, cook onion and bacon over medium heat until the bacon has crisped through. Drain bacon fat if necessary. Add the cranberries, syrup, salt, pepper, and bourbon, if desired. Add beans to the bacon-onion mixture heating through and tossing to combine. Remove from heat and serve warm.
Enjoy!


I am always looking for something new to do with Thanksgiving and Christmas leftovers. Last year I made the Thanksgiving rolls that are delicious but the way these left the plate I’d say these are a definite family favorite. I made these in the air fryer but you can easily bake these in the oven following the package directions on the puff pastry box. One bite is Thanksgiving all wrapped up in a beautiful crispy puff pastry. Don’t forget to have plenty of leftover gravy for dipping. Those leftovers won’t last long!
This recipe makes 6 puffs.
INGREDIENTS
2 packages ready-made puff pastry
2 Tablespoon leftover roasted turkey, per puff
2 Tablespoon leftover stuffing, per puff
2 Tablespoons leftover cranberry sauce, per puff
Olive oil for spritzing, if air frying
Gravy for dipping
DIRECTIONS
Cut the puff pastry into approximately 4-inch squares. Starting with one square, layer the turkey on top of the pastry and follow adding the stuffing and then the cranberry sauce. Using the second square of pastry, lay the second pastry on top of the cranberry pressing down the edges to seal with the first layer of pastry. You can roll or pull lightly on the top pastry if needed.
Do this for each pastry you are making.
Place one or more depending on the size of your air fryer, spritz the top with olive oil and fry at 400 degrees for 6 minutes. Turn the pastry over, spritz the second side with oil and continue to fry for an additional 6 minutes. Serve with warm gravy.
Enjoy!

 Ready or not those holidays are right around the corner! I know I’m not ready yet although I do enjoy big dinners with family and friends. I’m always looking for something new to serve as appetizers or desserts. If I change my main menu much I’ll be in big trouble with my family.
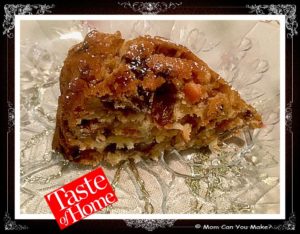
Although I’m not a fruitcake person I have to say this fruitcake was really good. I shared with my parents and they too agreed it was very good and a recipe worth keeping! It’s not super dense like most fruit cakes but it is packed full of lots of goodies! This could very easily be made in the small loaf pans and would be a great hostess gift or giving to co-workers or neighbors.
INGREDIENTS
1/2 cup butter, softened
1 cup sugar
3 large eggs
1 teaspoon lemon extract
2 cups all-purpose flour
1 teaspoon baking powder
1 teaspoon salt
1/2 cup orange juice
1 pound chopped mixed candied fruit
1 1/2 cups sweetened shredded coconut
1 cup golden raisins
1 cup chopped nuts, pecans or walnuts
DIRECTIONS
In a large bowl, cream butter and sugar until light and fluffy. Add eggs one at a time beating well after each addition. Beat in the extract. Combine the flour baking powder and salt. Gradually add to the creamed mixture alternating with the orange juice. Stir in the candied fruit, coconut, raisins, and nuts.
Press into a greased 10-inch tube pan. Bake at 300 degrees for 80 to 90 minutes or until a toothpick inserted comes out clean. Cool for ten minutes before removing from the pan to a wire rack. Let cool completely. If desired you can sprinkle with powdered sugar.
Enjoy!


