Grilling
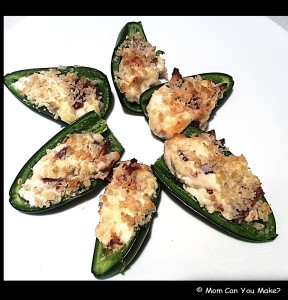
My favorite things to make are appetizers, but I am always looking for a new way to make something we have all seen before. This recipe is one of those ideas, although this does take some time to make they were absolutely delicious. The candied bacon was the star! These can be baked as I did, but also grilled and even smoked!
INGREDIENTS
8 slices of candied bacon, chopped (see instructions below)
8 ounces of cream cheese, at room temperature
1/4 cup shredded cheddar cheese
1/4 cup shredded Monterey Jack cheese
1/2 cup panko bread crumbs
1 Tablespoon Parmesan cheese
1 teaspoon Worcestershire sauce
2 dozen (approximately, depending on the size) jalapeño’s
DIRECTIONS FOR CANDIED BACON
8 slices of thick cut bacon
1/4 cup brown sugar
Preheat oven to 300 degrees. Place a cooling rack on top of a baking sheet and spray with non stick spray. Place 8 pieces of bacon on top of the cooling rack on a single layer and sprinkle the bacon with 1/2 of the brown sugar. Bake for thirty minutes (I used thick cut bacon, if you use a thin cut, cooking times will be different). After thirty minutes turn the bacon slices over and sprinkle with the remaining sugar and bake for 15 minutes or until crispy. Remove from oven and let cool completely.
NOTE- this can be done a day ahead.
DIRECTIONS FOR THE STUFFED JALAPEÑOS
Preheat the oven to 350 degrees. Slice the jalapeños in half lengthwise (being careful not to touch your face or eyes while working with the jalapeño’s). Scrape the ribs and seeds out of the jalapeño and place on a baking sheet.
In a medium bowl mix together the cheddar cheese, Monterey Jack cheese, cream cheese and Worcestershire sauce. Mix until well combined. Once well combined add your candied bacon pieces and mix so the bacon pieces are throughout your mixture. In a small bowl combine the panko crumbs and the Parmesan cheese. To assemble the jalapeños start by adding the cream cheese mixture into each jalapeño half and top with a sprinkle of panko Parmesan mixture. Do this for each jalapeño and place back on your baking sheet and bake for 12 minutes watching not to burn. Remove from oven and serve warm.
Enjoy!


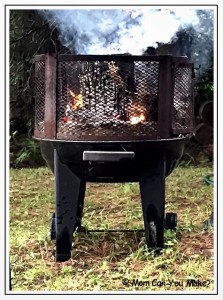
If you read my grilled breakfast pizza post last week you know some friends and I had a girls weekend at our friend Cathy’s lake camp in Northern NH. Well I only told you part of the story about us talking about how full we were from a big breakfast and late lunch. What I did not tell you is that we all wanted something a little sweet, so what do three girls lakeside decide to do? Skip directly past dinner and go right to dessert! Yup, that’s exactly what we did and it was damn good! These campfire cones are so simple and can be made a million different ways! We all had something a little different but we all agreed they were fantastic. These can be made over a campfire or on your grill over medium heat. I wish I had thought to take a picture of all of our candies we used but go ahead and picture all of the zillion combinations!
NOTE: Make sure you fill the cone as much as possible!!! Depending on what you are adding into the cone cooking time may vary slightly. We used mini candies that I think could have cooked a little longer or slice the candies in half before putting in the cone.
INGREDIENTS
(Any combination)
Sugar cones (this is a must)
Mini marshmallows
Mini chocolate chips
Peanut butter chips
Crushed walnuts
Maraschino cherries
Butterscotch chips
Nutella
Bananas
Crushed pineapple, Drained
Mini chocolate candies such as peanut butter cups, snickers or even peppermint patties.
Tin foil
DIRECTIONS
Take one sugar cone and fill it to the very top with your favorite combinations of candies. Wrap in tin foil and roast over medium heat on your grill or campfire for about 2 1/2 minutes per side. If you are using small candies they take just a little longer. Remove from heat, remove foil, serve warm.
Enjoy!
Some friends and I went for a girl’s lake weekend at our friend Cathy’s house. The “camp” was just over two hours away and we had some great food plans! One of our plans was grilled pizza for dinner. Well, that did not work as we had gone out for breakfast at a fantastic place that you will hear about next week, then we had a late lunch…then …well, after a few hours in the lake and in the sun we had all slowed down and none of us were very hungry. I think we were more water logged!
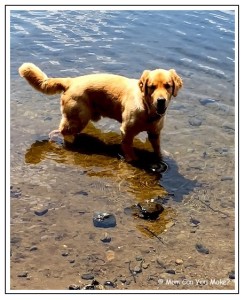
Speaking of water logged, Cathy’s dog, Putter, who is the sweetest dog ever, kept us busy! He loves the lake and loves to fetch ROCKS in the lake…yes, this dog fetches rocks at the bottom of the lake and brings them up on land and has such a good time with it! The first day we were there he brought out 12 rocks…no joke! 12! Do you see the size of that rock?
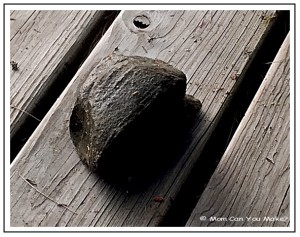
Such a silly, sweet pup! He wore us out that day!! Actually, we found out later that poor Putter got swimmers tail! Yes, it is a real thing. As Cathy said, “Putter broke his Rudder”! Poor guy was on medicine and rest for a week!! Not an easy thing for this guy! You will all be happy to know he is well and fine and back in the water!
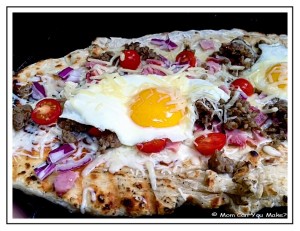
So as we sat back and pondered about the lack of dinner we wanted, we decided on instead of grilled pizza for dinner… to have grilled pizza breakfast! What a great idea that was, especially since Leanne brought fresh eggs from the chickens that she raises! We all loved it, and when I got home and told Jim about it he was feeling a little jealous and left out. I think he will be having grilled breakfast pizza very soon! This is definitely something you can make for breakfast, lunch or dinner with any combination of meat and veggies!
Note: We cooked and crumbled the sausage in advance. If you don’t like raw onions or veggies go ahead and sauté those as well. That can also be done in advance.
We cooked the farm fresh eggs sunny side up just before finishing the top of the pizza.
INGREDIENTS
Pizza dough
2 tablespoons of olive oil
1/2 cup of “hot” Jimmy Dean sausage, cooked and crumbled
1/2 cup of diced Canadian bacon
1/2 cup cherry tomatoes, sliced in half
1/4 cup red onion, diced
1/2 cup shredded cheddar cheese
1/2 cup shredded Monterey Jack cheese
4 eggs fried, yolks still runny (or you can do an over easy)
Salt
Pepper
DIRECTIONS
Preheat your clean grill to medium heat. Roll out your pizza dough. I made it more of an oblong shape to go on the grill a little easier. Brush both sides of the dough with the olive oil and place the dough directly on the grill. As the bottom of the dough starts to cook the top will bubble up just a little bit. That is the sign the bottom is cooking and almost ready to turn. When the bottom side of the dough is cooked through turn the dough to cook the other side, I let this cook just a couple minutes before adding the toppings. When it is time to add the toppings go ahead and add the cheese first, covering the entire crust. Close the grill lid and let the cheese begin to melt, about a minute or two. Then add your meats, tomatoes and onion. Add your already cooked sunny side up or over easy eggs, to the top of the pizza. Close the grill and continue until the bottom of the crust is finished cooking through. You can also add a little more cheese on the top at this time if you want to, along with some salt and pepper to taste. Remove from grill. Slice so each person has an egg on their pizza and serve warm.
Enjoy!
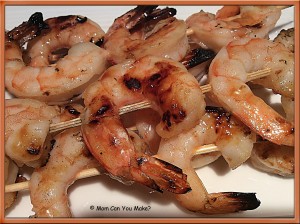 I LOVE this dish! I have already made it five times this grilling season, it gets high reviews from everyone that has had it! Did I mention it comes from Taste of Home magazine? But wait, that’s not all. BIG NEWS! I am also a Volunteer Taste of Home field editor!! Yup, it’s true!! How cool is that?! I feel like one of the cool kids! Now…back to the recipe. This shrimp is great as a side dish and would also be great on a salad ! I also added a light pinch of red pepper flakes… but that is optional! You will not be disappointed with this quick and easy recipe!
INGREDIENTS
1 bottle (8 ounces) Italian salad dressing. ( I use the robusto dressing)
1 cup of honey
1/2 teaspoon minced garlic
2 pounds raw shrimp, peeled and deveined
Red pepper flakes (optional)
8 wooden skewers, soaked
DIRECTIONS
In a small bowl combine Italian dressing, honey and garlic. Mix well and pour into a resealable bag and add the shrimp and let marinate for at least 30 minutes in the fridge. When you are ready to grill remove shrimp from fridge, discard marinade and thread shrimp onto soaked skewers. Preheat grill to medium heat. Grill skewers for two minutes per side or until shrimp turns pink. Add red pepper flakes, if desired. Serve warm.
Enjoy!
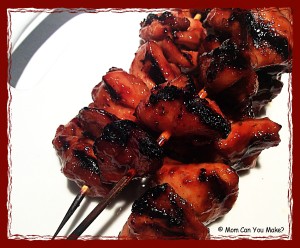
The sauce on this chicken is so good! Lick your fingers, lick the plate good! I made the sauce the day before I was going to grill the chicken, I let the sauce cool and marinated the chicken overnight and it was worth every bit of prep time! You could use boneless skinless chicken breasts but I highly recommend the thighs as they were incredibly tender and juicy. I will be making this often throughout the summer!
INGREDIENTS
6 boneless, skinless chicken thighs
2/3 cup ketchup
4 Tablespoons honey
4 Tablespoons low sodium soy sauce
2 limes zested and juiced
2 teaspoons fresh grated ginger
4 Tablespoons brown sugar
Skewers for grilling (soaked in water for at least 30 minutes)
DIRECTIONS
Place all of the ingredients except chicken into a small saucepan. Bring the sauce to a boil, reduce heat and simmer for two to three minutes while stirring. Remove from heat and let completely cool. Cut your chicken into bite size pieces and place in a Ziploc bag. Once the sauce has completely cooled add HALF of the sauce to the bag with the chicken and reserve the rest of the sauce for basting while grilling the chicken. Let marinate for a couple hours or overnight.
When you are ready to cook preheat your grill to a medium heat. Skewer your chicken pieces and place on the grill cooking and basting with the reserved sauce until chicken is completely cooked through.
Serve warm.
Enjoy!
This can be found on the website www.lovelauralee.com


