Food for Robby
Gluten free, low dairy and low fodmap
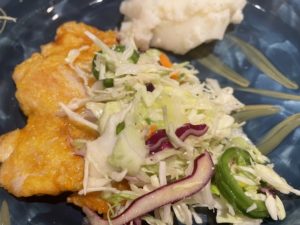
This dish is from chef Michael Symon and let me just say it’s become one of Jim’s all time favorite recipes! I made this last week and he is still talking about it. This recipe does take some time and prep work but it’s well worth it. I rarely deep fry anymore but this recipe is a keeper and one I will be making again!
INGREDIENTS
2 Tablespoons rice vinegar
1 teaspoon grated fresh ginger
1 teaspoon raw honey
1 Tablespoon extra virgin olive oil
Pinch of salt
Pinch of pepper
1 cup thinly sliced cabbage, I cheated and used pre shredded coleslaw
1/2 cup grated carrot
1 small jalapeno, seeded and thinly sliced
3/4 cup cornstarch
1 1/2 teaspoons baking powder
4 boneless skinless chicken thighs
Peanut oil for frying
1/4 cup rice flour
1 teaspoon ground turmeric
1/2 teaspoon smoked paprika
2 Tablespoons vodka
1/3 cup seltzer water
DIRECTIONS
In a large bowl whisk to combine the vinegar, ginger, honey and olive oil. Season with salt and pepper. Add the cabbage, carrot and jalapeño. Toss to combine refrigerate until you are ready to serve.
In a gallon size ziplock bag add 1/2 cup of cornstarch, one teaspoon of baking powder and a pinch of salt. Shake to blend. Season both sides of the chicken with a few pinches of salt and pepper. Dredge the chicken thighs in the cornstarch making sure to coat all sides. Shake off excess. Place the chicken on a wire rack set on a sheet pan and refrigerate uncovered at least 2 hours upto over night. (I did this step for 4 hours)
Pour 4 inches of peanut oil in a heavy bottom pot. Set over medium high heat and heat oil to 360 degrees.
In a large bowl combine rice flour, turmeric, remaining 1/4 cup cornstarch, remaining 1/2 teaspoon baking powder, the paprika and a pinch of salt. Whisk to blend. Add the vodka and seltzer. Stir until no lumps remain. Let stand for 1 minute.
When the oil is hot dip the chicken into the batter and allow the excess to drip off. Carefully add it to the oil and cook until lightly golden brown and crispy about 6 minutes. Remove from oil using a slotted spoon and drain on a paper towel lined plate, season with a pinch of salt.
Serve immediately with the slaw.
Enjoy!

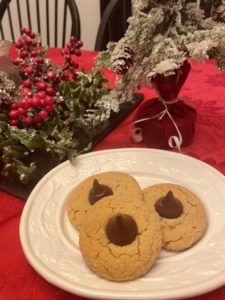
When it comes to gluten free cooking and baking I refer to Momma Knows Gluten Free quite often. This is one of her recipes and it’s delicious! Finding really tasty gluten free recipes for Robby is always a challenge but this one is one I will be making anytime of the year! I always try and have some desserts around for Robby especially now with all of the baking and cookie exchanges happening. This is a cookie that even the gluten eaters will like!
INGREDIENTS
1/2 cup gluten free peanut butter
1/2 cup granulated sugar
1/2 cup brown sugar, packed
1/2 cup unsalted butter, softened (I used smart balance)
1 teaspoon molasses
1 egg, room temperature
1 1/4 cups gluten free all purpose flour, I used Bob’s 1 for1 that includes xanthan gum
3/4 teaspoon baking soda
1/2 teaspoon gluten free baking powder
1/4 cup granulated sugar for rolling
Hershey kisses, unwrapped
DIRECTIONS
Add the granulated sugar, brown sugar, butter and peanut butter to a large bowl and mix with your mixer until fully combined and creamy.
Mix in the egg and molasses. Mix until fully combined.
In a medium bowl add the flour, baking soda, baking powder and whisk to combine, slowly pour the mixture into the batter and mix until fully combined. The cookie dough will be soft.
Cover the cookie dough and refrigerate for 30 minutes.
Preheat oven to 375 degrees. Add the 1/4 cup of granulated sugar to a small bowl to roll the dough in to.
Scoop 1 Tablespoon of dough and roll into a ball. Roll the ball into the sugar and place on a greased baking sheet.
Bake 10-12 minutes or until lightly browned on the edges.
As soon as you take the cookies out of the oven place the Hershey kiss in the center of each cookie and slightly push down. Allow to cool completely on a cooling rack. Store in an air tight container.
Enjoy!

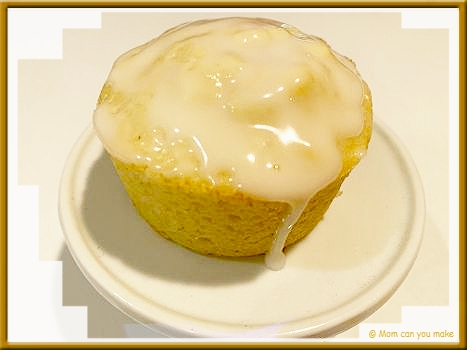
This recipe comes from Gluten-Free on a Shoestring, I found this recipe on Pinterest but have made many items from the Gluten-Free on a Shoestring blog. They are tried and true and this recipe is no different. Not only did Robby enjoy these gluten-free bites, but I did too. I like to use flour from Karma Baker. She specializes in Gluten-free /Vegan baking products. You can find her products online. I have ordered a number of things from her including her cookies and baked goods and I’m always pleased with the quality. https://karmabaker.com/shop/
INGREDIENTS
- 8 Tablespoons unsalted butter
- 1 cup granulated sugar
- 2 eggs, beaten
- 1 1/2 teaspoons vanilla extract
- 1 1/2 cup all-purpose gluten-free flour
- 3/4 teaspoon xanthan gum (omit if your flour has it in it already, Karma Baker includes it)
- 1 1/2 teaspoons baking powder
- 1/2 teaspoon salt
- juice and zest of one lemon, reserve 1 Tablespoon of lemon juice for the glaze
- 1/2 cup sour cream
- 1 cup confectioners sugar
- more lemon zest to sprinkle on top of cupcakes, I forgot this step!
Directions
Preheat your oven to 350 degrees. Grease or line the wells of a standard muffin tin and set aside. In a large bowl place the butter and sugar and beat until light and fluffy. Add the eggs, vanilla, lemon zest, and juice (reserving the ! tablespoon for the glaze) beat to combine. Add the flour, xanthan gum, baking powder and salt mix to combine. Add the sour cream to the batter and mix until just combined. The batter will be light and fluffy but not too thin.
Divide the mixture evenly among the muffin cups. Place into the center of your preheated oven and bake for about 20 minutes or until a toothpick inserted into the cupcakes comes out clean. Remove from the oven. Remove the cupcakes from the pan and cool on a baking rack allowing them to cool completely.
Once the cupcakes are cool, make the glaze. Place the confectioner’s sugar in a medium-size bowl and add about 1 1/2 teaspoons of the reserved lemon juice. Mix until you have a smooth and thick paste then add more lemon juice until you have a slightly thick but pourable glaze. Pour or spoon the glaze over the cupcakes once they have completely cooled. Sprinkle with lemon zest if desired.
Enjoy!

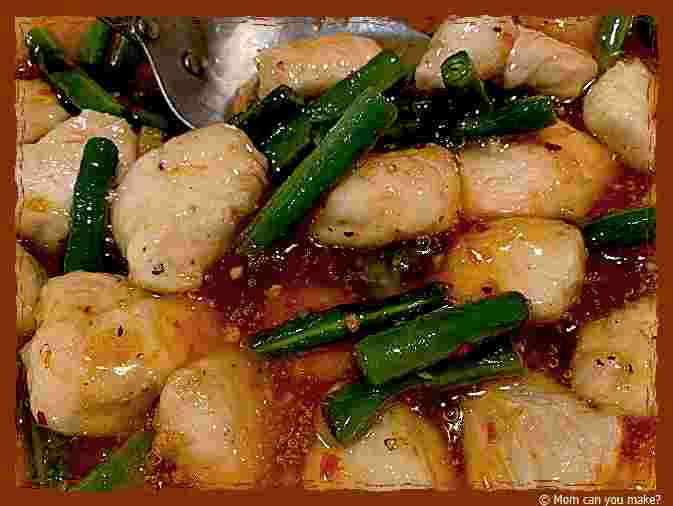
I know I have mentioned many times about Robby our son having to be gluten-free but there are also a number of vegetables that he cannot have so I am constantly having to adjust recipes to accommodate his dietary restrictions. This recipe is just one of those, I’m going to give you the recipe in full but I was unable to add the bell peppers. This recipe makes plenty of sauce which we love. I served this over white rice.
INGREDIENTS
- 2 lbs boneless skinless chicken thighs or breasts cut into bite-size pieces
- 3 Tablespoons cornstarch
- 1/4 cup vegetable oil, more if needed
- 2 bell peppers, sliced
- 1 cup steamed green beans (can use the freezer steam bags)
- 1 1/2 teaspoons of garlic, minced
- 1/2 teaspoon ginger, minced
- 1 1/2 teaspoon garlic powder
- 1 1/2 teaspoons crushed red pepper flakes
- 1/8 teaspoon toasted sesame oil
- 1 bottle of sweet chili sauce (1 1/4 cups)
- cooked white rice For serving
DIRECTIONS
In a large bowl add the diced chicken and tablespoon of oil. Add the garlic powder and corn starch. Mix until all of the chicken is coated With the corn starch.
In a large skillet or wok over medium-high heat add 3 tablespoons of oil. Let the oil heat up until it glistened slightly. Working in small batches, add the chicken and cook turning often until the chicken is cooked through. If the pan or wok gets dry go ahead and add more oil. Do this until all of the chicken is cooked through. Remove the chicken from the pan and add the bell peppers and cook until just slightly soft. Next, add the garlic and let cook for just a minute or two. Add the chicken back into the pan, add the steamed green beans, sweet chili sauce, sesame oil, ginger, and crushed red pepper flakes into the pan. Stir until combined and everything is coated in the sauce. Serve over rice.
Enjoy!

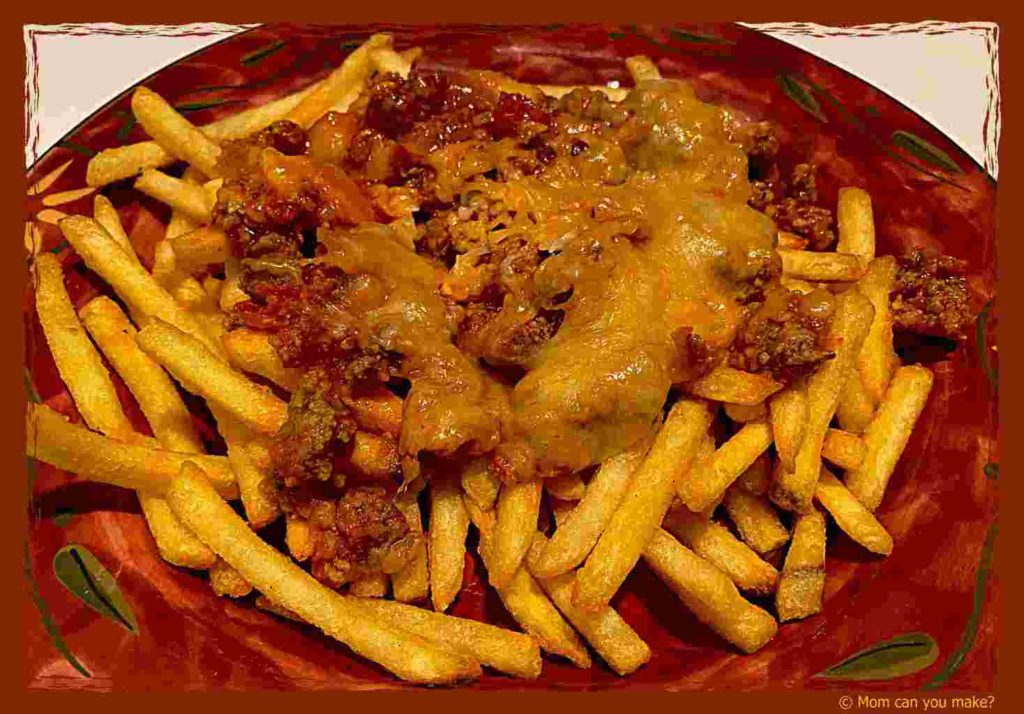
I saw the idea of pizza fries on Pinterest but changed it to what I had on hand for Robby to give this a go. One of the biggest things he misses the most while having to be gluten-free is a really good pizza. If you have never tried the frozen gluten-free pizzas from the store you are lucky. Cardboard would be a good alternative to those pizzas! The fries take the place of the crust. This worked really well as Robby enjoyed it. I’m not going to write this like I normally would as you can change this a million different ways with literally any pizza toppings you like.
The base of this is obviously the fries. Cook them as directed or air fry at 400 degrees for 10-12 minutes or to your desired doneness. For the topping, I used 1 pound of spicy crumbled sausage, chopped onion, and garlic. I sautéed these all together until the sausage was cooked through. I added 1/2 jar of pizza sauce to the pan to warm through. Finally, I added the shredded cheese to the top of the meat mixture. I let the cheese melt then added this mixture over the top of the fries.
Using a full bag of fries and the above measurements, it will feed a small army! Easily 6 people. Great for a small gathering or hungry teenagers. Add anything you would top a pizza with the combinations are endless. Keep in mind if you add lots of meats and veggies you may need a bit more pizza sauce. Put your creative hat on and make your own pizza fries!
Enjoy!


