Family favorites
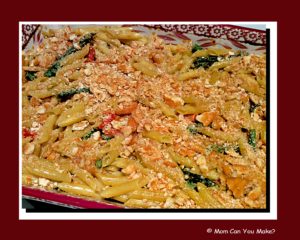
That’s some title, right? I was at a loss for a good name for this recipe but it definitely falls in the delicious category no matter what it’s called! This recipe does take some time and does use more pots and pans than I typically like to use, but when you take a bite you will agree it is worth the effort! This recipe would also be very good with fresh mushrooms added to the veggies. I did not add them as I am not a fan of ANY mushroom no matter how they are cooked, but if you like them feel free to add them!
INGREDIENTS
1 bunch of fresh asparagus, trimmed and cut into bite size pieces
12 ounces (one small container) of cherry tomatoes, halved
Salt
Pepper
2 Tablespoons olive oil
3 Tablespoons of butter, divided
3 cloves of garlic, finely diced
1/2 cup heavy cream
1/2 cup of 1% milk
Pinch of nutmeg
3/4 cup freshly grated Asiago cheese
1 large egg yolk, beaten
3/4 of a sleeve of buttery round crackers such as Ritz, crushed
1 box of penne pasta, cooked to al Dante
DIRECTIONS
Cook pasta in salted water until al Dante. For roasted vegetables turn your oven to broil and leave the oven door slightly open. On a sheet pan, add the sliced tomatoes and asparagus, drizzle with the olive oil, add a pinch of salt and pepper. Mix well, being sure to coat all the veggies with the oil. Place in the oven still leaving the door slightly open. Broil until the veggies are tender and just starting to char. Remove from oven and set aside.
To make the sauce, combine the 1 Tablespoon of butter, nutmeg, garlic, heavy cream and milk in a saucepan over medium heat. Bring sauce to a simmer and remove from heat stir in the Asiago cheese and the egg yolk whisking constantly to prevent egg from scrambling. If the mixture is too thick add a little more milk. Add salt and pepper to taste.
Preheat oven to 350 degrees. To assemble combine your cooked pasta, veggies and alfredo sauce mix well to make sure everything is coated with the sauce. Pour pasta into a 9 x 13 dish. Top with crushed crackers and 2 Tablespoons of melted butter. Bake for about ten minutes, just long enough for the crackers to slightly brown. Remove from oven and serve warm.
Enjoy!

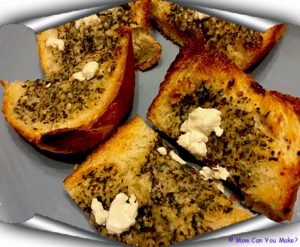
This is another great side dish! Lots of herbs and cheese! This recipe comes from Taste Of Home Magazine. I really like goat cheese so I was drawn to this recipe. If you don’t like goat cheese you can certainly leave it off as there is plenty of Romano cheese and herbs! I have already made this twice and look forward to making it again sooner than later!
INGREDIENTS
1/2 cup of butter, softened
1/4 cup grated Romano cheese
2 Tablespoons minced fresh basil or 2 teaspoons dried basil
1 Tablespoon fresh minced parsley
3 garlic cloves, minced
1 French baguette
4 ounces crumbled goat cheese
DIRECTIONS
Preheat oven to 425 degrees. In a small bowl mix the butter, Romano cheese, basil,parsley and garlic, mix until well blended. Cut the French baquette crosswise in half. Spread the cut sides of the baguette with the butter mixture and place on a Un-greased baking sheet. Bake uncovered for 7-9 minutes until lightly toasted. Sprinkle with goat cheese and bake 1/2 minutes longer until cheese is softened. Cut into slices and serve warm.
Enjoy!

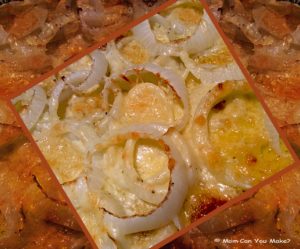
I love a side dish that can stand on it’s own. This side dish does just that and it’s really simple. We enjoyed this side dish as it was a new twist on onions. You can certainly change up the cheeses to your family’s taste!
INGREDIENTS
2-3 Vidalia onions ( or any sweet onion)
1/2 stick unsalted butter
Pinch of garlic salt
Pepper to taste
1 cup sharp cheddar cheese, grated
1 cup mozzarella cheese, grated
1/2 cup Parmesan cheese, grated
DIRECTIONS
Spray a 9 x 13 baking dish with non-stick spray. Pre-heat oven to 350 degrees. Slice onions into 1/4 – 1/2 inch rings and separate the rings. Lay rings in your baking dish, add salt, pepper, cut butter into pats and place on top of the onion rings. Add the cheddar and mozzarella cheese covering the onions evenly. Top with Parmesan cheese. Bake uncovered for 30 minutes or until bubbly and cheese is melted and slightly browned. Remove from oven and serve warm.
Enjoy!

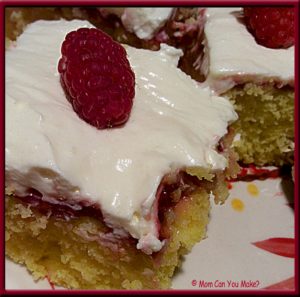
This cake is delicious! I will be keeping this recipe very close. We shared it with some friends and they loved it as much as we did. I knew exactly where Jim was when I could not find him. He was sneaking a piece of this cake! I love the fresh summer flavors this cake has and it’s so easy to make! This is perfect for any summer gathering you are going to.
INGREDIENTS
1 box lemon cake mix
1/2 cup fresh lemon juice
1/2 cup milk
14 ounces sweetened condensed milk
3/4 cup raspberry preserves
4 ounces cream cheese
3/4 cup lemon curd
8 ounce container of Cool Whip, thawed (I used low fat)
Fresh raspberries for garnish
DIRECTIONS
Make the cake mix according to the package EXCEPT substitute the lemon juice and milk for the amount of water that is called for. Spread the batter into a greased 9 x 13 baking dish and bake in a 350 degree oven for 25-27 minutes or until a toothpick inserted comes out clean. Let the cake cool for 5 minutes. Then take a fork and poke holes throughout the cake, pour the sweetened condensed milk slowly over the top of the cake, being sure to cover the cake completely and over the holes. Place the raspberry preserves in a microwave safe bowl and microwave for 15 seconds stir until melted. Spread the preserves over the entire cake. Let the cake cool for an hour on the counter then refrigerate until chilled through. Beat the cream cheese until creamy, add the lemon curd and beat again until smooth. Fold the Cool Whip into the cream cheese mixture and spread it over the chilled cake. Serve with fresh raspberries.
Enjoy!

This recipe can be found at www.insideblucrewlife.com
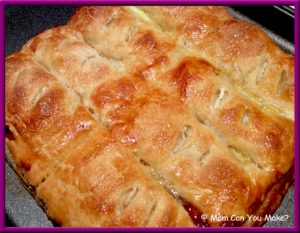
 When I was in Key West, there was this fabulous little Cuban convenience store that made and sold some of the most delicious pastries! This little store was in walking distance from where we were staying, so we found ourselves getting up and walking over for coffee and pastries. When I got home, I described this pastry to Jim and he did not look excited in the least about it. But he changed his mind and very quickly at his first bite of my re-creation! He LOVED this, and loved it so much I made them again a couple days later and they vanished just as fast as the first batch!! These are so simple and oh so tasty!!
INGREDIENTS
One box frozen puff pastry, thawed according to package directions.
Guava paste or any flavor fruit paste. I used plum (found in the gourmet cheese area of your store)
Mascarpone cheese (can use cream cheese)
1 egg plus teaspoon of water.
2 teaspoons granulated sugar
DIRECTIONS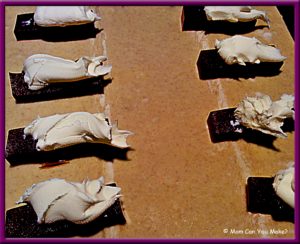
Preheat oven to 375 degrees.
Line your baking sheet with parchment paper and unroll one of the puff pastries placing it on your baking sheet. I made 8 pastries so slice your fruit paste into eight sections and spread them evenly, making two lines across the pastry sheet leaving enough room on all sides to seal. Add a sliver of the marscarpone cheese on top of each of your fruit paste slices.
Top the entire thing with the second sheet of puff pastry. Using your hand gently push the puff pastry down making 8 pastry pieces. Be sure to seal the puff pastry VERY WELL so the filling does not run out when baking! Mix the egg and water together making an egg wash and brush over the tops of the pastries. Sprinkle with sugar and bake for 20-25 minutes until the pastry is browned and cooked through. Let cool for five minutes. Serve warm.
Enjoy!


