Dessert
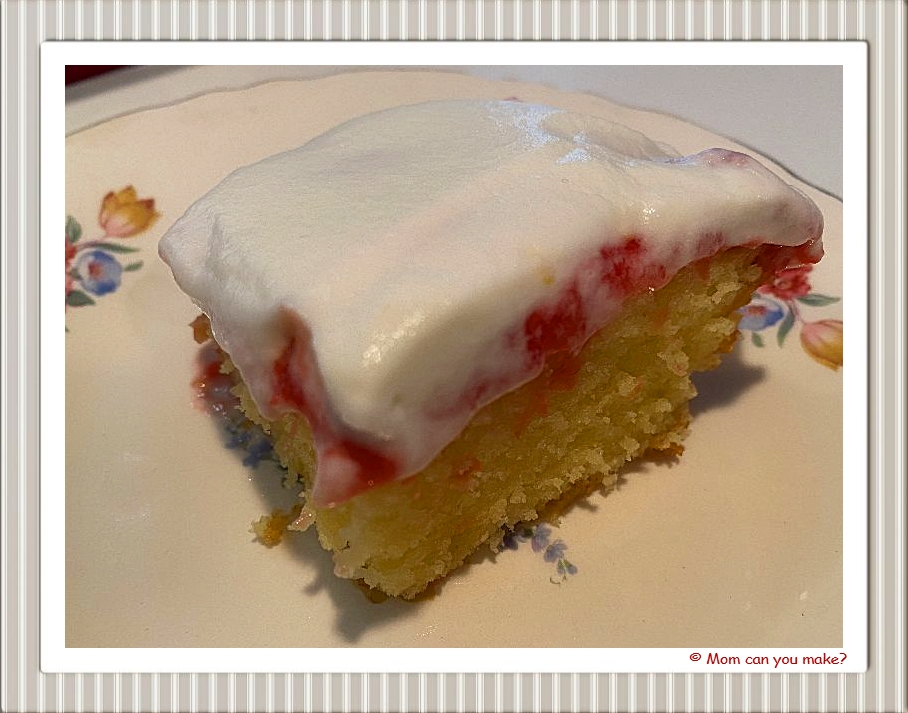
This cake is a keeper for us! This cake does take a little time but it is well worth it. This is a great dessert to share on Valentine’s Day or any day as it’s sweet and tart and so fresh with the raspberry sauce. It was hard to not just grab a fork and dig in right from the pan. That really might happen sometimes at my house..don’t judge too harshly!
INGREDIENTS
- 2 cups granulated sugar
- 1/2 cup vegetable oil
- 2 large eggs
- 2 large egg yolks
- 1 teaspoon vanilla extract
- 1/4 cup sour cream, can use light
- 1 large lemon zested
- 2 cups all-purpose flour
- 1 package instant lemon pudding (3.4 ounces)
- 3 teaspoons baking powder
- 1 teaspoon salt
- 1 cup buttermilk
- 1 can sweetened condensed milk (14 Oz)
THE RASPBERRY SAUCE
- 3- 6-ounce containers of fresh raspberries
- 1/4 cup granulated sugar
- 2 Tablespoons flour
- 1 Tablespoon lemon juice
FOR THE TOPPING
- 1 1/2 cups heavy whipping cream
- 3/4 cup powdered sugar
- zest of one lemon
DIRECTIONS
Preheat the oven to 350 degrees. In a large mixing bowl combine the sugar vegetable oil, eggs, and vanilla extract. Beat on medium speed until the eggs and oil are well incorporated and the batter is lighter in color. Just a couple of minutes. Scrape the bowl down as needed. Add in the sour cream and lemon zest beat again until combined.
in a separate bowl, combine the remaining dry ingredients. Add half of the dry ingredients to the batter and beat on low speed while pouring in half of the buttermilk and mix until the flour starts to incorporate. Add the remaining dry ingredients mixing on low while adding the other half of the buttermilk beating until all ingredients are combined. Use a spatula to scrape down the bowl as needed.
Pour the batter into a greased 9×13 inch pan and bake for 28-32 minutes. Remove from oven and allow to cool completely. While the cake is cooling use a toothpick to poke holes all over the entire cake, not going all the way to the bottom. Pour the can of sweetened condensed milk over the cake and let it run down into all of the holes. This keeps the cake incredibly moist. Let the cake continue to cool completely.
FOR THE RASPBERRY SAUCE
Combine the raspberries, sugar, and flour in a medium-size pot. Gently crush the raspberries and add the lemon juice. Cook over medium heat while stirring until it starts to bubble slightly. Once the sauce is bubbling and thick remove it from the stove and allow the sauce to cool until it’s no longer steaming. Pour the raspberry sauce over the top of the cake spreading evenly. Refrigerate the cake until it has completely cooled.
FOR THE TOPPING
Beat the heavy cream on medium-high speed for several minutes until it starts to thicken. Add the powdered sugar and continue beating until stiff peaks form. Spread over the cake when the cake is completely cooled. Zest lemon over the top if desired.
Enjoy

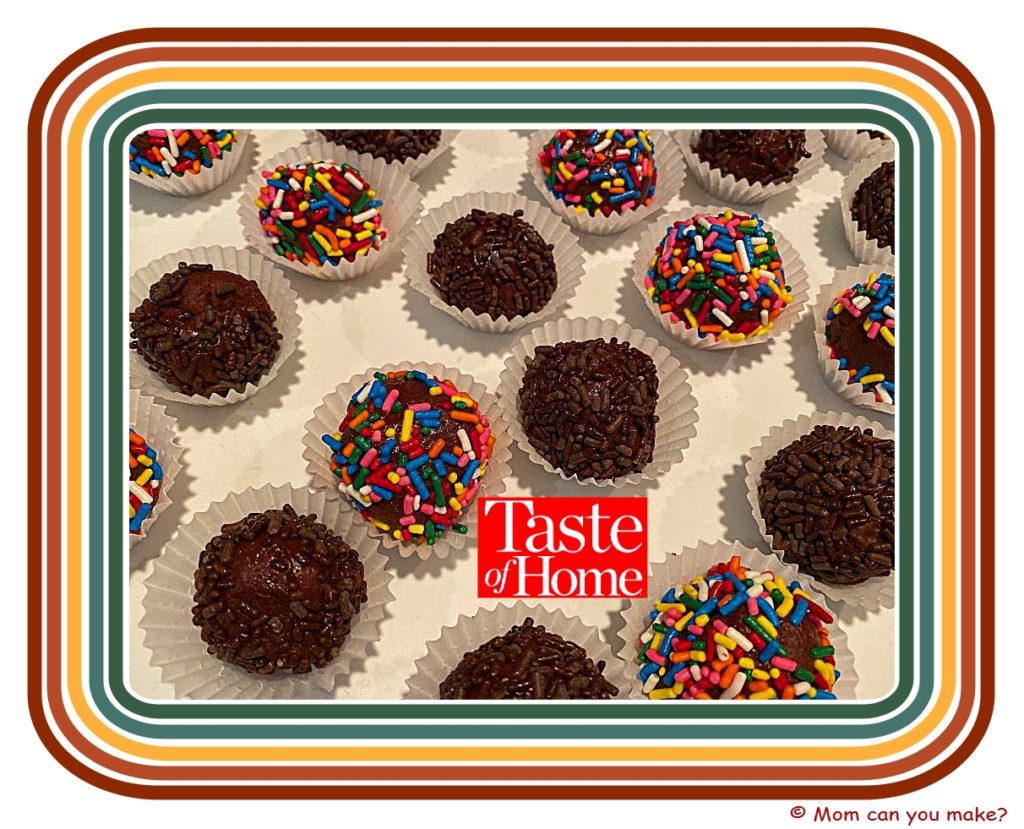
Valentine’s Day is just around the corner so I have a couple of sweet treats coming up for you including these simple chocolate truffles. These make enough to share with many of your loved ones! You can decorate them any way you want and use different colored sprinkles for different holidays. I hope your loved ones enjoy them as much as mine!
INGREDIENTS
- 3 cups semi-sweet chocolate chips
- 1 can (14 ounces) sweetened condensed milk
- 1 Tablespoon vanilla extract
- optional coatings- chocolate sprinkles, colored sprinkles, cocoa powder or espresso powder
DIRECTIONS
In a microwave-safe bowl melt the chocolate chips and sweetened condensed milk for 30-second intervals until the chocolate is smooth. Stir in the vanilla. Remove from microwave and place the bowl in the refrigerator (covered) until firm enough to roll. About 2 hours.
When firm enough to roll into balls, shape them into about 1 inch balls and roll into your desired topping. Store in the refrigerator until ready to give to your favorite people!
Enjoy!

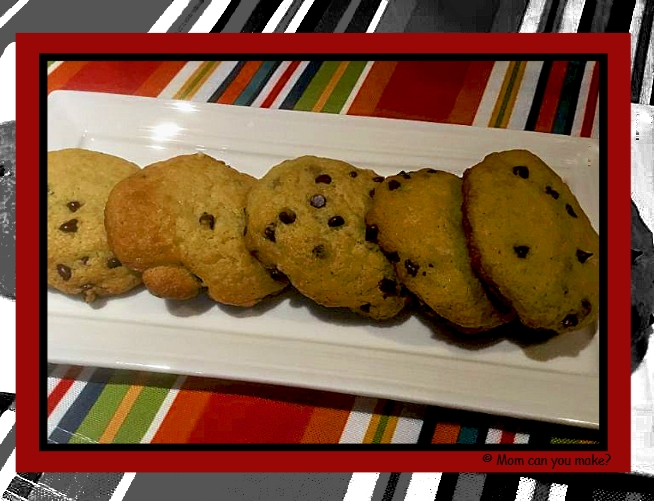
Although I made these for Robby as they are gluten-free even the gluten eaters in the family enjoyed these muffins tops! These were easy to make with everything I already had in my pantry. I will be making these often!
INGREDIENTS
- 2 cups gluten-free flour ( I used Bob’s 1 for 1)
- 1 cup of sugar
- 1 Tablespoon baking powder
- 1 teaspoon baking soda
- 3/4 teaspoon xanthan gum if your flour does not have it in there already
- 1/4 teaspoon salt
- 1/2 cup of milk, I used Fair Life
- 1/2 cup canola oil
- 2 large eggs
- 2 teaspoons vanilla extract
- 1 1/2 cups of semi-sweet chocolate chips. I used Enjoy Life
DIRECTIONS
Preheat oven to 350 degrees. Spray baking sheets with non-stick spray and set aside.
Mix the flour, sugar, baking powder, baking soda, and xanthan gum( if using} in a large bowl. In another medium bowl add the milk, oil, eggs, and vanilla and beat them all together. When mixed well, add the wet ingredients into the flour mixture and stir until combined. Fold in the chocolate chips.
Scoop out about 1/4 cup of the batter and place on your prepared baking sheets leaving some room as the batter will spread slightly. Bake for 13 – 18 minutes depending on the size of your muffin tops. They will be a light golden brown and slightly puffed up when they are done. Allow to sit in the pan for a couple of minutes then transfer muffin tops to a cooling rack to finish cooling.
Enjoy!

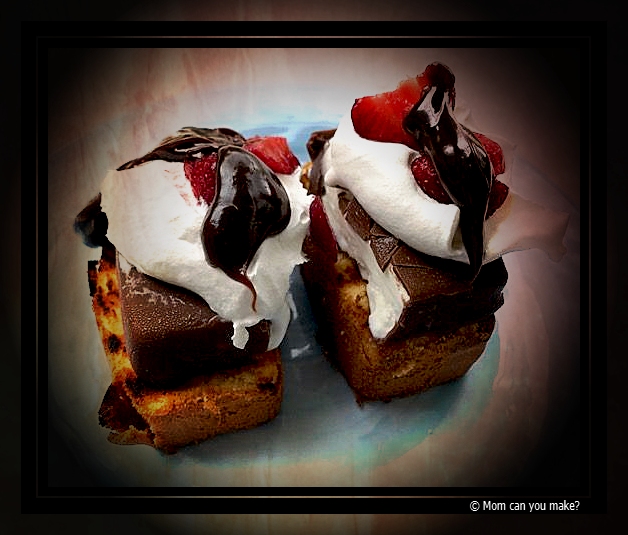
When I was thinking about making this dish it was just going to be a grilled pound cake with strawberries BUT the weather was insanely hot and humid so I had no choice but to add ice cream. What goes perfect with ice cream? You guessed it…hot fudge sauce! We did not have any hot fudge as we were in our motorhome BUT the place we were staying had an ice cream shop so we asked them for a small cup of hot fudge and they were happy to give us some. This dish has it all. Warm pound cake, cold ice cream, creamy whipped topping, fresh-picked strawberry from a farm stand down the road and sweet creamy hot fudge sauce. Jim highly recommend’s this dish on a hot summer day.
INGREDIENTS
- 1 store-bought pound cake, sliced
- store-bought whipped cream
- strawberries, I used about 1/4 cup per serving
- Klondike bars or your favorite ice cream
- warm hot fudge sauce, 1/4 cup per serving
DIRECTIONS
Heat your grill to medium heat. Grill pound cake slices for about 2 minutes per side or u til golden grill marks form on both sides. Transfer to a plate and assemble with the other ingredients. Start with the pound cake on the bottom. Add 1/2 of a Klondike bar or ice cream, add the whipped cream then the strawberries and top with the warm hot fudge. Serve Immediately.
Enjoy!

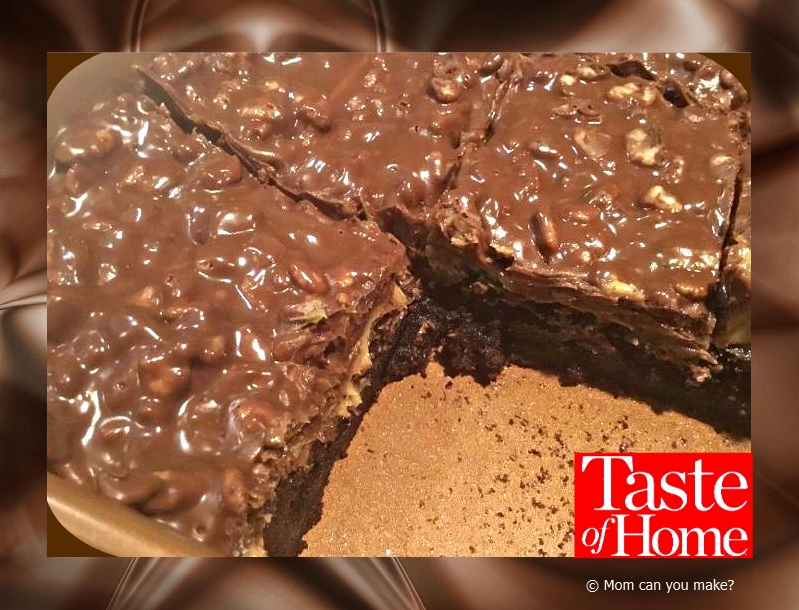
I made this dessert for Robby using a gluten-free brownie mix and let me tell you I could not keep him away from these bars. He said it was the best dessert he has had since having to be gluten-free. Now that says a lot as Robby does not get excited over many dishes. And because it was only Robby and me home I cut the recipe in half and made it in an 8 x 8 baking dish.
INGREDIENTS
- 1 package fudge brownie mix (13×9 inch pan size) gluten-free mix works great.
- 2 1/2 cups peanut butter, chunky or creamy. I used creamy, divided
- 2 cups semi-sweet chocolate chips, I used Enjoy Life brand
- 3 cups Rice Krispie cereal
DIRECTIONS
Prepare and bake brownie mix according to package directions. Cool in the pan on a wire rack for 30 minutes. Refrigerate until cold.
Spread 1 1/2 cups peanut butter over the brownie. Place chocolate chips and remaining peanut butter in a large microwave-safe dish. Microwave in 30-second intervals until melted. Stir until smooth. Stir in the Rice Krispie cereal and spread over the peanut butter layer. Cover and refrigerate at least 30 minutes or until set.
Cut into squares and serve. Store in an airtight container in the refrigerator.
Enjoy!


