Dessert
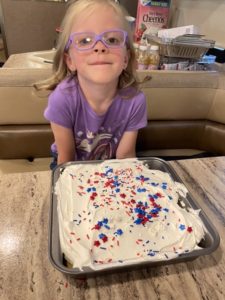
We were spending some time in New York with Amanda, Steve and our twin Grandchildren Luna and Aksel. Before we left home in the motorhome I was thinking of what I could make with Luna for a fun dessert for everyone. We celebrate a number of holidays in July so I remembered a no bake dessert that was VERY popular way back in our flight school days……late 80’s! I have just aged us but I thought this was the absolute perfect dish for Luna to make…..it’s no bake with super simple ingredients that everyone will love! Luna made this with strawberries but we all agreed adding some sliced bananas would be great! I did absolutely nothing to make this dish with the exception of giving Luna the ingredients and give her slight direction. If you have a budding young baker or chef in the making this is the perfect dish to start out with!
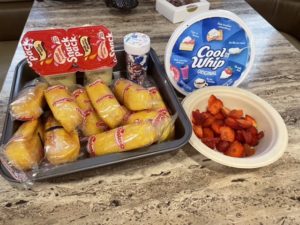
I had a 9×9 pan in the motorhome so that is what we used. We had a touch of open space with it but no one seemed to mind. An 8×8 would be a little better. You can also make your pudding or use store bought as we did. Luna LOVED each layer and insisted on trying each layer including the strawberries….I was not sure we would have enough for the cake but that’s what this is about. Spending time with loved ones , licking spoons and adding enough sprinkles to cover a rainbow!
INGREDIENTS
1 box of twinkies, enough to cover whatever pan size you use. We used 9×9 and used all the twinkies. I suggest an 8×8 pan.
Vanilla pudding, we used pre made store bought. I used all 4 single serve size.
8 ounces of cool whip, thawed
Fresh sliced fruit. We used strawberries but would add bananas.
Decorative sprinkles of your choice.
DIRECTIONS
Simply lay all of the unwrapped Twinkies on the bottom of your pan, filling as much as you can. Add the desired amount of pudding in an even layer over the twinkies.
Add your sliced fruit on an even layer over the pudding and spread your thawed cool whip over the top coving the fruit layer.
Add sprinkles of your choice, cover and refrigerate for an hour or more. When ready to serve simply slice and enjoy!
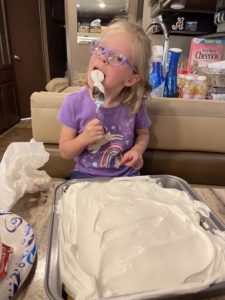
Be a Luna and try each and every layer more than once!

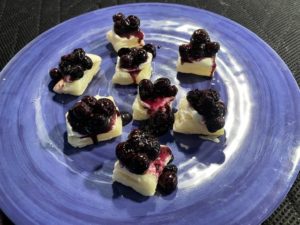
I came across this recipe from Food Network. As with most of Food Network recipes this did not disappoint. The one hiccup I had was that the grocery store we stopped at in Bar Harbor did not have the phyllo cups. So what’s a girl to do? You know it, improvise! Nothing some puff pastry sheets could not take care of. Using the puff pastry added a lot more work to this dessert but worth it. I’ll be packing the cups next time!
INGREDIENTS
1 Cup fresh blueberries
1/4 cup granulated sugar
1/4 teaspoon ground cinnamon
1/2 cup mascarpone cheese
2 Tablespoon powdered sugar
1/2 teaspoon grated lemon zest
2 Tablespoons lemon juice
1 package mini phyllo shells
DIRECTIONS
Combine the blueberries , granulated sugar and cinnamon in a small sauce pan. Cook over medium high heat until the berries start to break down and the liquid is syrupy, about ten minutes. Remove from heat and let cool to room temperature.
Whisk together the mascarpone, powdered sugar , lemon zest and lemon juice in a medium bowl.
Spoon or pipe dollops of the mascarpone mixture into the phyllo shells, leaving room for the blueberry compote. Then top with the blueberry compote. Zest with more lemon zest if desired.
Serve immediately.
IF you get stuck like an did with no phyllo shells. You can use puff pastry sheets. I just cut the into bite size pieces and baked according to package directions.
Enjoy!

I came across this recipe on Pinterest and knew I had to make it. I changed it slightly by adding a drizzle of salted caramel sauce over the top. This recipe is gluten free BUT everyone in the house loved these bars. These are simply to make and very similar to my apple pie recipe so it was no surprise everyone enjoyed these apple pie bars!
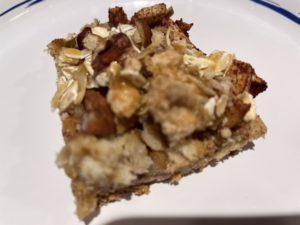
INGREDIENTS
INGREDIENTS FOR THE COOKIE BASE-
1 1/2 cups gluten free flour. I used Bob’s 1 for 1 that has xanthan gum in it.
1/3 cup granulated sugar
Pinch of salt
8 Tablespoons dairy free butter. I used Earth’s Balance, cut into Tablespoons.
You will be reserving 1/3 cup of this mixture to use in the crumble.
FOR THE CRUMBLE-
2 Tablespoons brown sugar, packed
1/3 cup chopped pecans
1/4 cup gluten free old fashioned rolled oats
1/3 cup of reserved cookie base
APPLE CINNAMON FILLING-
3 cups chopped, peeled apples. I used a combination of honey crisp and Granny Smith. Chop into 1/4 inch or so pieces.
1 1/2 teaspoons cinnamon
AT THE END OF COOKING-
Add a drizzle of salted caramel sauce if desired.
DIRECTIONS
Pre heat oven to 375 degrees.
Line 8 inch square baking pan with parchment paper or Tim foil so the foil hangs over the edge so you can easily remove the bars from the pan at the end of cooking time.
TO MAKE THE BASE-
Using a stand mixer add the flour, sugar and salt into the mixing bowl and mix on low speed to combine. Add butter a couple pieces at a time and continue to mix until a dough forms and pulls away from the sides of the bowl. About 2-3 minutes. Measure 1/3 cup of the dough and set aside to use in the crumble.
Using your hands press the remaining dough into an even layer on the bottom of your prepared pan. Bake 15 minutes or u til edges begin to brown rotating pan half way through baking.
APPLE CINNAMON FILLING-
While the base bakes, combine chopped apples and cinnamon in a bowl mixing to coat the apples in the cinnamon.
CRUMBLE TOPPING-
While the base bakes add the reserved dough, brown sugar, pecans and Oates into the mixing bowl used for the base using the mixer or a pastry cutter, or your hands mix until combined and crumbly. Set aside.
ASSEMBLE-
Pour the cinnamon apples over the hot base and spread evenly. Sprinkle with the crumb topping pinching the crumble to create a tiny crumble. Do not press it into the filling. Bake 22 minutes then cover with foil and bake an additional 10 minutes. Turn oven off and leave covered in the pan in the oven for 5 more minutes. This will allow the apples to bake without over browning the crumble topping.
Let bars cool completely in the pan. Add salted caramel if desired . A light drizzle over all of the top. When cooled completely remove from the pan using the over lapping foil and cut into squares. Store in the fridge.
Enjoy!

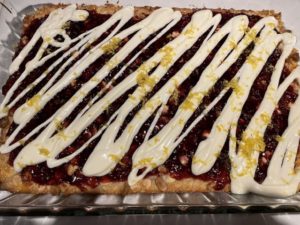
I have been enjoying making these layer bars and so are Jim’s co-workers! I sent these bars into the flight facility with Jim and they were not disappointed. I used a raspberry jam with seeds so if you don’t care for the seeds you can get the seedless jam. These take a little bit of time to make but each step is very easy. These would be great to take to any spring or summer gathering!
INGREDIENTS
1 box of shortbread cookies (10oz.)
1/2 cup unsalted butter, melted
1 can sweetened condensed milk (14 Oz)
2 large lemons, zested
3/4 cup macadamia nuts, chopped
1 cup shredded sweetened coconut
1 cup of white chocolate chips
1 cup raspberry jam
1 package ghirardelli white melting chips (found in the baking aisle)
DIRECTIONS
Pre heat oven to 350 degrees. Spray a 9×13 pan with non stick spray and set aside. Grind the package of shortbread bread cookies into fine crumbs using a food processor or blender.
In a small bowl melt the butter in the microwave for 30-45 seconds.
Pour the melted butter over the cookie crumbs and stir until the crumbs are well coated. Press the mixture into the bottom of the pan.
Pour the can of sweetened condensed milk over the cookie crumbs and spread over the bottom crust. Zest one of the lemons evenly over the sweetened condensed milk. Sprinkle the macadamia nuts , shredded coconut and white chocolate chips over the top of the sweetened condensed milk to cover evenly.
Bake the bars for 25-27 minutes. Remove the bars from the oven and allow to cool for at least 30 minutes then place the bars in the refrigerator for at least 1 hour to allow the bars to firm . Remove from fridge and Gently spread the raspberry jam over the top of the bars in an even layer.
Pour the ghirardelli melting chips into In a microwave safe dish, I used a large measuring cup and melt according to the package directions. Once melted drizzle the melted chocolate over the bars then top with more lemon zest. Place back in the fridge for the melted chocolate to firm. Slice when ready to serve.
Enjoy!

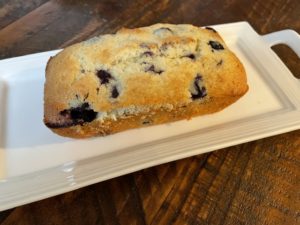
This Tea bread is very similar to the lemon blueberry loaf already on the blog. Both are absolutely delicious. Great in the morning with your cup of coffee or for an afternoon snack. I made these in my mini loaf pans, It makes 3 mini loaves. To my surprise I did not have any confectioners sugar so I did not use the glaze but it was still just as good. The tart flavor from the lemon and sweet from the blueberries always a great combination.
INGREDIENTS
1/2 cup of butter, softened
3/4 cup of sugar
2 large eggs, room temperature
1 teaspoon grated lemon zest
1 teaspoon vanilla extract
2 cups all purpose flour
1 1/2 teaspoons baking powder
1/4 teaspoon salt
1/2 cup milk
1 cup fresh blueberries
1/4 cup confectioners sugar
1 Tablespoon lemon juice
DIRECTIONS
In a small bowl cream butter and sugar until light and fluffy. Add eggs one at a time beating after each addition. Beat in the lemon zest and vanilla . Combine the flour, baking powder and salt. Beat into the butter and sugar mixture alternating with the milk. Fold in the blueberries.
Pour into greased 8×4 loaf pan or 3 mini loaf pans and bake at 350 degrees for 60-70 minutes for the large loaf pans or about 30 minutes for the mini loaf pans. Cool for 10 minutes before removing from the pan to a wire rack.
If you make the glaze simply add the powdered sugar and lemon juice together u til smooth and drizzle over the warm bread.
Enjoy!


