Dessert
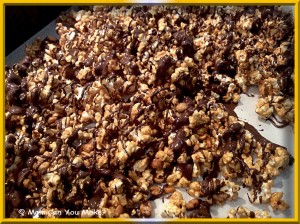
This recipe is so addicting! Crunchy, chocolatey, peanutty, what more can I say… so good! This will make a terrific gift around the holiday or for any occasion! You will have lots of friends with this snack, not to mention it is so much cheaper to make than to buy. If you want to get really fancy you can also drizzle white chocolate over the popcorn after the chocolate is dry and set.
INGREDIENTS
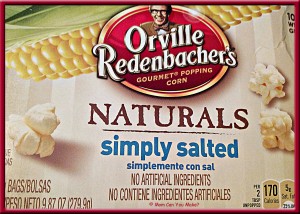
2 bags of microwave popcorn popped (I used Orville Redenbacher’s Natural Simply Salted bags, whole grain)
You want about 12 cups of popcorn
1 1/2 cups of nuts (I used peanuts but you can also use pecan or cashews)
1 cup packed brown sugar
3/4 cup of butter
1/2 cup light corn syrup
1 teaspoon baking soda
1 12 ounce bag of chocolate Ghirardelli melting wafers
1 disposable large roasting pan
DIRECTIONS
Preheat oven to 250 degrees. Spread popped popcorn and nuts into your large roasting pan. In a heavy saucepan combine brown sugar, butter and corn syrup. Cook over medium heat for about 8 minutes or until mixture comes to a boil. Continue to boil and stir for two minutes. Remove from heat and add the baking soda. Pour warm mixture over the popcorn and nuts and stir well coating all of the popcorn. Bake 60 minutes stirring every 15 minutes. Remove from oven and spread nuts and popcorn over wax paper. Do not break up the popcorn. Allow to cool completely.
Once cooled, melt the chocolate according to package directions and using a fork generously drizzle the chocolate over the popcorn and let stand for 3-4 hours or until chocolate is set.
Break into pieces and serve! Store in an airtight container.
Enjoy!

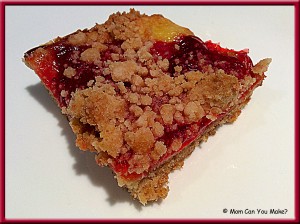
I came across this recipe on Pinterest and have had it pinned for a couple weeks and finally decided to make it. I am very happy I did! These bars are super simple and can be made using any pie filling you like. I used strawberry, but Jim has already requested blueberry for the next batch. When Jim got home from work he made his way to the kitchen and ate four of them. One after the next! I was sending some to a neighbor that night and was afraid to send them over with Jim as I was not sure they would ALL arrive to her!! If you are looking for something quick and easy to make with ingredients you most likely already have, give this a try!
INGREDIENTS (Crumb Mixture)
1/2 cup unsalted butter, melted and cooled
1/2 cup packed brown sugar
1 1/2 cup flour
1/2 teaspoon baking powder
1/2 teaspoon baking soda
1/4 teaspoon salt
FILLING INGREDIENTS
1 cup pie filling (any flavor)
1/2 cup sour cream
1/4 cup sugar
1 Tablespoon flour
1 egg
1/2 teaspoon vanilla extract
DIRECTIONS
Preheat oven to 375 degrees. Line an 8 x 8 baking pan with foil and spray with non-stick spray. Add flour, brown sugar, baking soda, baking powder and salt and mix with a whisk until evenly combined. Add butter and combine until mixture is wet and crumbly. Reserve 3/4 of a cup of the crumb mixture and set aside for the topping. Press the remaining mixture into your sprayed pan, forming a bottom layer. Set aside while you prepare the filling.
For the filling add the sour cream, sugar, 1 tablespoon of flour, egg and vanilla extract to a large bowl and combine well. Spread the filling over the crust in your pan forming a second layer. Drop spoonfuls of your pie filling over the sour cream mixture. Gently stir pie filling through the sour cream mixture creating a swirl effect (without stirring or mixing the crumb mixture). Sprinkle your reserved crumb mixture evenly over the top. Bake in your preheated oven for 25-28 minutes or until top of the bars are lightly browned and the center of the bar is “set”. Cool completely, slice and serve. Store any leftovers in the fridge.
Enjoy!

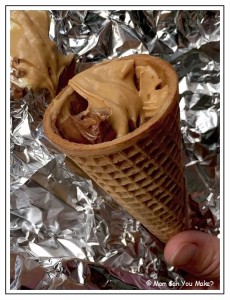
If you read my grilled breakfast pizza post last week you know some friends and I had a girls weekend at our friend Cathy’s lake camp in Northern NH. Well I only told you part of the story about us talking about how full we were from a big breakfast and late lunch. What I did not tell you is that we all wanted something a little sweet, so what do three girls lakeside decide to do? Skip directly past dinner and go right to dessert! Yup, that’s exactly what we did and it was damn good! These campfire cones are so simple and can be made a million different ways! We all had something a little different but we all agreed they were fantastic. These can be made over a campfire or on your grill over medium heat. I wish I had thought to take a picture of all of our candies we used but go ahead and picture all of the zillion combinations!
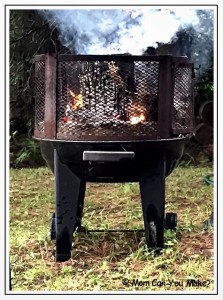
NOTE: Make sure you fill the cone as much as possible!!! Depending on what you are adding into the cone cooking time may vary slightly. We used mini candies that I think could have cooked a little longer or slice the candies in half before putting in the cone.
INGREDIENTS
(Any combination)
Sugar cones (this is a must)
Mini marshmallows
Mini chocolate chips
Peanut butter chips
Crushed walnuts
Maraschino cherries
Butterscotch chips
Nutella
Bananas
Crushed pineapple, Drained
Mini chocolate candies such as peanut butter cups, snickers or even peppermint patties.
Tin foil
DIRECTIONS
Take one sugar cone and fill it to the very top with your favorite combinations of candies. Wrap in tin foil and roast over medium heat on your grill or campfire for about 2 1/2 minutes per side. If you are using small candies they take just a little longer. Remove from heat, remove foil, serve warm.
Enjoy!

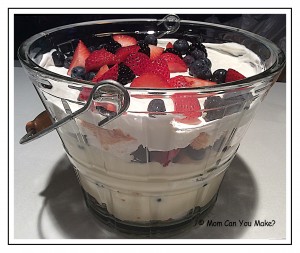
As the fourth of July is quickly approaching, I wanted share some quick and easy, but most of all delicious, treats with you. Tthe first and my favorite is a trifle made with angel food cake and lemon curd that is just delicious. Just ask the men and woman of the Dover Fire Department. Jim, Mr. MCYM called to say the bowl is empty!
INGREDIENTS
1 store bought angel food cake (depending on the size of your bowl you might need two)
2 (8 ounce) blocks of cream cheese (you can use low fat)
2 (10 ounce) jars of store bought lemon curd
Blueberries
Strawberries
Blackberries
1 (8 ounce) container of low-fat cool whip
DIRECTIONS
Wash your berries, slice strawberries and mix all fruits together in a bowl, set aside.
Cube the angel food cake into 1 inch pieces.
Combine lemon curd and cream cheese together, mix with a blender until smooth.
To assemble layer using your trifle bowl with the angel food cake covering the bottom of the bowl, next spoon the lemon curd mixture over the cake and spreading to cover all of the cake, add a layer of the mixed berries, repeat layer, cake, curd, berries. For the last layer top with remaining cake, spread all of the cool whip over the cake and finish with the last of your berries!
~~~~~~~~~~~~~~~~~~~~~~~~~~~~~~~~~~~~~~~~~~~~~~~~~~~~~~~~~~~
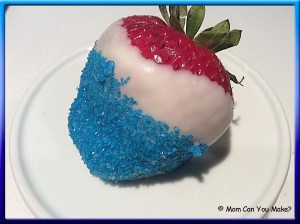
My next treat for you that I think is just adorable and is so simple. Simply melt the white chocolate, dunk your strawberries three quarters of the way and sprinkle with blue sugar crystals.
~~~~~~~~~~~~~~~~~~~~~~~~~~~~~~~~~~~~~~~~~~~~~~~~~~~~~~~~~~~
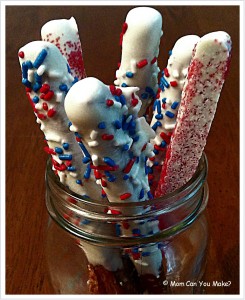
My last, but not least, is a delicious crunchy, sweet treat and it is done the same way as the berries. Dip the pretzels rods three quarters of the way, let the excess chocolate drip off and sprinkle with red, white and blue candy decorations.
I hope everyone has a wonderful, flavorful and, most of all, safe Fourth of July !
Enjoy,
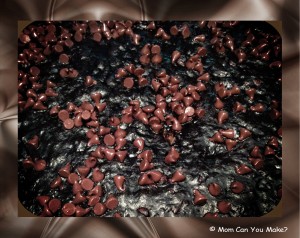
I know you are asking how can chocolate cake be almost healthy and taste good? Well, there is no butter or oil in this cake but it DOES have bananas and applesauce! And is it good? It is excellent! Full of chocolate flavor and moist!! It is delicious and I will make this again! You can serve this as is or if you really want to make it special, serve it with a small scoop of black raspberry chocolate chip Gelato!
INGREDIENTS
3 medium ripe bananas
3/4 cup brown sugar
1/2 cup applesauce
1 teaspoon vanilla
1 egg, lightly beaten
1 cup flour
1/2 cup cocoa powder (I used Hershey’s special dark chocolate)
1 teaspoon baking soda
1/2 teaspoon salt
1 cup semi- sweet mini chocolate chips plus some for sprinkling on top if desired.
DIRECTIONS
Preheat the oven to 350 degrees and coat an 8 x 8 inch pan with baking spray. Set aside. Combine mashed bananas and sugar into a large mixing bowl and stir until sugar is dissolved and well combined. Add the applesauce, vanilla and egg. Stir to combine. Add the flour, cocoa powder, baking soda and salt stirring well to combine. Fold in one cup of the mini chocolate chips and pour into your prepared pan. Top with more mini chips, if desired, and bake for 25-30 minutes. Mine took 26 minutes.
Let cool, slice and serve.
Enjoy!

This recipe was found at www.fridayiscakenight.com

