Dessert

We all know what time of year it is and that means making some cookies to share with all your family and friends! Although I do bake it’s not my favorite thing to do but these sugar cookies from Taste Of Home made it simple. After reading some of the reviews of this recipe I made a few small changes. The original recipe calls for vanilla extract. I wanted something just a little different so I used lemon extract and I also added lemon zest to the batter. This recipe can be made as a drop cookie or rolled into balls. Flatten with the bottom of a glass that has sugar on the bottom of it so it leaves a nice light coating of sugar on top of the cookies. Needless to say, this recipe is easily adaptable and it makes a lot. This made almost five dozen!

Because it made so many I was able to send some with my husband while he was flying with the Army National Guard. During his travels, he stopped at an Air Force base where our dear friend Adam (our niece Becky’s significant other, who we love) was working and could come out and enjoy a cookie or two! Needless to say, there were some happy military people today!
INGREDIENTS
1 cup of butter, softened
1 cup of vegetable oil
1 cup of sugar
1 cup of confectioners sugar
2 large eggs
1 teaspoon vanilla extract (or if making lemon, I used 1 1/2 teaspoons lemon extract)
4 1/2 cups flour
1 teaspoon baking soda
1 teaspoon cream of tartar
NOTE– if making the lemon version you will need 3 small lemons. I zested two of the lemons into the batter and zested 1 lemon into 1/2 cup of granulated sugar I used for the top.
DIRECTIONS
Preheat oven to 375 degrees. In a large bowl beat the butter, oil, and sugars. Beat in the eggs until well blended. Add the vanilla or lemon extract. In another large bowl, add the flour, baking soda, and cream of tartar. Gradually add the flour mixture into the butter/sugar mixture and mix to combine. If making the lemon version add the zest of two lemons and mix until combined.
If making drop cookies simply drop about a tablespoon of the dough on an ungreased baking sheet and bake for 8-10 minutes until they are lightly browned. Mine took 8 minutes.
If you want to flatten them and add the sugar on the top, place about 1/2 cup of granulated sugar onto a plate, add the zest of one lemon into the sugar and mix. Roll the dough into balls about a tablespoon or so and place on an ungreased baking sheet. Using the bottom of a drinking glass coat the bottom of the glass lightly with the sugar mixture and lightly press the dough balls down to your desired thickness. This will leave a light coating of sugar on the top of the cookie. Bake for 8 – 10 minutes.
Enjoy!


Pumpkin season is in full swing and this would be a great addition to any of your fall gatherings. This is another tried and true recipe from Taste Of Home! This was easy to make and I love the cream cheese frosting so much better than the canned, but of course, if you are short on time, grab a can of your favorite cream cheese frosting!
INGREDIENTS
1 can solid pack pumpkin (15 ounces)
2 cups sugar
1 cup canola oil
4 large eggs, lightly beaten
2 cups all-purpose flour
2 teaspoons baking soda
1 teaspoon ground cinnamon
1/2 teaspoon salt
FROSTING
3 ounces cream cheese, softened
5 Tablespoons butter, softened
1 teaspoon vanilla extract
1 3/4 cups confectioners sugar
3-4 teaspoons whole milk
Chopped nuts to sprinkle over the top
DIRECTIONS
In a large bowl beat pumpkin, sugar, and oil until blended. Beat in eggs. Combine flour, baking soda, cinnamon and salt in another bowl and mix. Gradually add the flour mixture into the pumpkin mixture mixing until well blended.
Pour into a greased 15 x 10 x 1-inch baking pan. Bake at 350 degrees for 25-30 minutes or until a toothpick inserted in the center comes out clean. Cool on a wire rack.
For the frosting, in a small bowl beat the cream cheese, butter, and vanilla until fluffy. Gradually beat the powdered sugar until smooth. Add milk until frosting reaches desired spreading consistency. Frost cake and sprinkle with nuts.
Enjoy!

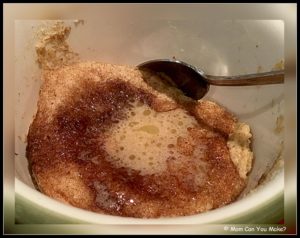
I came across this single serving microwave cake on Pinterest and I had my doubts, BUT Robby really loved this sweet dessert. One of his all-time favorite things are cinnamon rolls but having those belly issues lately that I have mentioned, has changed his diet to a gluten free one for now. As you can imagine this has been a roller coaster for me trying to meet all of his restrictive needs but that’s why I am so thrilled he loves this as I can make it in under five minutes and he gets all of his favorite flavors! Win, win!
NOTE – the recipe I found called for this to bake in the microwave for one minute but my cake took over one minute thirty seconds. So depending on your microwave, times may vary.
INGREDIENTS
1 scoop vanilla protein powder (use the scoop that comes in the powder)
1/2 teaspoon baking powder
1 Tablespoon coconut flour
1/2 teaspoon cinnamon
1 Tablespoon granulated sugar
1 large egg
1/4 cup unsweetened almond milk
1/4 teaspoon vanilla
1 teaspoon granulated sugar for the top
1/2 teaspoon cinnamon for the top
GLAZE
1 Tablespoon butter or coconut butter, melted
1/2 teaspoon almond milk
Pinch of cinnamon
DIRECTIONS
Grease a microwave safe bowl with cooking spray. Add the protein powder, baking powder, coconut flour, cinnamon and 1 Tablespoon of sugar. Mix well. Add the egg and mix into the dry mixture. Add the milk and vanilla mixing well. Batter will be thick, add a slight amount more milk if needed. Mix together the sugar and cinnamon for the top and sprinkle over the batter. Microwave between 1-2 minutes until the middle is cooked through, you will see the edges slightly pull away from the bowl. Mix the glaze together and drizzle over the top of the cake.
Enjoy!

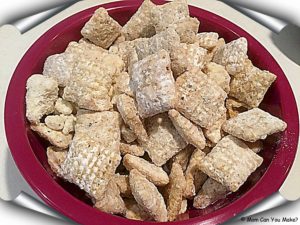
Have you seen the new Blueberry Chex cereal yet? They are really good as a cereal but even better turning them into this dessert! I don’t like the regular Chex mix that people like to snack on but this sweet lemon blueberry mix is so good. Robby and I found ourselves going in for more and more! The entire box of cereal is so great for your hungry teenagers or a summer get together. You can also find the recipe right on the box!
INGREDIENTS
1 box Chex blueberry flavored cereal
1 1/4 cups white vanilla baking chips
1/4 cup butter or margarine
4 teaspoons lemon zest
2 Tablespoons lemon juice
2 cups powdered sugar
DIRECTIONS
Place the cereal in a large bowl. In a small microwaveable bowl, microwave the baking chips, butter, lemon juice and lemon zest uncovered for 1 minute and 30 seconds, stirring every 30 seconds until melted and smooth. Pour lemon mixture over the cereal and mix until evenly coated.
Pour cereal into a 2 gallon Ziploc bag, add powdered sugar, seal bag and gently shake, coating all of the cereal with the sugar. Once well coated spread on a baking sheet covered in parchment paper and let cool. Store in an airtight container.
Enjoy!

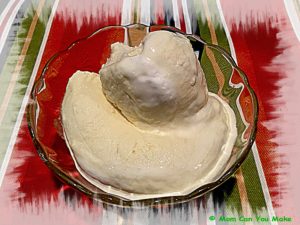 A two ingredient delicious recipe? Yes! And it’s so good on a hot summer day! It is a gluten free recipe but it really makes no difference as this is so tasty gluten or not! It’s also crazy easy. It just takes some time in the freezer. Everyone in the house enjoyed this cold pineapple whip! I think this would also work well with frozen strawberries or any other frozen fruit. I think the method used here is the important part. It does take a little bit of time to incorporate the fluff into the mixed fruit, but give it a little bit of time it does come together!
INGREDIENTS
16 ounces frozen pineapple pieces
14 ounce tub of store bought marshmallow fluff
DIRECTIONS
Divide the pineapple pieces into two equal portions. Leave one portion frozen and defrost the other half either by allowing it to sit at room temperature or placing it in the microwave on low power until cold, but not frozen. Place the defrosted portion in a blender or food processor and process until smooth. Add about 1/4 cup of marshmallow fluff and the frozen pineapple to the blender and process until the pineapple is smooth. If necessary add a little more fluff and continue to process.
Transfer the pineapple mixture to a large bowl, add the remaining marshmallow fluff and mix to combine. The mixture will turn to a light yellow color.
FOR A SCOOPABLE CONSISTENCY
Transfer the mixture into a freezer safe container with a tight fitting lid and place in the freezer for at least 6 hours or overnight. If frozen for longer than 12 hours, leave the container out for about ten minutes until scoopable.
FOR SOFT SERVE CONSISTENCY
Transfer the mixture to a large Ziploc bag, fill with the mixture and close the top, place the bag in the freezer for about 4 hours or until mostly firm. Snip off the bottom corner of the bag and pipe into bowls.
Serve immediately. It will melt quick!
Enjoy!

This recipe can be found at www.glutenfreeonashoestring.com


