Dessert
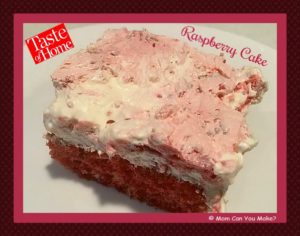
I absolutely love fruit desserts in the summer! This cake is no exception although this cake is very sweet, the raspberry flavor really comes through. Don’t forget to garnish with some fresh raspberries. I think this would be just as good changing the raspberry to strawberry. I know I will be trying a strawberry version before summer is over. This is an easy cake to make for all of your friends and family.
INGREDIENTS
1 package white cake mix (regular size)
1 package, 3-ounce raspberry gelatin
4 large eggs
1/2 cup canola oil
1/4 cup hot water
1 package (10 ounces) frozen sweetened raspberries, thawed, but do not drain
FROSTING
1 carton (12 ounces) frozen whipped topping, thawed
1 package (10 ounces) frozen sweetened raspberries, thawed, not drained
Fresh raspberries for garnish, optional
DIRECTIONS
Preheat oven to 350 degrees. In a large bowl combine the cake mix, gelatin, eggs, oil, and water. Beat on low speed until combined. Stir in raspberries until combined. Pour into a greased 9 x 13 baking dish. Bake for 35 – 40 minutes or until a toothpick inserted in the center comes out clean. Let cake cool.
For the frosting: In a large bowl, fold whipped topping into the raspberries. Spread evenly over the cooled cake. Refrigerate for 2 hours before serving. Garnish with fresh raspberries if desired.
Enjoy!

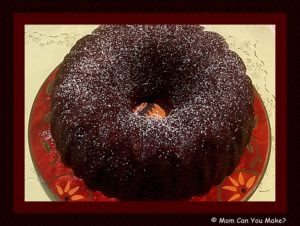
This is another zucchini recipe for you. Although this one is not as healthy as yesterday’s, it’s just as tasty and your friends and family will never know about that zucchini that’s in there. A friend shared this recipe with me and said I would not be disappointed and I most definitely was not disappointed! This cake has that yummy chocolate flavor you want without all the guilt or… maybe just a little less guilt!
INGREDIENTS
2 cups of flour
2 cups of white sugar
3/4 cup unsweetened cocoa powder
2 teaspoon baking soda
1 teaspoon baking powder
4 eggs at room temperature
1/2 teaspoon salt
3/4 cup canola oil
3/4 cup applesauce
3 cups grated zucchini, not drained
3/4 cup semi-sweet chocolate chips
DIRECTIONS
Preheat oven to 350 degrees. Spray a 9 x 13 baking pan or a bundt pan and set aside.
Mix together the flour, sugar, cocoa powder and salt. Add the eggs, oil, and applesauce and mix well. Fold in the zucchini and chocolate chips. Pour into prepared baking dish and bake for 50-55 minutes. Check after 40 minutes. Cool cake and dust with powdered sugar if desired.
Enjoy!

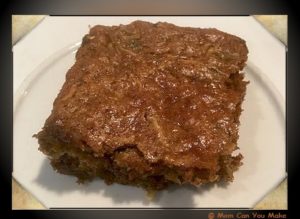
With spring here and summer not far behind I thought I would share a couple of zucchini recipes with you. This recipe I saw on the television show “The Chew” when they hosted Kristin Cavallari who has a new cookbook out called “True Roots”. Her book is made up of real food, farm to table type of recipes with many of them being gluten free, dairy free and refined sugar-free. With Robby needing to be gluten free and dairy free, this was just the kind of book I was looking for. Not only did I make this recipe, I also bought the book. Lots of great and easy recipes in the book. You can also find a number of her recipes online and on Pinterest. This is such an easy recipe that really does taste like an indulgent chocolate brownie. You would never know there is zucchini in it. A perfect recipe for the kids and adults alike!
INGREDIENTS
1 cup creamy almond butter
1 egg
1/2 teaspoon pink Himalayan salt (can use regular table salt)
1/2 teaspoon baking soda
1/2 cup coconut sugar
1/2 teaspoon vanilla extract
1/2 cup dark chocolate chips
1 large zucchini, grated and NOT drained
DIRECTIONS
Preheat oven to 350 degrees. Line an 8 x 8 baking dish with parchment paper or spray with non-stick baking spray. In a large bowl, mix together the almond butter, egg, salt, baking soda, sugar, and vanilla until well combined. Fold in the chocolate chips and zucchini. Put into prepared baking dish pressing down to spread evenly in the pan.
Bake for 25 – 30 minutes or until golden brown and a toothpick inserted comes out clean. Let cool slightly before serving.
Enjoy!

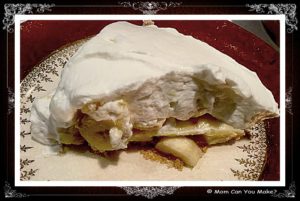
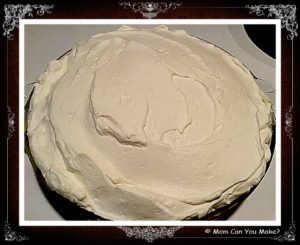
One of Jim’s all-time favorite pies is the banana cream pie. I don’t make it often and sometimes I cheat by buying a pre-made shell, but not this time! I made this recipe I found on Pinterest from scratch and it was worth all of the effort. I highly recommend it as there really is a difference in flavor. Along with my apple pie, this is one recipe I will be making over and over again!
INGREDIENTS
Crust
1 1/2 cups graham cracker crumbs
1/3 cup sugar
6 Tablespoons melted butter
Filling
3/4 cup sugar
1/4 cup cornstarch
2 cups half and half
4 egg yolks
3 Tablespoons Butter
1 1/2 teaspoons vanilla extract
2 bananas, sliced
Topping
2 cups heavy whipping cream
1/2 cup sugar
1/2 teaspoon vanilla extract
DIRECTIONS
Crust – Preheat oven to 375 degrees. In a small bowl combine graham cracker crumbs and sugar. Mix well, add melted butter and mix until well combined. Press into a 9 inch pie pan and bake for 7 minutes. Remove from oven and cool completely. Set aside.
Filling – In a medium saucepan combine sugar and cornstarch. Add half and half and egg yolks. Whisk until combined and bring to a boil over medium heat, stirring constantly. Boil one minute and remove from heat. Stir in the butter and vanilla. Pour 1/2 of the filling into the cooled crust, top with sliced bananas to cover the filling. Pour the rest of the filling over the banana layer and cover with Saran Wrap directly onto the filling layer. This avoids a sticky film on the top. Chill for at least 3 hours. Top with another layer of sliced bananas.
Topping – In a medium mixing bowl, beat the whipping cream at high speed. Gradually add the sugar and vanilla. Beat until stiff peaks form. Spread whipping cream over the top of the bananas and then garnish with a few more slices of bananas. Slice and serve.
Enjoy!

This recipe came from www.chefintraing.com
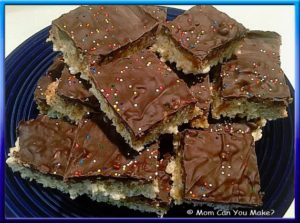
I don’t know anyone who does not love Rice Krispies treats, but how about kicking them up with some salted caramel, pecans, and chocolate?! What? oh yes! These are easy, delicious and can be decorated for any holiday you might be serving them for. I sent these in with my husband for He and his co-workers to enjoy and needless to say none of them came home! These would be great for any party or school bake sale!
INGREDIENTS
5 1/2 cups Rice Krispies cereal
4 1/2 cups mini marshmallows
1/4 cup butter
11-ounce package caramel bits
1/2 cup pecan chips
1/2 Tablespoon sea salt
10-ounce package melting wafers
Decorations or sprinkles of your choice
DIRECTIONS
In a large pot, melt the butter over medium heat. Once melted, add the marshmallows and stir often until the marshmallows have melted and turned creamy being careful not to burn the bottom. Once melted remove from heat and stir in the Rice Krispies cereal and mix well to combine. Spray a 9 x 13 baking dish with non-stick spray and pour the Rice Krispies mixture into the prepared pan and evenly flatten the cereal mixture into the pan. Set aside and let this cool and set up. Once cooled down place the caramel bits into a microwave-safe bowl with 2 tablespoons of water and microwave for one minute. After one minute, stir the caramel and microwave another 30 seconds and stir again. Depending on your microwave the caramel may need another 30 seconds. You want the caramel nice and smooth. When smooth remove from microwave and pour over the Rice Krispies covering all of the cereal mixture. Sprinkle with the sea salt and pecan pieces. Let this rest for 30 minutes or so until the caramel is cooled.
Place the melting chips in the microwave and microwave according to the package. Once melted and creamy add this layer on top of the caramel layer covering all of the caramel. Add sprinkles or decorations of your choice. Set aside and let the chocolate cool and set up. Once set cut into squares and serve.
Enjoy!


