Breakfast
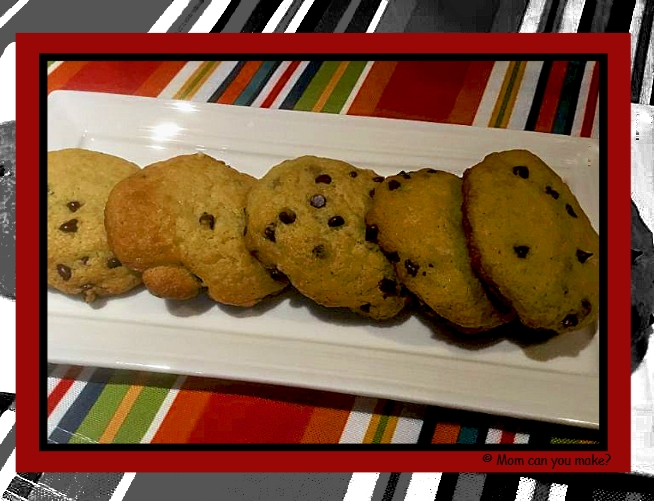
Although I made these for Robby as they are gluten-free even the gluten eaters in the family enjoyed these muffins tops! These were easy to make with everything I already had in my pantry. I will be making these often!
INGREDIENTS
- 2 cups gluten-free flour ( I used Bob’s 1 for 1)
- 1 cup of sugar
- 1 Tablespoon baking powder
- 1 teaspoon baking soda
- 3/4 teaspoon xanthan gum if your flour does not have it in there already
- 1/4 teaspoon salt
- 1/2 cup of milk, I used Fair Life
- 1/2 cup canola oil
- 2 large eggs
- 2 teaspoons vanilla extract
- 1 1/2 cups of semi-sweet chocolate chips. I used Enjoy Life
DIRECTIONS
Preheat oven to 350 degrees. Spray baking sheets with non-stick spray and set aside.
Mix the flour, sugar, baking powder, baking soda, and xanthan gum( if using} in a large bowl. In another medium bowl add the milk, oil, eggs, and vanilla and beat them all together. When mixed well, add the wet ingredients into the flour mixture and stir until combined. Fold in the chocolate chips.
Scoop out about 1/4 cup of the batter and place on your prepared baking sheets leaving some room as the batter will spread slightly. Bake for 13 – 18 minutes depending on the size of your muffin tops. They will be a light golden brown and slightly puffed up when they are done. Allow to sit in the pan for a couple of minutes then transfer muffin tops to a cooling rack to finish cooling.
Enjoy!


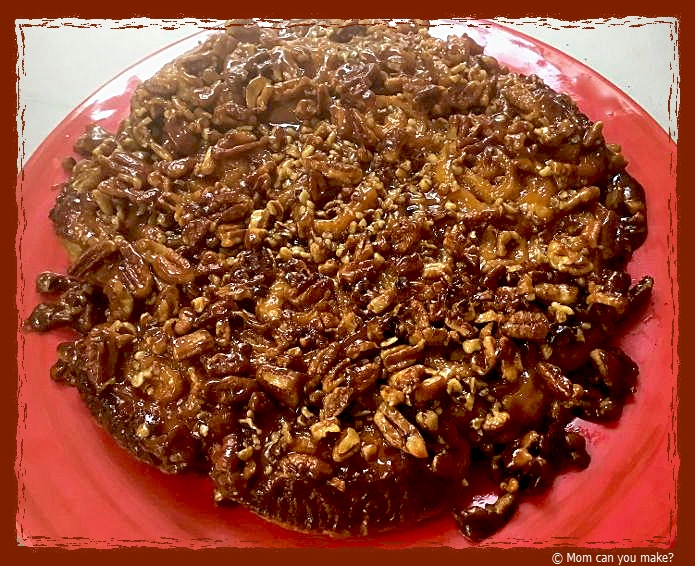
This is another recipe I adapted for the grill but no matter if you grill or bake these you will have happy people all around you. We liked these so much I made them 2 mornings in a row for friends and family we were camping with. I had an empty plate both mornings. I am most definitely keeping this recipe close by as it’s so simple and just the perfect amount of sweetness for any sweet tooth!
INGREDIENTS
- 3/4 cup chopped pecans
- 1/2 cup salted caramel of plain caramel sauce. Use a good quality caramel, not a thin caramel
- 1 8-ounce can of refrigerated crescent rolls
- 1/4 cup brown sugar
- 1/4 teaspoon ground cinnamon
- pinch of sea salt-optional
DIRECTIONS
Grease a 9.5-inch pie plate (for the grill I used 2 tin pie plates.) Scatter the pecans in a single layer in the bottom of the pie plate. Pour the caramel sauce evenly over the pecans. Set aside.
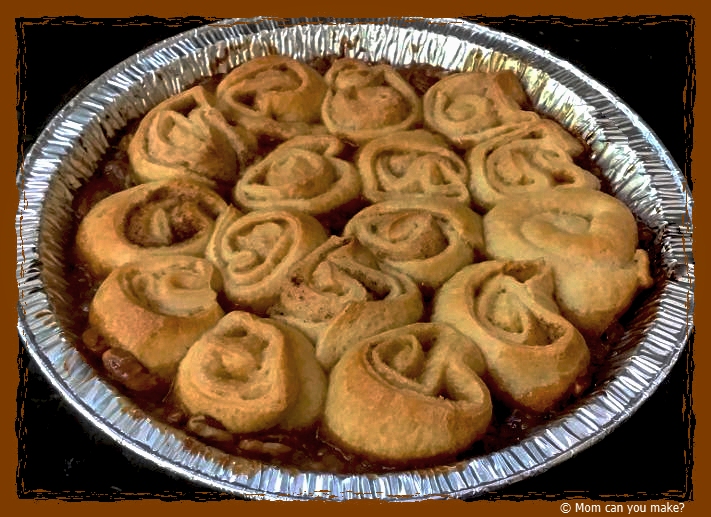
On a lightly floured surface roll out the crescent dough into an approximately 9×13 rectangle. Be sure to press the seams together as you want this in one sheet. Sprinkle the brown sugar and cinnamon over the dough leaving about a 1/2 inch border on the outer edges of the dough.
Starting on the long side of the dough, tightly roll the dough into a log. Cut the dough into 10-12 small rolls using a sharp knife.
Place the rolls cut side up on the top of the caramel in the pie dish.
FOR THE OVEN
Preheat the oven to 375 degrees. Bake for 16-18 minutes or until the buns are lightly golden brown and the caramel sauce is bubbly. Remove from the oven and place a large plate over the top of the pie dish, then quickly flip the pie dish over to invert the buns onto the plate. Spoon any leftover pecans or caramel left in the pie plate over your rolls. If desired add a sprinkle of sea salt. Serve warm.
FOR THE GRILL
This is very important..I used TWO pie plates, this kept the pecans from getting too browned as well as keeping the caramel from burning.
Turn your grill to the lowest setting. Place the pie dish on your grill and cover the hood of your grill. My rolls took between 25-30 minutes. I did check them often to avoid burning. Grills will cook slightly different so check often. Once the rolls are a golden brown and the caramel is bubbly remove from the grill and place a large plate over the top of the pie plate and quickly flip the pie plate over inverting the rolls onto the plate. If you have any caramel or pecans sticking to your pie plate spoon that over your rolls. If desired add a sprinkle of sea salt. Serve warm.
Enjoy!
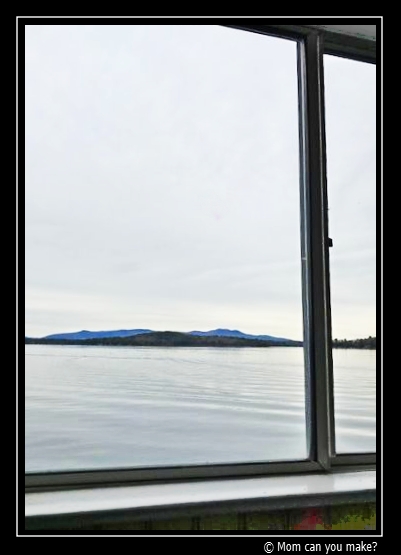
If you happen to live in New Hampshire you have certainly heard of the M/S Mount Washington cruise ship that takes visitors on a beautiful cruise on Lake Winnipesaukee. They offer a number of cruises including a Sunday brunch cruise, dinner cruises and theme night cruises. We took my parents for their Mother’s Day champagne brunch cruise.

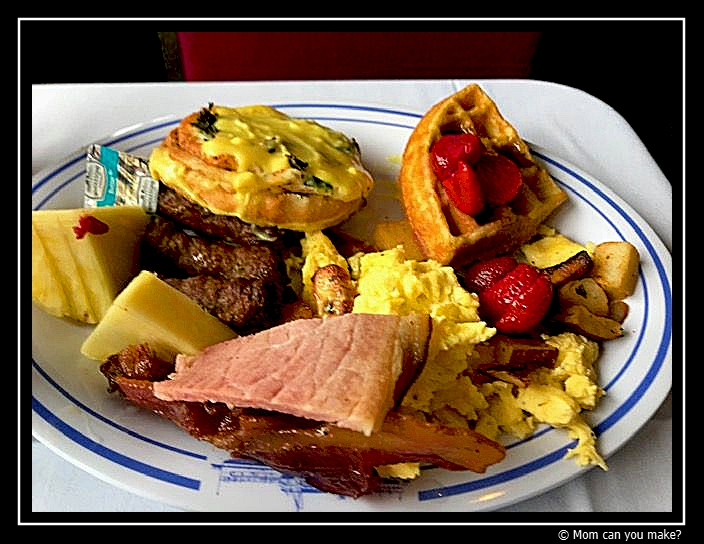
The Sunday we went it was a bit overcast and chilly but it was still a wonderful day for a 2 1/2 hour cruise on this beautiful boat. This boat is 230 feet long with indoor and outdoor seating, 4 decks and three dance floors. The $54.00 dollar per person includes the cruise, brunch buffet and live entertainment. We sat inside near the center of the boat. After the boat left the dock we decided it was time to check out the brunch buffet. They had a couple of brunch stations set up throughout the boat.
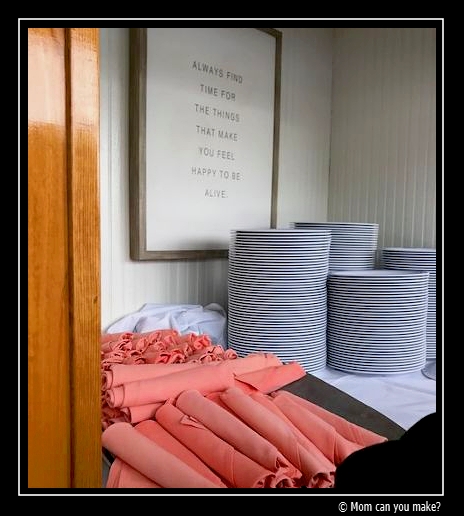
You start out grabbing your plate and silverware then you round the corner and find endless amounts of food. Scrambled eggs, bacon, sausage, hash browns. Lots of fresh fruit, muffins, danishes, various kinds of salad. Fresh made waffles right in front of you along with a carving station. The food was bright, fresh and delicious.
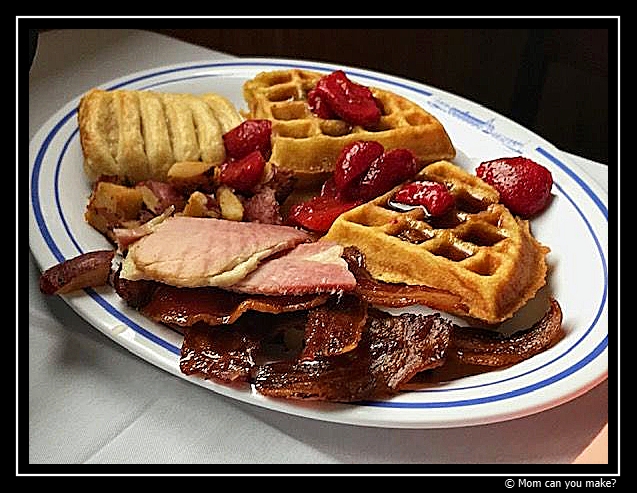
Between the four of us, I think we had a little bit of everything.

We enjoyed our brunch while listening to a small live band where some of the kids on the ship danced on the dance floor as we cruised the scenic lake.

After Jim finished his plate it was not long before he went looking for the dessert table and boy did he find it! He brought back a variety of cookies, brownies, and pastries for all of us to try.
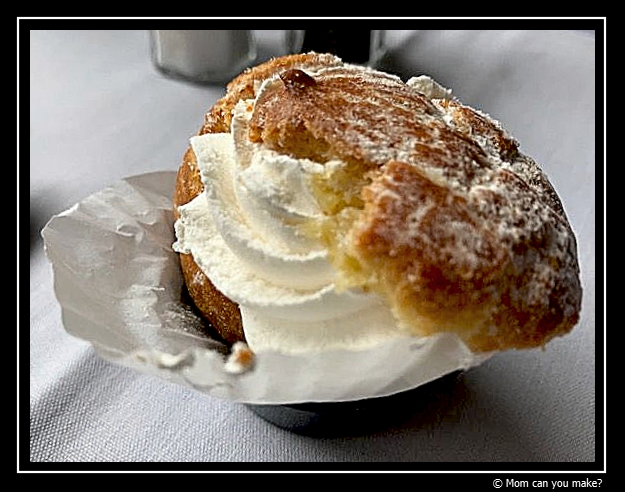
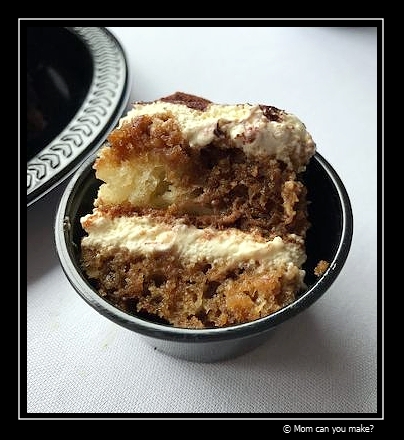
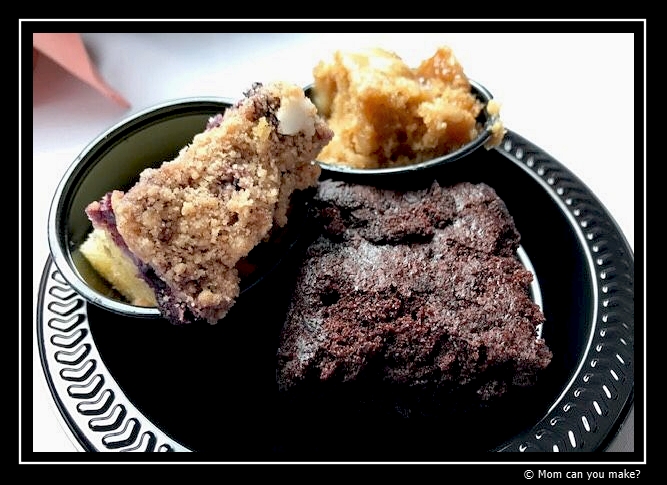
Some of the staff on boat raved about the brownies and we can see why. They were incredibly rich and chocolatey! Everything we had was very good, we were all stuffed! What a way to spend Mother’s Day!
It does not have to be Mother’s Day to enjoy this as they have brunch most Sundays along with dinner and dance cruises. Find them online and on Facebook for more information and tickets.
Enjoy!
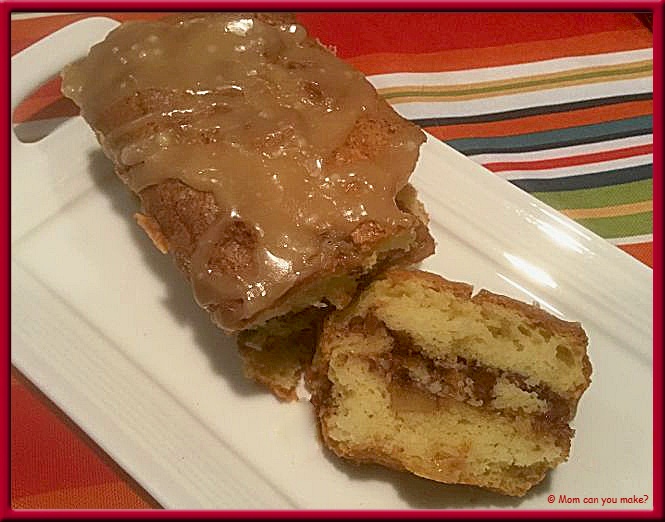
I have never met an apple bread that I did not enjoy! I love the apple fritter bread I have on the blog but this one was just a little different from that one. I thought I would give it a try. This recipe did not disappoint in fact it was gone within 24 hours without sharing! Yikes! I love the apples and cinnamon combination and of
INGREDIENTS
- 1/2 cup plus 1 Tablespoon brown sugar, divided
- 1 teaspoon cinnamon
- 1/2 teaspoon nutmeg
- 2 apples, peeled, cored and diced. I used Honey Crisp apples
- 1 Tablespoon plus 2/3 cup granulated sugar, divided
- 1 teaspoon apple pie spice
- 1/2 cup walnuts , chopped
- 8 Tablespoons butter, softened
- 2 eggs
- 1 1.2 teaspoons vanilla extract
- 1 1/2 cups
all purpose flour - 2 teaspoons baking powder
- 1/4 teaspoon baking soda
- 1/2 cup sour cream
GLAZE
- 1/4 cup brown sugar
- 1 Tablespoon butter
- 2 Tablespoons heavy cream
- 2 Tablespoons confectioners sugar
Preheat oven to 350 degrees. Using a
In a medium bowl, toss the apples with 1 Tablespoon of brown sugar, 1 Tablespoon sugar
In the bowl of a stand mixer with a paddle attachment, cream butter then add 2/3 cup granulated sugar and beat until light and fluffy, about 1 minute. With the mixer, add one egg at a time and mix. Scape the bowl down and mix for one more minute on medium until slightly pale in color. Add vanilla and mix just to combine.
In a small bowl. mix flour with baking powder and baking soda. With the mixer running on low, alternate adding the flour mixture and the sour cream. Mix until just combined.
Pour half of the batter into your prepared pan and spread covering the bottom of the pan. Add half of the apple mixture and pat down slightly into the batter. Sprinkle with half of the sugar mixture. Repeat with the remaining batter, apples and sugar mixture.
Bake on the center rack of the oven for 50-60 minutes or until a toothpick inserted into the center of the bread comes out clean. While cake is baking prepare the glaze by combining brown sugar, butter, and cream in a small saucepan. Heat to a boil and simmer on medium heat for two minutes without stirring. Remove from the heat and sift in the powdered sugar. Let sit at room temperature for ten minutes. Once the cake is out of the oven, cool in the pan on a baking rack for 15 minutes. Loosen the sides and flip out of the pan onto the cooling rack. Place the rack over a sheet pan and drizzle glaze over the top and let it melt into the warm cake. Serve warm or at room temperature.
Enjoy!
This recipe come from www.familyfeast.com
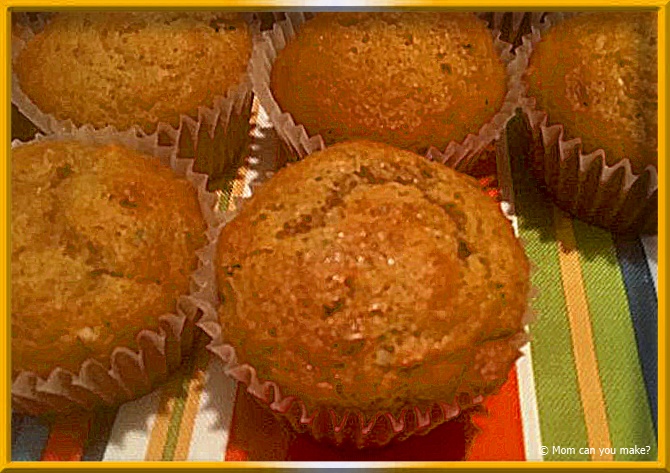
I love a muffin in the morning, slightly warmed with just a small pat of butter. That’s a nice way to start the day! One of my favorite muffins is the Morning Glory Muffin. It’s packed with so many great flavors and a bit healthier than many of the muffins out there. This is hands down my most favorite Morning Glory Muffin that I have made. I no longer have to look for another recipe, this is it! I did change it just the slightest by lessing the amount of carrots and coconut to 1/4 cup of each and added 1/2 cup of golden raisins. I came across this recipe on Pinterest from www.laurenslatest.com
INGREDIENTS
- 3/4 cup granulated sugar
- 2 1/4 cups all-purpose flour
- 1 1/2 teaspoons cinnamon
- 2 teaspoons baking soda
- 1/2 teaspoon salt
- 1/2 cup shredded sweetened coconut
- 1/2 cup chopped walnuts or pecans
- 1 cup grated zucchini, wrung out and dry
- 2 cups grated carrots
- 1/2 cup unsweetened apple sauce
- 1/2 cup maple syrup, the real stuff
- 3 large eggs
- 1/2 cup vegetable oil
- 1 teaspoon vanilla
DIRECTIONS
Preheat oven to 350 degrees. Line muffin tins with paper liners and set aside. In a large bowl whisk sugar, flour, cinnamon, baking soda, salt, coconut and walnuts until combined. Add zucchini and carrots and stir. Create a well in the center of the dry ingredients and add in the wet ingredients. Stir the wet ingredients together and then start to incorporate the dry into the wet using a rubber spatula until just combined. Scoop into prepared tins and bake 25-35 minutes or until a toothpick inserted in the center comes out clean. Cool for 7 minutes in the pan then transfer to a cooling rack.
Store in an airtight container for up to 3 days or freeze for up to 2 months.
Enjoy!
Stay In Touch


Follow me!


