Appetizers
I mentioned in yesterday’s post that I made a simple salad dressing and salad for our New Years Eve dinner this is it! This is the salad dressing that is commonly served at your Japanese steakhouse or your local Asian Restaurant. It’s sweet and a touch sour and packed with vegetables. This would be a great way to get some extra veggies into you as it’s all very finely processed so no one is any wiser that all those carrots and celery are in there! I served this over a super simple salad of crisp iceberg lettuce and off the vine diced tomato’s.
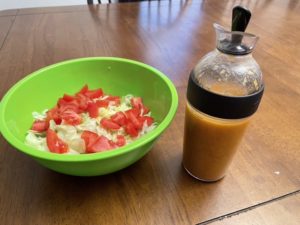
This comes together really easy and can be made a day ahead as I did. I actually did much of the work for this dinner the day before. We were spending some time with friends so it worked out great. This recipe makes a lot, next time I will cut it in half.
NOTE- I’m going to be taking a small amount of time off to do some work on the backside of the blog. I need to update a few recipes that I have not had time to do, it should not take me too long and I’ll be back with some more family favorite recipes!
INGREDIENTS
1 cup diced vidallia onion
6 Tablespoons grated fresh ginger
1/4 cup celery, chopped
1/2 cup chopped carrots
1 teaspoon fresh chopped garlic
2/3 cup rice vinegar
1/4 water
2 Tablespoons ketchup
2 1/2 Tablespoons lite soy sauce
1/4 cup agave nectar
1 1/2 Tablespoons fresh squeezed lemon juice
Pinch of salt
Pinch of pepper
1 cup peanut oil
DIRECTIONS
In a food processor place the onions, ginger, celery, carrots and garlic and process until the vegetables are fine and grainy.
Add the vinegar, water, ketchup, soy sauce, agave, lemon juice, salt and pepper and pulse a few more times.
With the food processor running add the oil in a steady stream. When you are finished putting in the oil stop the processor. The mixture should be loose.
Serve over salad and store in the fridge.
Enjoy!

For many, many years now I have been making my own Chinese food for New Years Eve. I keep it very simple but this year I added a couple new recipes to my usual fried rice and egg rolls. I added as Asian ginger salad dressing to a simple salad along with the recipe I’m sharing today the Boneless Chinese Ribs. When our daughter Amanda was little she would always call them the “red things” so anytime we got Chinese take out we always made sure to order the red things for her! I think she still calls them that to this day!
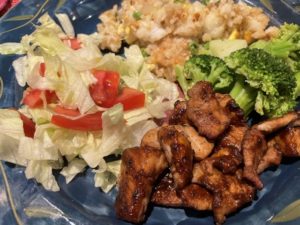
This was my first time making them at home and I did make a couple changes to keep them gluten free for Robby and I did NOT add the food coloring to the sauce that gives them that red color that we all know. I can say this was super simple to make and we all enjoyed them. They are not quite the same as what you get from your favorite take out place but a great at home option.
INGREDIENTS
1.5 pounds boneless pork loin or boneless spare ribs. I used the loin
1/3 cup lite soy sauce
1/3 cup Hoisin sauce, I used gluten free but any will work
1/4 cup fry red wine
1 Tablespoon sugar
1/2 Tablespoon minced garlic
1/2 teaspoon of Chinese five spice
2 drops natural red food coloring, optional
DIRECTIONS
Thinly slice the pork into strips about 3 inches long and place in a large disposable plastic bag.
Whisk together the remaining ingredients in a small bowl until well combined and pour the marinade into the bag with the pork and allow to marinate in the fridge for at least four hours or up-to over night.
When ready to cook pre heat the oven to 350 degrees. Line a large baking sheet with tin foil and top with a baking rack.
Place the pork slices on top reserving the marinade. Depending on the size of your pork slices bake for 30 minutes or until cooked through.
Add the reserved marinade into a small sauce pan and bring to a boil. Reduce heat and simmer for ten minutes. Remove from heat.
When the pork is cooked through remove the pan from the oven and pour the sauce over the pork. Move the oven rack to the top portion of the oven and turn the oven to broil.
Put the pan back into the oven for just a couple minutes to get some of those crispy edges and the sauce carmalized. Keep an eye on them during this part as they will burn quickly. Remove from oven and serve.
Enjoy!

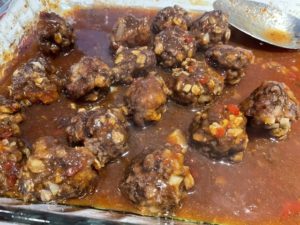
Happy New Year! I hope everyone had a wonderful Holiday. The first recipe I am giving you for the New year became a family favorite Very quickly, so much so that both Jim and Robby have requested it again for next week! I’m not going to argue with them as I loved them as much as they did! The meatballs balls are light and the sauce is a party in your mouth. I was originally making these as an appetizer but then decided to serve them over rice as that has been one of Robbys favorite things lately. I don’t mind making rice anymore as I just bought a new little Black and Decker rice machine that I absolutely love. I bought it on Amazon for under $20.00 and I have gotten my money back on it already. If you serve them as an appetizer or main course I think your family will be just as happy as mine.
NOTE- I made this a second time using ground Turkey and the results are delicious! We loved this so much the first time so this time I doubled the meatball portion of the recipe BUT kept the sauce recipe as is. The sauce recipe makes plenty of sauce even when doubling the meatballs!
INGREDIENTS
FOR THE MEATBALLS
1 pound lean ground beef
1/2 rolled oats , I used Bob’s red mill Gluten free, any will work
1 egg, slightly beaten
1/4 cup Vidalia onion, chopped
Pinch of salt
Pinch of pepper
Dash of Worcestershire sauce
FOR THE SAUCE
1 cup packed brown sugar
2 teaspoons yellow mustard
1/4 cup ketchup
1/4 barbecue sauce-I use a sweet BBQ sauce
2 teaspoons Worcestershire sauce
1/2 cup white vinegar
DIRECTIONS
Pre heat your oven to 350 degrees.
Mix the ground beef,oats, onions, egg, salt, pepper and Worcestershire sauce. Mix until well combined but don’t over work the beef.
Using a small scoop or 2 Tablespoons at time roll the meat mixture into balls and place in a baking dish. Roll until all of the meat mixture has been used.
In a medium size bowl mix together all of the sauce ingredients until well combined. Pour over the meatballs and bake uncovered. Depending on the size of your meatballs cooking times can vary. My meatballs took 30 minutes. (I made about 20 meatballs) remove from oven when cooked through and serve as an appetizer or over cooked rice.
Enjoy!

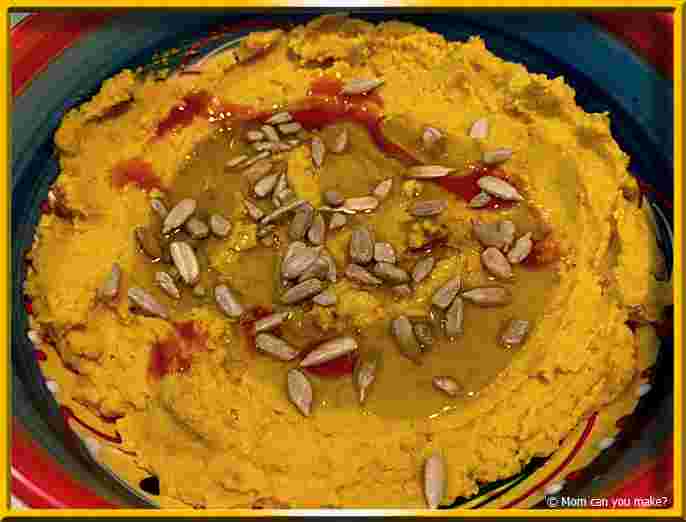
There was a hummus brand that made a roasted carrot hummus, however, I have not been able to find it. What’s a girl to do but make my own. This was delicious and could possibly be my favorite hummus yet! I served this with sliced veggies and Naan bread. I shared this dish with a friend and she really enjoyed it as well. So much so, she requested the recipe.
INGREDIENTS
- 1 can organic chickpeas
- 1 cup peeled, diced carrots
- 3 cloves of garlic
- 3-4 Tablespoons olive oil into the processor plus more for drizzling over veggies and garnish
- 2 Tablespoons tahini paste (sesame seed paste)
- 1 Tablespoon water
- 2 Tablespoons lemon juice
- 1 teaspoon hot sauce plus more to drizzle on the top (I used Cholula hot sauce)
- 1/4 teaspoon turmeric
- 1/4 teaspoon cumin
- 1/4 teaspoon sea salt
- 1/8 teaspoon cayenne pepper
- 1/4 cup roasted sunflower seeds (I found them already roasted and shelled in the grocery store)
- veggies and Naan bread for serving
DIRECTIONS
Preheat oven to 400 degrees. Spread the carrot slices and garlic cloves over a sheet pan that has been sprayed with non-stick spray. Drizzle olive oil over the vegetables and stir to coat them. Roast for 15-20 minutes. Allow to cool and remove skins from the garlic.
NOTE– This can also be done in an air fryer, air frying at 400 for 5-minute increments until the vegetables are soft.
Place all ingredients in a large food processor and process for a few minutes until you have the desired consistency. Scrape the processor sides down once or twice through this process. Remove to a serving dish, drizzle with olive oil, and more hot sauce if desired. Top with sunflower seeds.
Enjoy!

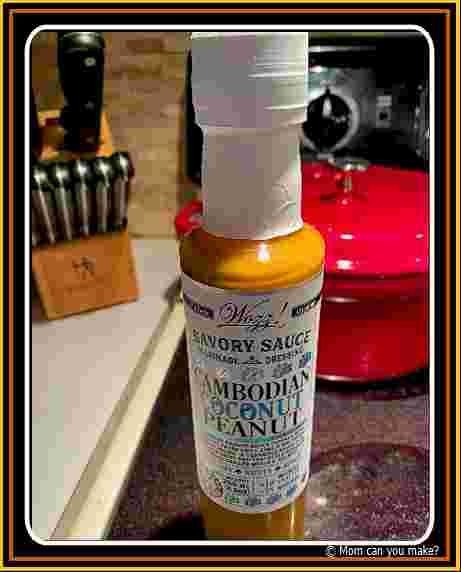
I was recently gifted a few products from one of my favorite food companies. I knew right away I was going to make something using this Cambodian Coconut Peanut Sauce. For inspiration, I went to Wozz’s Kitchen Creation’s website https://www.wozzkitchencreations.com/ and found this recipe and knew right away I was going to make it for dinner that same night as I had everything I needed on hand.
I did make just a couple of very small changes. I used chicken breast because that’s what I had and instead of turning my oven on with the weather pushing the high 90 degrees, I decided to air fry the chicken bites. These can be air fried, baked, or grilled. You can serve these as an appetizer with the sauce on the side or you can do what I ended up doing and serve this over rice with a drizzle of that amazing sauce. The sauce is sweet with a little pinch of heat. Robby and I both loved this dish and Robby does not typically like chicken in general but ate two helpings with extra sauce! That is high praise! Needless to say, I will be making this not just at home but when we are out in the motorhome as well. This will be a great dish to throw on the grill.

INGREDIENTS
- 1 package of 6 boneless chicken thighs (or breasts, but I do recommend thighs) diced into bite-size pieces
- 2 Tablespoons coconut oil
- 1 garlic clove, chopped
- 3 Tablespoons low sodium soy sauce
- 2 Tablespoon honey
- juice of 1 lime
- 1 teaspoon turmeric
- 1/2 teaspoon chili flakes
- Wozz! Cambodian Coconut Peanut Sauce for serving
DIRECTIONS
In a large bowl combine the coconut oil, garlic, soy sauce, honey, lime, turmeric, and chili flakes. Add the diced chicken coating all of the chicken. Let marinate in the fridge for 4 hours (or longer)
NOTE– The coconut oil after being in the fridge will look like little white balls due to the temperature but that’s ok. As soon as the heat hits it, it melts back to oil.
if you are grilling or baking, go ahead and skewer the chicken pieces on soaked wooden skewers.
Preheat oven to 400 degrees (or heat grill over medium heat). Bake skewers for 15 minutes turning once or until a nice brown, but still tender. Internal temperature needs to be over 165 degrees. Remove from oven or grill and serve with peanut sauce.
TO AIR FRY– place the chicken bites in the air fryer and fry at 350 degrees for 12-15 minutes or until cooked through depending on the size 9f the chicken pieces.
Enjoy!


