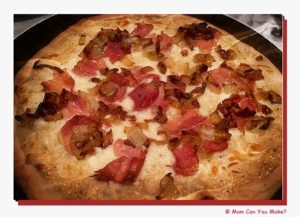
 We LOVED this pizza! It is our new favorite. Although this pizza does take some time, much of the preparation can be done in advance. The caramelized onions make it a little sweet and the prosciutto brings the salty flavor. Absolutely delicious! For the sauce, I used the white BBQ sauce that we have been loving so much and it worked perfectly for this pizza. No matter what recipe you try with this white sauce, just try it. I know you will love it!
Caramelized onion and roasted garlic can be made in advance.
INGREDIENTS
1 medium onion, sliced
1 Tablespoon extra virgin olive oil
1 Tablespoon Butter
1 pizza dough, I used store bought or buy from your favorite pizza place
1/2 cup prepared white BBQ sauce (see prior post)
1/2 cup shredded cheddar
1/2 cup shredded Monterey Jack cheese
5 thin slices of prosciutto
2 teaspoon roasted garlic, can be store bought or homemade
Flour to dust counter
DIRECTIONS
In a medium sauté pan over medium heat add oil, butter, and sliced onion. Once the onions are hot and starting to cook turn down the heat to medium-low and cook stirring occasionally for 40-45 minutes until the onions are dark and caramelized. Remove from heat to cool. If making ahead store in the fridge.
Meanwhile, bring your pizza dough to room temperature. Preheat oven to 400 degrees.
Stretch the dough out on a floured surface and roll out into about a 16 inch round. Place the dough on a baking sheet or if using a pizza stone, warm the stone in the oven as the oven comes to temperature.
Spread the white BBQ sauce on the dough just to within a 1/2 inch of the edges. Sprinkle both kinds of cheese over top of the sauce, add the roasted garlic over the cheese, add the caramelized onion throughout the pizza and finally lay the pieces of prosciutto on the top. Place pizza in the oven on the middle rack and bake about 18 minutes or until the crust is cooked through and the top is hot and bubbly. Remove from oven, slice and serve warm.
Enjoy!

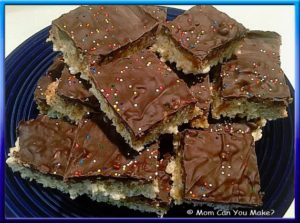
I don’t know anyone who does not love Rice Krispies treats, but how about kicking them up with some salted caramel, pecans, and chocolate?! What? oh yes! These are easy, delicious and can be decorated for any holiday you might be serving them for. I sent these in with my husband for He and his co-workers to enjoy and needless to say none of them came home! These would be great for any party or school bake sale!
INGREDIENTS
5 1/2 cups Rice Krispies cereal
4 1/2 cups mini marshmallows
1/4 cup butter
11-ounce package caramel bits
1/2 cup pecan chips
1/2 Tablespoon sea salt
10-ounce package melting wafers
Decorations or sprinkles of your choice
DIRECTIONS
In a large pot, melt the butter over medium heat. Once melted, add the marshmallows and stir often until the marshmallows have melted and turned creamy being careful not to burn the bottom. Once melted remove from heat and stir in the Rice Krispies cereal and mix well to combine. Spray a 9 x 13 baking dish with non-stick spray and pour the Rice Krispies mixture into the prepared pan and evenly flatten the cereal mixture into the pan. Set aside and let this cool and set up. Once cooled down place the caramel bits into a microwave-safe bowl with 2 tablespoons of water and microwave for one minute. After one minute, stir the caramel and microwave another 30 seconds and stir again. Depending on your microwave the caramel may need another 30 seconds. You want the caramel nice and smooth. When smooth remove from microwave and pour over the Rice Krispies covering all of the cereal mixture. Sprinkle with the sea salt and pecan pieces. Let this rest for 30 minutes or so until the caramel is cooled.
Place the melting chips in the microwave and microwave according to the package. Once melted and creamy add this layer on top of the caramel layer covering all of the caramel. Add sprinkles or decorations of your choice. Set aside and let the chocolate cool and set up. Once set cut into squares and serve.
Enjoy!

I’m BACK! Wow, what a crazy couple of months we have had. After recovering from my broken leg and helping my Mom after her surgery we were ready to tackle Christmas. However, two days before Christmas our small dog Zelda slipped a disk in her back leaving her unable to walk. Not the best way to start the holiday, but after two emergency vet visits, 6 weeks worth of medicine and two months of her resting, (the best a dog can rest) I am happy to report that Zelda is now walking unassisted and is back to her playful self. Although she still is unable to tackle stairs she has done amazing!
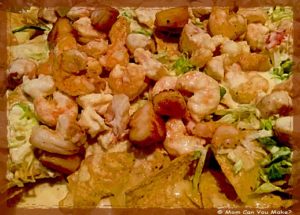
I have still been tracking all my recipes and pictures so I have so many to share with you! The first recipe I am sharing is Seafood Nachos. These were delicious! I have been wanting to make this dish for a while now as each summer we do a lot of camping with friends and family and always have a huge lobster/clam bake. So I thought it would be fun to have a seafood nacho dish one night! This recipe will be made a number times this summer! I used lobster meat, scallops, and shrimp so this can be an expensive dish BUT also a very impressive dish. You can make a couple of shortcuts with this recipe by purchasing already cooked lobster meat as well as cooked, deveined and tails off shrimp if you wanted to. I chose to roast the shrimp myself and pan sear the scallops adding a beautiful color and texture to the scallops. For the lobster, I simply cooked two lobster tails according to the package instructions as they were frozen tails. This recipe is enough for 4-6 hungry people as an appetizer.
INGREDIENTS
1 large bag of tortilla chips
2 cups sharp cheddar cheese
2 cups shredded pepper jack cheese
1 Tablespoon Of butter
2 teaspoons roasted garlic
1 pound large shrimp, peeled and deveined, tails off
2 lobster tails, cooked and meat removed and chopped (not too small)
1/2 pound scallops, muscle removed
1 cup heavy cream
1 cup grated parmesan
1 cup grated asiago cheese
Pinch of pepper
Pinch of salt
1 cup shredded iceberg lettuce
SERVE WITH
Sour cream
Pico de gallo
Pickled jalapeño
DIRECTIONS
For the shrimp – place the shrimp on a baking sheet drizzle with olive oil, add a pinch of salt and pepper and mix to combine. Place in a 400-degree oven for 6-8 minutes or until the shrimp turn pink and are cooked through. Remove from oven and set aside.
For the scallops – place a tablespoon Of butter in a frying pan, let the butter melt and pan heat up. Add the scallops to the hot pan and let sear until turning a golden brown, turn the scallops and do the same for the second side. Remove from pan and set aside.
For the lobster – I bought frozen lobster tail and followed directions on package. Remove cooked meat from shells and set aside. Or purchase already cooked and shelled meat.
In a large sauté pan add the heavy cream, Parmesan and Asiago cheeses, roasted garlic, salt, and pepper. Allow the cheese to melt. When the cheese has melted and is creamy add the lobster meat to the sauce, cut the scallops in half and add to the sauce, add the shrimp cutting in half if they are large shrimp. Stir to combine and warm the seafood through.
Meanwhile, on a large baking sheet spread the tortilla chips over the pan, add the cheddar and pepper jack cheese covering the chips and bake in a 350-degree oven for 2-4 minutes until the cheese is melted. Remove from oven, add a layer of the shredded lettuce over the cheese and top with the seafood sauce.
Serve warm with sour cream, pico de gallo and pickled jalapeño.
Enjoy!

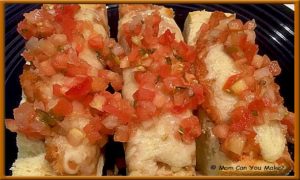
This is a super simple five-ingredient dish! Jim loves anything with a Mexican or Tex Mex flavor so he loved this dish! I, on the other hand, am not a huge fan of refried beans so this was not a huge favorite for me. Jim and I both agreed this would make a great party appetizer. I would slice them a little smaller than shown in the picture here.
INGREDIENTS
1 crusty Italian loaf
1 can (16 oz.) refried beans – I used the spicy version
1 cup sharp cheddar cheese, shredded
1 cup Monterey Jack cheese, shredded
1 1/2 cup homemade or store-bought pico de gallo
DIRECTIONS
Preheat oven to 350 degrees. Slice bread in half lengthwise and then in half widthwise and place cut side up on a baking sheet. Spread about 1/4 of the can of refried beans on each slice of the cut side of the bread. Top each slice with both kinds of cheese.
Bake for 15 minutes or until cheese is melted. Cut into 1/2 inch slices and top each slice with a spoon full of pico de gallo. Serve warm.
Enjoy!

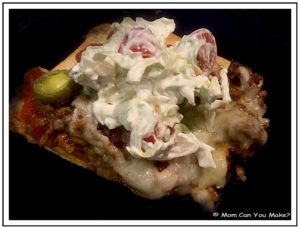
One of our favorite pizza places in Portsmouth, NH has our favorite Mexican pizza but we don’t always have time to go into Portsmouth so what’s a girl to do? Make my own version right? Well, this is not exactly like the restaurant version and it is definitely a little spicier, but the cool lettuce and tomato slaw on top cools it right down. You can also change the spice level by using mild salsa and leaving the jalapeño’s off. I made this one Saturday afternoon and shortly after I made it we had some neighbors pop over so I was thrilled to see how they liked it. I did not tell them it was my creation before they ate it so I was thrilled when they both cleaned their plates and said how much they liked it! I knew Jim and I liked it but it’s nice to have some additional feedback. I also made a gluten free version for Robby using gluten free crust and gluten free taco seasoning. Robby loved his pizza too! If you want to keep it dairy free, don’t use the sour cream and use dairy free cheese.
INGREDIENTS
Pizza crust of your choice, store bought, home made or dough from your favorite pizza place
1/2 pound ground beef
2 Tablespoons of taco seasoning, I use low sodium
3 Tablspoons water
1/2 cup of salsa, I used medium spice
1/2 cup shredded Monterey Jack cheese
1/2 cup shredded cheddar cheese
1/4 – 1/2 cup jarred sliced pickled jalapeños, depending on how much you want
TOPPING ingredients
1 cup shredded lettuce
1 cup cherry tomatoes, halved
1 cup sour cream
FOR A GLUTEN FREE PIZZA – like this one
Use a gluten free crust and gluten free taco seasoning. To make this dairy free leave out the sour cream and use dairy free cheese.
DIRECTIONS
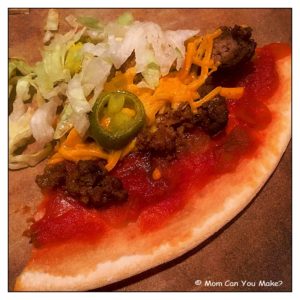
Preheat oven to 450 degrees. Lightly spray sheet pan with non-stick spray. Flatten the dough forming your crust. Prebake the crust for 3-4 minutes partially baking it. Remove from oven. In the meantime, heat a skillet to medium heat and add your ground beef. Cook ground beef breaking into crumbs as it cooks, drain excess liquid from the pan and add the taco seasoning and water, mix to combine and finish cooking. When cooked through, remove from heat.
To assemble, add your salsa to the top of your pizza crust and spread to about 1/4 of and inch to the edges, add the ground beef mixture and cover the salsa, add the cheeses spreading over the beef. If desired add the sliced jalapeños. Place back in the oven and bake an additional 8 minutes.
While the pizza is baking combine all of the topping ingredients together and set aside. When pizza is cooked through remove from oven, let rest for just a couple minutes, slice and add a spoonful or so of the topping. Serve warm.
Enjoy!


