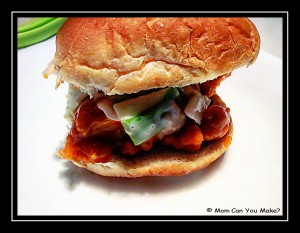
I came across this recipe a few weeks ago and for the chicken it used a rotisserie chicken, but sadly when I went to the store they did not have any. So I changed things up a bit and used frozen crunchy chicken tenders! We liked the crunch that it brought to the sliders! This recipe comes together quick and would be a great game day item for sure!!
INGREDIENTS
1/2 bag of Tyson crispy chicken tenders
1 stick of unsalted butter, melted
2/3 cup wing sauce, I used Frank’s
A splash of Worcestershire sauce
1 Tablespoon of cornstarch
8 slider rolls
GORGANZOLA SLAW
1/2 bag of shredded coleslaw mix
1 jar of Marie’s Coleslaw Dressing or your favorite slaw dressing
1 green apple, chopped
3/4 cup crumbled Gorgonzola
Pepper to taste
DIRECTIONS
Bake the chicken according to package directions. Melt the stick of butter in a saucepan over medium heat. When the butter is melted, add the hot sauce, Worcestershire sauce and the cornstarch whisking until smooth and the sauce has thickened. When the chicken is cooked, remove it from the oven and dice the chicken into bite size pieces. Add the chicken pieces into the sauce and coat all of the chicken with the buffalo sauce. For the slaw,add all of the ingredients into a bowl mixing until well combined. To put the sliders together simply place some of your chicken on the bottom slider bun, top with slaw and add the top bun and serve!
Enjoy!

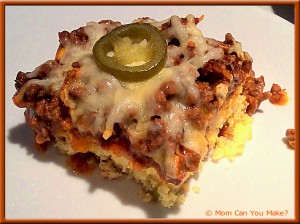
This recipe was super easy and comes together in no time. Great for a weeknight dinner. Add a salad and you are done! Robby really enjoyed this dish. He had two servings and later that same evening another portion of leftovers! The next day when Jim went to have more it was all gone! I used medium spiced enchilada sauce, but you can use mild or hot!
INGREDIENTS
1 box of cornbread mix (I used Krusteaz Honey Cornbread Mix) or your favorite cornbread mix that bakes in an 8 x 8 pan.
1 pound ground beef
1 package of low sodium taco seasoning
1 cup red enchilada sauce
1 cup of sharp cheddar cheese, shredded
1 cup Monterey Jack cheese, shredded
Pickled jalapeños
OPTIONAL TOPPINGS
Salsa
Sour cream
Guacamole
DIRECTIONS
Preheat your oven according to box directions. Make the cornbread according to package directions in a 8 x 8 pan. While the cornbread is baking, add the ground beef into a skillet and cook over medium heat until cooked through. Drain the fat if needed and add the taco seasoning. Stir until well combined. You can add a slight bit of water if needed. Remove from heat. When the cornbread is done take it out of the oven and turn the oven down to 350 degrees.
Using a fork, poke holes throughout the cornbread, not going all the way to the bottom of the bread. Pour the enchilada sauce over the cornbread letting it seep into the holes of the cornbread. Top with ground beef covering the cornbread. Add both of the cheeses covering the ground beef. Add picked jalapeños . Cover with aluminum foil and bake for 20 minutes. Remove foil and bake an additional 5-10 minutes or until cheese is melted. Remove from oven, add any optional ingredients and serve warm.
Enjoy!

 A couple Sunday’s ago Jim and I were getting caught up on some work around the house and Jim decided he was making dinner. He knew exactly what he wanted and was off to the store gathering the ingredients before I could say a word! Not that I would ever complain about having dinner made for me!! I love days like that as it does not happen often, not because Jim is not a good cook, he is a fabulous cook, but just never has the time!
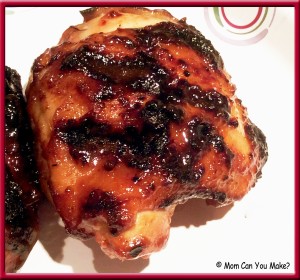
 So the BBQ sauce is a recipe Jim’s dad did for every family BBQ, although Bob is no longer with us, all of his kids still make this recipe and it is enjoyed just as much now as it was years ago! This sauce is simply two ingredients and is terrific with grilled chicken, as the sauce brings the sweet and tangy flavors to your BBQ!
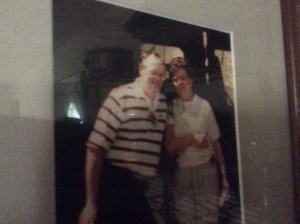
This is one of my favorite pictures of Joan and Bob.
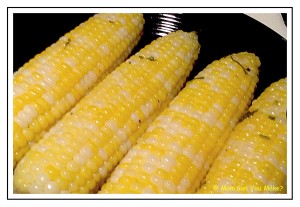
The butter recipe is also just a couple of ingredients, but makes corn on the cob much more interesting and delicious ! Jim is not a huge fan of cilantro so he did not add a lot of it to the butter, so feel free to add more if you enjoy cilantro!
BBQ Sauce Ingredients
18 ounce bottle of Kraft BBQ sauce (we used honey BBQ)
15 ounce can of cling peaches
DIRECTIONS
Combine the BBQ sauce and peaches (don’t drain the peaches) in a blender and blend until well combined and smooth. Baste both sides of the chicken as it is being grilled. Be sure chicken is fully cooked first. Remove from heat and serve warm.
Cilantro Butter Ingredients
1 stick of unsalted butter, room temp.
1 Tablespoon (or more) diced fresh cilantro
Salt
DIRECTIONS
Combine butter and cilantro until well combined. Jim grilled our corn by wrapping each corn in tin foil and placing on the upper rack of the grill and grilling for 15 minutes, turning occasionally! When corn is cooked remove from heat, remove tin foil and run the cilantro butter over the corn and salt as desired. Serve warm.
Enjoy!


It has been so hot and humid the past couple weeks. The last thing I have been wanting to do is heat the kitchen up!! Our grill has been working overtime, but I did take a little time to make this “everything” pasta salad! You can add as much or as little of the add in ingredients as you like. I made a full pound of pasta so this lasted us more than one night! This would be great to take for a potluck or picnic as well.
INGREDIENTS
1 pound spiral pasta
Wishbone Robust salad dressing
1/4 cup McCormick’s salad supreme seasoning
Mix -in’s
Cucumber, sliced into bite size pieces
Cherry tomatoes, halved
Pepperoni halved
Smoked cheddar cheese, cut into bite size cubes
Black olives
Green olives
Pepperonchini, sliced
DIRECTIONS
Boil your pasta until cooked al dente, drain and place in large bowl. Add all of your favorite mix-ins and mix well. Add the salad supreme seasoning and about half of a large bottle of the Robust Italian salad dressing mix well and you are done! Serve chilled.
Enjoy!

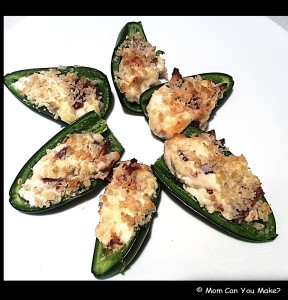
My favorite things to make are appetizers, but I am always looking for a new way to make something we have all seen before. This recipe is one of those ideas, although this does take some time to make they were absolutely delicious. The candied bacon was the star! These can be baked as I did, but also grilled and even smoked!
INGREDIENTS
8 slices of candied bacon, chopped (see instructions below)
8 ounces of cream cheese, at room temperature
1/4 cup shredded cheddar cheese
1/4 cup shredded Monterey Jack cheese
1/2 cup panko bread crumbs
1 Tablespoon Parmesan cheese
1 teaspoon Worcestershire sauce
2 dozen (approximately, depending on the size) jalapeño’s
DIRECTIONS FOR CANDIED BACON
8 slices of thick cut bacon
1/4 cup brown sugar
Preheat oven to 300 degrees. Place a cooling rack on top of a baking sheet and spray with non stick spray. Place 8 pieces of bacon on top of the cooling rack on a single layer and sprinkle the bacon with 1/2 of the brown sugar. Bake for thirty minutes (I used thick cut bacon, if you use a thin cut, cooking times will be different). After thirty minutes turn the bacon slices over and sprinkle with the remaining sugar and bake for 15 minutes or until crispy. Remove from oven and let cool completely.
NOTE- this can be done a day ahead.
DIRECTIONS FOR THE STUFFED JALAPEÑOS
Preheat the oven to 350 degrees. Slice the jalapeños in half lengthwise (being careful not to touch your face or eyes while working with the jalapeño’s). Scrape the ribs and seeds out of the jalapeño and place on a baking sheet.
In a medium bowl mix together the cheddar cheese, Monterey Jack cheese, cream cheese and Worcestershire sauce. Mix until well combined. Once well combined add your candied bacon pieces and mix so the bacon pieces are throughout your mixture. In a small bowl combine the panko crumbs and the Parmesan cheese. To assemble the jalapeños start by adding the cream cheese mixture into each jalapeño half and top with a sprinkle of panko Parmesan mixture. Do this for each jalapeño and place back on your baking sheet and bake for 12 minutes watching not to burn. Remove from oven and serve warm.
Enjoy!


