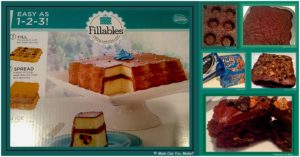
 I was recently given a 9 inch square Fillables cake pan to review. I’ll be honest, I don’t consider myself a baker so this project made me a little nervous. The first thing I did was take out the instruction booklet to see what I was in for. The instructions certainly looked easy enough and I must say all the pictures of the filled cakes looked amazing, but…what is it really going to look like and is it really just six simple steps? Let’s review the 6 steps as it really does sound easy.
step 1- fill both pans 3/4 of the way with batter
Step 2- bake until cakes cooked through
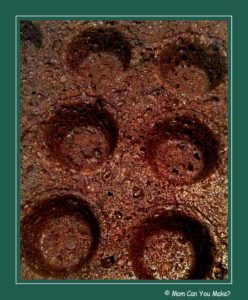
Step 3- flip pans over to remove cake from the pan
Step 4- fill the pockets with any treat you like
Step 5- spread a layer of icing over the filled cake
Step 6- top with the second cake and ice the rest of the cake.
Use the scalloped edges as a guide when cutting.
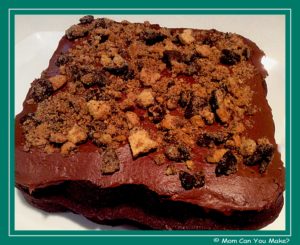
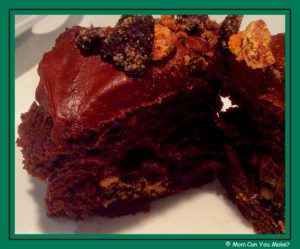
Sounds easy enough right? I can tell you this cake was really just that simple! I was so excited with this cake pan! I made a chocolate cake and I filled the inside with three types of crumbled cookies, but that’s not all, I frosted the cake with whipped chocolate frosting! This cake was so fun to make and delicious! It was death by chocolate! The instruction booklet gives you recipes and ideas!
 There are so many possibilities for this cake pan, this would be the perfect pan for a baby gender reveal or how about a summer cake filled with fresh fruit? So many choices! I will be using this pan over and over again! Do you want to know where you can get one? You have lots of places to buy them!
Amazon, Bed Bath & Beyond, Kohl’s, Target and Walmart to name a few. May be available either at their stores or on their websites listed below.
https://www.amazon.com/s/ref=nb_sb_noss?url=search-alias%3Daps&field-keywords=Fillables+cake+pans
https://www.bedbathandbeyond.com/store/s/fillables-cake-pans?ta=typeahead&_requestid=1736210
http://www.kohls.com/search.jsp?search=Fillables+Cake+Pans&submit-search=web-regular
http://www.target.com/s?searchTerm=Fillables%20cake%20pans
https://www.walmart.com/search/?query=fillables%20cake%20pans
Baking Advantage Fillables pans come in many different shapes. Mine was the 9 inch square, but they also have a heart fluted pan, cupcake cone pan, mini-heart pan, round cake pan to just name a few. They have a pan for all your special occasions. Although I was given this pan all opinions are my own and I am not getting any other compensation for this review.
Enjoy!

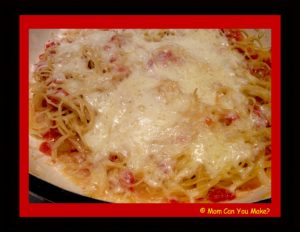 I love a tasty one pot meal and this fits the bill! This is also a recipe that you most likely have all the ingredients on hand. The Rotel tomatoes really add a boost of flavor to this dish! I served this with a nice crusty garlic bread and Caesar salad. Simple and delicious!
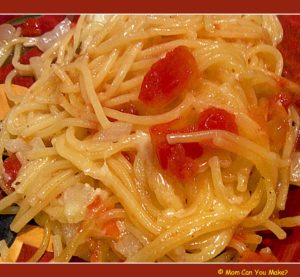
INGREDIENTS
1 box of thin spaghetti, broken in half
1 can of original Rotel tomatoes
2 cups water
1 Tablespoon Italian seasoning
2 cloves of garlic, minced
1 cup shredded cheddar cheese
1 cup shredded Monterey Jack cheese
2 Tablespoon olive oil
1/2 cup Vidalia sweet onion
1/2 teaspoon sugar
Sal and pepper to taste
DIRECTIONS
In a large skillet heat 1 Tablespoon of olive oil. Add the onion and sauté until soft then add minced garlic and continue to cook and stir for a couple minutes. Add Rotel tomatoes (not drained), Italian seasoning, sugar, water, and 1 Tablespoon of olive oil. Stir to combine. Add the dry spaghetti to the skillet, coating the noodles with the liquid. Bring to a boil for 10 minutes, stirring occasionally.
Set the broiler to low and once the noodles are cooked through add both of the cheeses making an even layer. Place the skillet under the broiler, and broil until the cheese is melted and just starting to turn a golden brown.
Remove from oven and serve warm.
Enjoy!

 Jim LOVES Mexican food! Anything with beans and beef is a fast favorite for him. This dish is no different. If I say a burrito is on the menu he is already at the table! This recipe is simple and perfect for a weeknight dinner. It is also easily customized to your taste. If you want more spice, add some canned chopped jalapeños, if you want to use different cheese go for it! Serve with salsa and sour cream, add a salad and rice and beans and your dinner is done.
Note- this is slightly adapted from the original Taste of Home Recipe
INGREDIENTS
1 pound ground beef
1 envelope taco seasoning
1 can refried beans (16 ounce)
6 flour tortillas (12 inches)
1 cup shredded Colby Monterey Jack cheese
4 teaspoons canola oil
Sour cream for serving
Salsa for serving
DIRECTIONS
In a large skillet cook beef over medium heat until no longer pink, drain and stir in the taco seasoning stirring well to combine. Add in the desired about of refried beans (I used about 1/2 the can). Stir to combine with beef and warm through, add the cheese and stir until melted and combined. Remove from heat.
With one tortilla at a time, fill the tortilla with about 1/4 cup of the beef/bean mixture. Fold the sides of the tortilla and roll setting aside with the seam side down. Follow this for each tortilla.
In a large skillet over medium high heat, add the canola oil. Add the burritos a couple at a time until browned on both sides. This does not take long so don’t leave the stove! Serve warm with salsa and sour cream.
Enjoy!

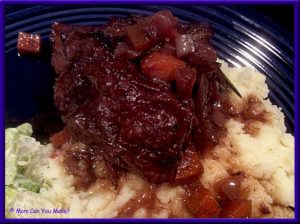 Every once in a while Jim has to travel for a few weeks at a time with the NH Army Guard. He was recently on a four-week trip and I wanted to make him a nice cozy dinner when he got home. Let’s face it there is nothing better than a home cooked meal. I wanted to make something I don’t usually make so I decided on a Ree Drummond (Pioneer Woman) recipe for Braised Beef Short Ribs. This was absolutely the perfect recipe, lots of flavor! The meat was so tender it was falling off the bone and made the house smell terrific all afternoon! I will definitely be making this again many more times. I served this with salad and mashed potatoes…the perfect side dishes for the beef ribs.
INGREDIENTS
8 whole beef short ribs
Salt and pepper to taste
1/4 cup all purpose flour
6 pieces of Pancetta, diced
2 Tablespoons olive oil
1 whole medium onion, diced
3 whole carrots, diced
2 shallots, peeled and finely minced
2 cups red wine
2 cups beef broth
2 sprigs of thyme
2 sprig of Rosemary
DIRECTIONS
Salt and pepper the ribs then dredge in flour and set aside. In a large dutch oven cook pancetta over medium heat until crispy and the fat is rendered. Remove pancetta and set aside keeping the grease in the pan. Add olive oil to the pan with the pancetta grease. Raise the heat to medium/high heat. Add the ribs to the hot pan and brown the ribs on all sides. Remove ribs from the pan setting aside. Turn the heat down to medium. Add onions, carrots and shallots to the pan and cook for a couple minutes. Pour in the wine and scrape the bottom of the pan releasing any bits that are on the bottom of the pan, bring to a boil and cook two minutes. Add broth, 1 teaspoon of salt and pepper, taste for seasoning adding more salt or pepper if needed. Add the ribs back in with the liquid. They should be almost all the way submerged. Add pancetta back in along with the whole sprigs of thyme and rosemary to the liquid. Put the lid on and place in the oven and cook at 350 degrees for two hours, reduce heat to 325 degrees and cook for 30-45 more minutes. Ribs should be fork tender and falling off the bone. Remove pan from oven and allow to sit for 20 minutes with the lid on before serving. Just before serving skim off any fat from the top. Serve warm.
Enjoy!

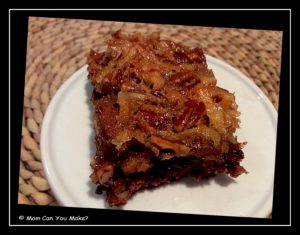
This is a fabulous dessert for your holiday table! This really brings the flavors of a German chocolate cake into a pecan bar!
This is sweet, salty and chocolatey all at the same time. The best part is that this makes a 9 x 13 pan so you have enough to share with all your guests! These bars are also on the sweet side, so I cut them into small bars!
INGREDIENTS
3 cups pecan halves
1 3/4 cups all purpose flour
3/4 cup confectioners sugar
3/4 cup cold butter, cubed
1/4 cup unsweetened cocoa powder
1 1/2 cups semi-sweet chocolate chips
3 large eggs
3/4 cup firmly packed light brown sugar
3/4 cup light corn syrup
1/4 cup unsalted butter, melted
1 cup sweetened flaked coconut
DIRECTIONS
Preheat oven to 350 degrees. Place pecans in a skillet and roast over medium heat just until lightly toasted, stirring occasionally. When you can smell the pecans they are ready. Line the sides of a 9 x 13 baking pan with aluminum foil leaving an overhang on the two short sides. Grease the foil.
Whisk together the flour, confectioners sugar and cocoa powder. Add the cold butter and combine using a pastry blender (or two knives) until mixture resembles course meal. Press the mixture on the bottom and up the sides of the prepared pan. Bake the crust for 15 minutes and remove from oven. Spread the semi sweet chips in an oven layer over the crust. Allow to cool on a wire rack for 30 minutes. Place the eggs in a large mixing bowl and beat lightly. Add the brown sugar, corn syrup, and melted butter. Whisk together until smooth. Stir in pecans and coconut. Pour evenly over the partially baked crust and bake for 28-34 minutes or until the edges are golden and the filling has set. Cool completely on a wire rack. Using the overhang of the foil lift out of the pan and cut into bars. Be sure to cool completely before removing from pan and cutting!
Enjoy!

This recipe comes from www.bakeorbreak.com


