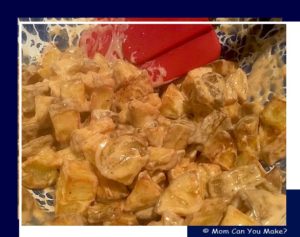
I found this recipe on Food Network and have made it multiple times as it has quickly become a family favorite. I made them in the air fryer but will give the directions for oven roasted as well. This is a great gluten-free side dish for all of your gluten-free friends or in my case, our son Robby. Robby has been known to take seconds and even thirds of this dish so I always make plenty!
INGREDIENTS
2 pounds potatoes, diced- I used the small gold potatoes
1 cup of mayonnaise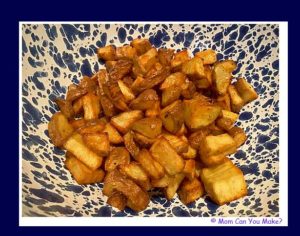
1/4 cup white vinegar
1 Tablespoon paprika
2 teaspoons sugar
Salt
Pepper
Olive oil
for garnish-optional
FOR THE OVEN METHOD YOU WILL NEED
2 Tablespoons unsalted Butter
(Second picture are the potatoes before sauce went on)
DIRECTIONS
Place the diced potatoes in a bowl and drizzle with enough olive oil to coat them. Transfer them to the air fryer and fry at 400 degrees for 18 minutes stirring half way through. Keep in mind air fryers vary in size and temp. While the potatoes are frying you can make the sauce by combining the mayonnaise, white vinegar, paprika, and sugar in a small bowl and mix well. When the potatoes are done transfer them to a serving dish, season with salt and pepper and stir. Add the sauce and stir again until well combined. Add chives if desired. Serve immediately.
BAKED VERSION
Preheat the oven to 450 degrees. Bring a large pot of heavily salted water to a boil, add the potatoes until slightly tender 4-6 minutes depending on the size of potatoes. Drain and pat dry.
Scatter the potatoes on a baking sheet, season with salt and pepper, drizzle with melted butter and toss to coat using tongs. Roast until dark brown and crispy 30 -45 minutes stirring half way through.
Make the dressing as directed as above and add to the potatoes when they are done roasting in the oven and transfer to a serving bowl.
Enjoy!

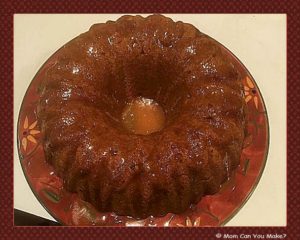
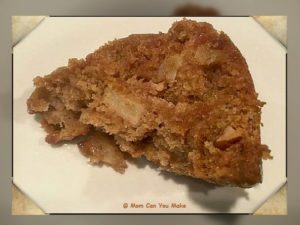
My family loves apple cake and it’s not just a fall favorite for us. I make apple cake year round but when I saw this recipe by www.afamilyfeast.com, I knew I had to make it and I’m so glad I did. This cake reminded me of my Mother-in-Law, Joan’s apple cake. Sadly Joan has passed and I don’t have her recipe but this was the closest I have tasted to her wonderful cake! Needless to say, this is a keeper that I will be making many, many more times!
INGREDIENTS FOR THE CAKE
3 cups all-purpose flour
1 teaspoon baking soda
2 teaspoons cinnamon
1/2 teaspoon nutmeg
1/2 teaspoon salt
1 1/2 cups vegetable oil
1 1/2 cups granulated sugar
1/2 cup brown sugar
3 eggs
2 teaspoons vanilla
3 large apples, peeled and cut into large pieces – I used a combination of Granny Smith and Honey Crisp
1 cup chopped walnuts – optional
INGREDIENTS FOR THE GLAZE
3 Tablespoons Butter
3 Tablespoons brown sugar
3 Tablespoons granulated sugar
3 Tablespoons heavy cream
1/4 teaspoon vanilla
DIRECTIONS
Preheat oven to 325 degrees. Grease and flour a 12 cup bundt pan and set aside.
In a large bowl, whisk together the flour, baking soda, cinnamon, nutmeg, and salt.
In a bowl of a stand mixer combine oil, both sugars, and mix until well blended.
Add eggs one at a time mixing after each one. Add vanilla and mix again. Add the whisked dry ingredients to the batter a little at a time until it’s all combined. By hand fold in apples and walnuts and mix until evenly combined.
Spoon the batter into your prepared pan bake for 1 hour and 15 minutes or until a toothpick inserted into the center of the cake comes out clean. Remove cake from oven and allow the cake to cool in pan for 20 minutes.
While the cake is cooling, you can prepare the glaze in a saucepan over medium heat. Combine all of the ingredients. Bring to a boil and allow to boil for 1 minute. Remove glaze from the heat.
Remove the cake from the pan onto a serving plate. Spoon the glaze over the warm cake and allow to cool a little longer before serving.
Enjoy!


I recently purchased a Philips XXL Air Fryer and have loved it! This was one of the first recipes I tried. This makes enough for 2 people and It could not have been any easier or more delicious! Most air fryer recipes can be done in the oven as well and this recipe could easily be adapted to baking it. If I were to bake it I would put the corn and the potatoes on a sheet pan and bake for about 30 minutes at 375 degrees, stir veggies and add the sliced kielbasa and continue baking for an additional 15-20 minutes until the potatoes are cooked through.
INGREDIENTS
2 frozen half ears of corn (can use fresh but this is what I had on hand. If using fresh, cooking time will be same as kielbasa and potatoes )
1 fully cooked kielbasa-sliced into rounds
3 cups small diced potatoes
Olive oil
Salt
Pepper
Butter to spread on corn when done
DIRECTIONS
Drizzle a small amount of olive oil over the corn and add the corn into your air fryer. Cook at 350 degrees for ten minutes. Open the air fryer and add the kielbasa and diced potatoes that you have also drizzled with olive oil. Add salt and pepper over all of the kielbasa, sausage, potatoes, and stir. Continue cooking for an additional ten minutes. Mine were done at this point but depending on the model and size cooking time may vary.
Remove from fryer, add butter to your corn and serve.
Enjoy!


Ok, so if you follow me, you know I’m on a quest for a new Chinese restaurant! This restaurant happens to be halfway between us and a number of my family members on Calef Highway in Epping, NH. When we were on our way home from visiting family we decided to stop and check it out!
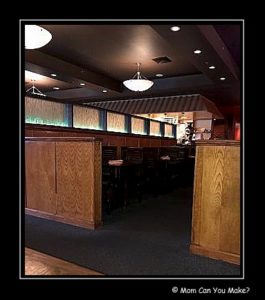
We were seated right away with our menus in hand. The decor is a little dated and it’s not much to write home about, but its how the food is that really counts in my book. Jim ordered the chicken Pad Thai ($9.95) and I tried something I have not had before and that was the Honey walnut chicken ($10.75).
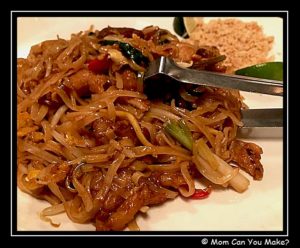 Jim did clear his plate and said the chicken pad, Thai, although good, it was not the best he has ever had…but still good. Funny enough I think Jim liked my dish better as his fork kept making its way to my plate!
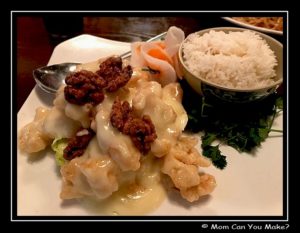
My honey walnut chicken was excellent and something I would order again. It is on the sweeter side and the candied walnuts make it even sweeter. It comes with a side of white rice which was a nice compliment to the crispy fried chicken and the sweet sauce.
Orient Pearl Asian Bistro opens daily at 11:00 am. They serve Chinese and Japanese cuisine along with a sushi bar. You can dine in, take out and they do catering as well. The menu is huge with all of the usual suspects you see on Chinese/Japanese menus. Soups, salads lots of appetizers Rice, chicken, pork, and vegetable dishes to choose from, along with some mandarin specialties.
I heard from my very good friend Lenny that the sushi is excellent here although we did not try it this time we will certainly try it next time.
Orient Pearl also has many lunch specials including an all you can eat buffet daily from 11:30 to 2:00 pm. I am hoping next time we are in the area we can check out this buffet and have a better idea of all the flavors they serve!
My quest for Chinese food will continue, but this is a great spot and we will be back. In the meantime, if you want to learn more, please visit their website for more information and menu option!
http://www.orientpearlrestaurant.com/
Enjoy!

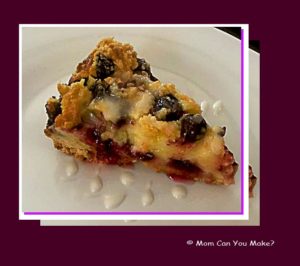
This is a Pinterest recipe that I could not pass by! Although there are a number of steps, they are well worth it! This was really good and would be great for a brunch or any summer gathering dessert! This is a perfect way to use up all of those summer picked blueberries!
INGREDIENTS FOR CRUMB CAKE
3 1/2 cups flour
2 teaspoons baking powder
1/4 teaspoon salt
1/2 cup butter, cold and cut into cubes
Grated zest from 1 lemon
1/3 cup light brown sugar
1/3 cup sugar
2 eggs
1 teaspoon vanilla
BLUEBERRY CHEESECAKE FILLING
8 oz. mascarpone cheese
8 oz. cream cheese, softened
1/2 cup plus 2 Tablespoons sugar
2 Tablespoons cornstarch
2 eggs
1 teaspoon vanilla
1 2/3 cups blueberries
GLAZE INGREDIENTS
1/2 cup powdered sugar
2-3 teaspoons milk
DIRECTIONS
Preheat oven to 350 degrees. Line the bottom of a 9-inch springform pan with parchment paper or spray bottom and sides well with non-stick baking spray. Set aside.
In a large bowl stir together flour, baking powder, salt, brown sugar, sugar and lemon zest.
Add the butter into the dry ingredients mixture and work it in with your hands or press with a fork. Work through until it’s a grainy texture.
Add eggs and vanilla mixing to combine. The mixture should be crumbly. If it’s too fine, squeeze with your fingers making pea-sized crumbs. Press about 2/3 of the mixture into the bottom and up about 1 1/2 inches of your prepared pan and set aside. Place pan and the remains crumbs in the fridge.
To make the filling mix together cream cheese, mascarpone, vanilla, sugar, and cornstarch just to combine.
Add eggs and mix again until combined not overworking it.
Pour half of the cheesecake mixture into chilled crust. Scatter about 2/3 cup of the blueberries over the filling. Spread remaining cheesecake filling over the top and spread, top with the remaining blueberries and remaining crumb mixture.
Bake 350 degrees until golden brown and a toothpick inserted in the center comes out clean, about 65-75 minutes. If it starts to brown too much place an aluminum foil tent over the top. Remove from oven and let cool.
To make the glaze stir together powdered sugar and enough milk for your desired consistency. Drizzle over the cooled cake.
Enjoy!


