I LOVE Pinterest! I get so many ideas and great recipes from there! What are some of your favorite things on Pinterest??
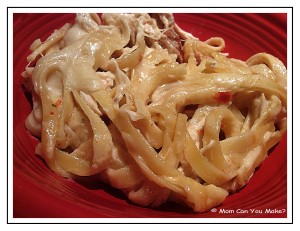
This recipe became an instant favorite with my entire family! Next time I make it I am going to double the recipe as this is made in an 8 x 8 pan. This recipe also has bacon in it and in my house even though a recipe only calls for two or three pieces, I have to make a full pound as I have the sweetest, senior dog that just goes crazy for bacon. She knows when it is baking in the oven and sits patiently until it is done and then all bets are off. She is having BACON! Daphne does crazy things for bacon and if you have a piece you better watch out as she is not opposed to begging from you and being YOUR best friend too!
How can you not love that face and not
give her that bacon?!
INGREDIENTS
1/2 pound of fettucini pasta, cooked al dente and drained
6 Tablespoons butter
3 Tablespoons flour
14.5 ounces of chicken broth
1/2 cup half and half
1 cup grated Parmesan cheese
1 1/2 cups cooked chicken (I used rotisserie chicken from my grocery store)
1/2 cup oil packed sun dried tomatoes, drained and sliced
3 slices of cooked and crumbled bacon
DIRECTIONS
Preheat oven to 350 degrees. Spray an 8 x 8 baking dish with non-stick spray. Cook pasta al dente and drain.
Melt butter in saucepan over medium heat. Stir in flour, whisk for about one minute then gradually stir in broth. Heat to a boil stirring constantly. Remove from heat. Stir in half and half and 1/2 cup of the Parmesean cheese. Stir in the cooked chicken, tomatoes and bacon. Combine well. Spoon into baking dish and top with remaining cheese. Cover with foil and bake for 25 minutes. Uncover and bake an additional 5-10 minutes until hot and bubbly.
Enjoy!


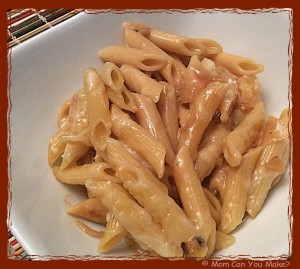
This dish started with my love for french onion soup, but sadly I am the only one in the family that likes it. I wanted the same flavors, but something transformed, that my family would all enjoy. This was just right! We all enjoyed it, but I think next time I would add some crushed Ritz crackers mixed with a little melted butter on top to add a little more texture and even more flavor! I brought this to work the next day and had a few extra taste testers and they all agreed it was definitely a keeper and a must make recipe! You could also add some shredded rotisserie chicken to this and it would be terrific!
INGREDIENTS
1 pound penne pasta
1/2 large onion
1/2 cup white wine
1 packet of Lipton onion dry soup mix
3 cups chicken stock
2 cloves of garlic, minced
1/2 cup of cheddar cheese, grated
1/2 cup Monterey Jack cheese, grated
1/4 cup light cream
1 Tablespoon flour
1 Tablespoon extra virgin olive oil
DIRECTIONS
Cook pasta according to package direction and set aside. In a large saucepan, heat the olive oil and add the chopped onion and stir until golden brown. Add the minced garlic to the onion mixture, stir and let cook another minute. Add the white wine to the pan scraping up any little bits that are stuck on the bottom of the pan. Add all of the chicken stock and the dry soup mix packet and let cook for 30 minutes. Stir in the flour and whisk the mixture until it thickens about ten minutes. Add the cream to the sauce along with the cheddar cheese and Monterey Jack cheese and stir until combined and cheese is melted. Add the pasta (and shredded cooked chicken, if using) and stir well, coating all of the pasta. Pour this into a 13 x 9 casserole dish. You can add a little extra cheese on top or top with crushed crackers mixed with melted butter. Bake at 350 degrees for 30 minutes. If you have a crumb topping, cover and bake 20 minutes, uncover and bake an additional ten minutes. Remove from oven and serve warm.
Enjoy!

 This recipe comes from our daughter, Amanda. If you follow my blog you may have noticed you don’t hear a lot about Amanda. Well, that is because she lives an hour away in Manchester, NH while she attends Southern New Hampshire University. She will be graduating in January of 2016! Something else you may not know about Amanda is that she has a rare disease called, Ehlers Danlos Syndrome (she has type 3). EDS as it is known, is a connective tissue disorder that is characterized by lax joints, dislocated joints, super soft skin, along with limb and joint pain. There is a lot more involved, but that is the quick version. Amanda was diagnosed in her freshman year of high school when she dislocated her shoulder. It would not go back into place despite many doctor visits, physical therapy, and a huge amount of frustration. She had surgery at Massachusetts General Hospital to repair the shoulder and has been a patient at Boston Children’s Hospital ever since the diagnosis. Are you wondering what all that has to do with lavender lemonade? Well, lavender has properties in it that are known to reduce inflammation, as well as give a calming sense. Now you know where this is leading! Anything Amanda can do to help her joints, without taking mass amounts of prescriptions, is always a great thing! Amanda has learned to live with EDS and does not let it get her down or stop her from doing all the things she loves or wants to do and, some things she should not do! There might just be a video of her cliff jumping somewhere but I would rather not see that again! Amanda is a great role model for anyone dealing with all of life’s challenges or long-term illnesses. Amanda tried this and really enjoys it! I hope you enjoy it as well! Thank you Amanda, we love you!

This picture is a couple years old, but one of my favorites!
INGREDIENTS
1 cup of honey
12 cups purified water
juice of 6 squeezed lemons
1 drop of lavender essential oil
NOTE: Only 1 drop of oil as it can taste bitter if you add more than that! If you want to order some follow the link at the top of my homepage for Young Living.
DIRECTIONS
Mix all ingredients and serve over ice, store in fridge.
Enjoy!


Have you seen these Yancey’s Fancy New York Artisan Cheeses products in your grocery store? I have been buying them for awhile now and really have enjoyed them. They are a great addition to any cheese platter. Although they have several varieties I am sharing the “Buffalo Wing” cheese with you today! This is one of Robby’s favorite cheese’s, although we all like this cheese simply with crackers, Robby loves this cheese diced up and put on nacho’s! I think this would be a great addition to any recipe you want to add some spice to! This has been a favorite at our house and if you like buffalo wing flavor, you will love this cheese as much as Robby.
Enjoy!


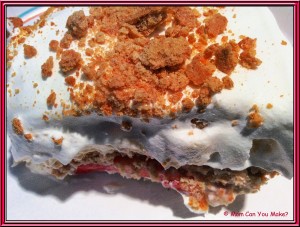
I made this recipe a couple weeks ago. I was looking for something that was sweet, but not too sweet. This had fresh strawberries in it with a cheesecake flavor! The recipe sounded delicious and it is a make ahead recipe. Also another bonus in my book! We had our neighbor Randy over so he was my guinea pig for this recipe! Lucky for me and for Randy it was a terrific recipe and loved by all of us. All the plates were licked clean!! This gave us thoughts of summer in this very cold winter! This would be a fantastic summer pool side dessert!
INGREDIENTS
2 pounds of strawberries, cleaned and hulled
2 sleeves of graham crackers
1 8 ounce package cream cheese, at room temperature
1 14 ounce can sweetened condensed milk
2 3.4 ounce packages instant cheesecake flavored pudding mix
3 cups milk (I used 1%)
1 12 ounce carton of fat free Cool Whip
DIRECTIONS
Slice your cleaned strawberries about 1/4 inch thick and set aside. Line the bottom of a 13×9 inch baking pan with graham crackers and set aside. Combine cream cheese and sweetened condensed milk in a large bowl and beat with an electric mixer until smooth and creamy. Add pudding mixes and milk and continue to mix it on low for 4-5 minutes or until mixture starts to thicken. Fold in two cups of Cool Whip mixing until smooth. Pour half of the cream cheese mixture over the graham crackers. Arrange a single layer of strawberries slices over cream cheese mixture, top strawberries with another layer of graham crackers then cover with the rest of the cream cheese mixture. Top cream cheese mixture with another layer of strawberries. cover and refrigerate for 6-8 hours.
When ready to serve top with remaining Cool Whip and crushed graham cracker crumbs.
Enjoy!

This recipe can be found at www.southyourmouth.com


