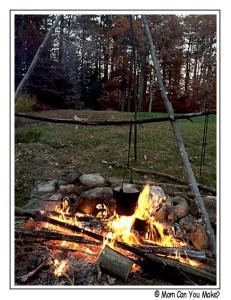
 On November 4th, my good friend Rosalie and I went to a campfire cooking workshop put on by GALA. Have any of my NH friends heard of GALA? Well they are just an amazing group! GALA stands for Global Awareness Local Action. They were founded in 2006 and are located in Wolfeboro, NH. GALA is a non profit organization whose mission is to create a community building model that translates sustainability education into local action that is practical, effective and fun. GALA hosts many community events throughout the year,. Things like this outdoor cooking class along with farm to table feast, contra-dance series and homesteading workshops. GALA does offer memberships that are renewable each year. The memberships have many benefits and anyone can be a member. The price for memberships for an individual is just $15.00, for a family it is $35.00, students are $10.00 and businesses just $50.00. They also take donations! Let’s talk about the amazing campfire cooking class!
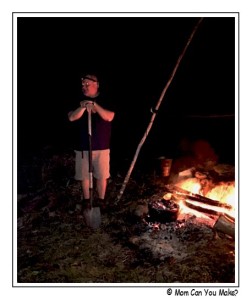
This class was so much fun and so informative! The class was $15.00 per person and worth every penny! We learned about dutch ovens, and reflection oven cooking and a little bit about pot suspension system! Our instructor for the night was Tim Smith of Jack Mountain Bushcraft School. Tim was so informative and gave us so much information in such a small about of time! I should also mention, Tim lives six months of the year off the grid traveling everywhere from Maine to Alaska. Tim does not just teach his skills…he practices them in his daily life.
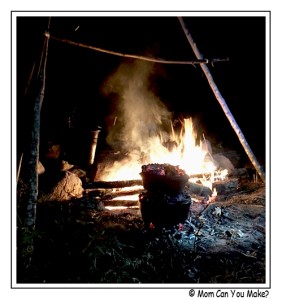
When we pulled up to the location of the class, we were instantly impressed as the fire was already going with a tripod over the fire. The tripod was huge and used to hold the cooking pots over the fire. Due to time, Tim already had the rice cooking! Tim did not waste a moment of our time. He started the class putting together a 4-5 pound pork roast into a dutch oven with some potatoes, onions, a can of beer, cabbage and adobo peppers for more flavor and spice! He covered the pot and moved some of the coals from the fire, placed the pot on top and added more coals to the top of the pot!
Next up were the sourdough biscuits. These were very simply made and placed on a baking sheet just like you would do in your own kitchen. However, these were baked on the pan in a reflector oven placed directly in front of the fire. About half way through the cooking time Tim turned the pans so all of the biscuits would cook evenly.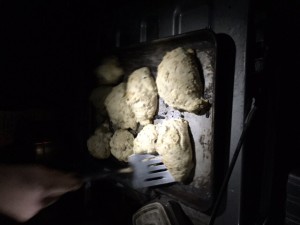
Guide coffee was up next. This was hung over the fire using the pot suspension system. The coffee and water were brought to a boil and taken off the fire, then Tim swung the bucket of coffee to settle the grounds. Yes, you read that right, Tim really did 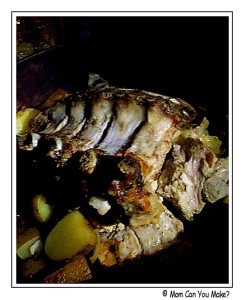 swing the bucket of coffee! I would have liked to have gotten a good picture or video, but the class was in the evening so it was just too dark!
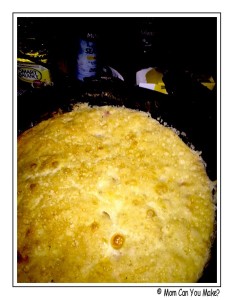
Next up, fruit cobbler! We needed a dessert after all! This was super simple! Tim used fruit cocktail and cake mix. What I found the most interesting is the amount of eggs he used! Tim doubled the amount of eggs that the cake box said to use and added two more eggs on top of that! Sounds crazy doesn’t it? Tim cooked these directly on top of the pot he was cooking the pork in and added more coals to the cover of that pot! Let me just say…it worked! The cake was fruity and very moist! Perfectly cooked!
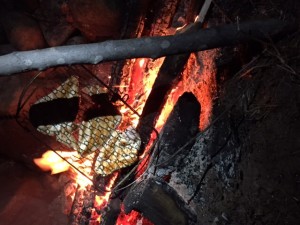
Last, but not least, Tim hung some chicken breasts over the fire using BBQ basket (like the one’s used for BBQing vegetables). Are you wondering how everything tasted? It was all terrific, the pork was tender and flavorful, the biscuits were just right, soft with a little bit of butter! I will admit I did not try the coffee as I am not a coffee drinker. However, the group was very pleased with it! The fruit dessert was my favorite. I was impressed with the flavor and how moist it was! Oh, I almost forgot about the chicken! The chicken was beautifully browned, moist with a little bit of smokey flavor from the fire!
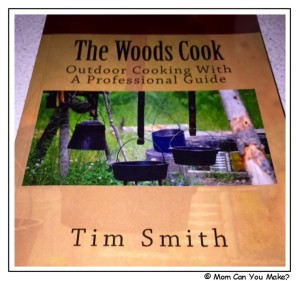
Have I mentioned Tim has a book? He did not have any for sale that night but did have one for all of us to look at. The name of the book is “The Woods Cook” and can be ordered on Amazon. The book was full of information about how to cook over an open fire, the tools and equipment, along with lots of recipes! What a fun night we had and we can’t wait to support GALA and go to more of their events! GALA has a great website at www.galacommunity.org you will find lots of fun things to do and some great information!
Enjoy!

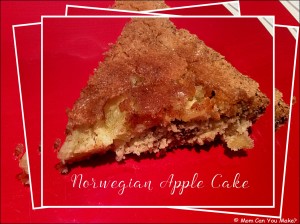 This is a Taste of Home recipe that I recently reviewed. We really enjoyed this recipe. It would be great with a cup of coffee in the morning or as a dessert in the evening with a scoop of ice cream! This apple cake is sweet, but not over the top sweet. The added cinnamon sugar on the top makes a wonderful crust! Such a simple tasty recipe, go ahead and give it a try!!
INGREDIENTS
3/4 cup of sugar
1 teaspoon baking powder
1/4 teaspoon salt
2 eggs, beaten
1/2 teaspoon vanilla extract
1 medium Granny Smith apple, peeled and chopped
1/2 cup chopped walnuts
TOPPING
1 1/2 Tablespoons sugar mixed with 1 teaspoon cinnamon
DIRECTIONS
Preheat oven to 375 degrees. In a bowl combine sugar, flour, baking powder and salt. Add eggs and vanilla mixing well. Stir in the apples and walnuts. Spread into a 9 inch pie plate and sprinkle with the cinnamon sugar mixture.
Bake for 25-30 minutes or until a toothpick inserted near the center comes out clean. Best served warm.
Enjoy!

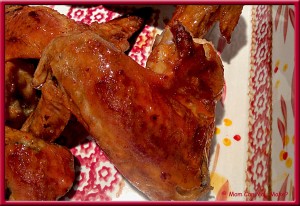 I found this recipe at the Food and Wine website and thought it was a great way to change up your typical hot wings! It has your typical ingredients but the one ingredient that caught my eye was adding melted hot pepper jelly! I know right…why didn’t I think of that!! The original recipe calls for the wings to be baked at 500 degrees. Well my oven does not take to cooking that hot so I baked mine at 450 degrees and they were just fine!
INGREDIENTS
2 Tablespoon all purpose flour
1 teaspoon salt
1/2 teaspoon dried garlic
1 teaspoon paprika or smoked paprika
2 pounds chicken wingettes and drumettes
2 1/2 Tablespoons hot sauce, I used Frank’s
2 Tablespoons unsalted melted butter
2 Tablespoons hot pepper jelly, melted
DIRECTIONS
Preheat oven to 450 degrees. Line a large baking sheet with foil and spray with vegetable oil. In a bowl mix the flour, salt, dried garlic and paprika. Add the chicken to the flour mixture and toss to coat all of the chicken pieces.
Spread the chicken out on your baking sheet on a single layer and spray the chicken with vegetable oil. Roast the chicken for 45 minutes turning the chicken two or three times until browned and crispy.
In a bowl whisk the hot sauce , butter and hot pepper jelly. When the chicken is cooked through remove from oven, toss with the sauce and serve warm.
Enjoy!

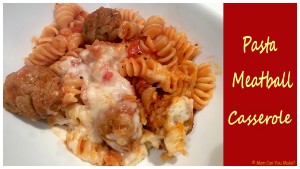
Every now and then I will have a night I just don’t want to cook and when that happens this is the kind of recipe I make. Super simple, throw it all in a baking dish and call it done! But the big question is always, how does it taste? Although both Jim and I liked this the teenagers in my house that night LOVED IT and all of them went back for seconds! If hungry teenagers are happy I am too! It’s a win!
INGREDIENTS
1 (16 ounce) package uncooked rotini pasta
1 (25 ounce) jar of your favorite pasta sauce
3 cups of water
1 (14 ounce) package of fully cooked, mini meatballs (thawed)
1 cup sharp cheddar
1 cup Monterey Jack cheese
1 teaspoon fresh chopped basil
1 teaspoon dried oregano
DIRECTIONS
Preheat oven to 425 degrees. In a large baking dish combine uncooked pasta, pasta sauce, water and meatballs. Cover and bake for 30 minutes. Uncover and add your basil and oregano, stir well and bake uncovered for ten minutes. Remove from oven and serve warm.
Enjoy!

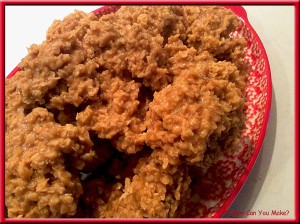 We have all seen and made the no bake chocolate cookies but have you tried the peanut butter version? The recipe is basically the same as the chocolate version and just as sweet as well! They are a little too sweet for me, but the kids certainly enjoy them!!
INGREDIENTS
1/2 cup butter
1/2 cup milk
2 cups sugar
2 teaspoons vanilla
1/2 cup creamy peanut butter
4 cups quick cooking oats
DIRECTIONS
Place butter, milk, sugar, vanilla and peanut butter into a saucepan. Being all of the ingredients to a rolling boil. Let boil two minutes, remove from heat. Stir in the quick oats and drop by tablespoon onto wax paper. Let sit to firm up. Store in fridge when cooled and firm.
Enjoy!


