Pasta
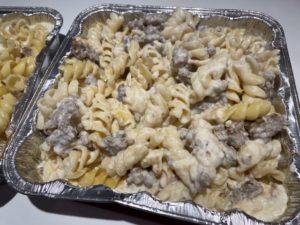
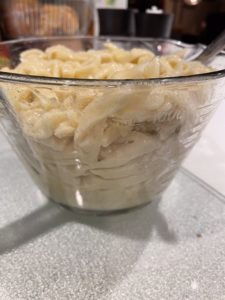
I have been making this dish for many years. It’s not only my families favorite but a favorite of so many friends and family that have tried it including one of our good friends that Jim used to work with in fact every time Jim runs into him he mentions the dish. Well, jim ran into him recently so I decided to make him some! Jim was thrilled as he got some too as I split it into two dishes…… hence the aluminum container! I made a garden salad to go and one for us as well! This dish does not photograph well but it certainly tastes great!
NOTE-I usually roast the garlic the day before
INGREDIENTS
2 whole garlic heads
2 teaspoon olive oil
1 pound Jimmy Dean “Hot” sausage
2 Tablespoons butter
1/3 cup all purpose flour
6 cups milk, I used whole milk but 1% also works
1 cup fresh Parmesan, grated
2/3 cup gruyere cheese, grated
1/2 teaspoon salt
Pinch of pepper
1/2 teaspoon nutmeg
1 pound pasta-penne or spiral, cooked to Al Dante
DIRECTIONS
Pre heat oven to 350 degrees.
Cut the top of the garlic heads off exposing the garlic cloves. Wrap each garlic head separately in foil leaving the top exposed. Drizzle with a teaspoon of olive oil over each one. Bake for 1 hour. Remove from oven and let cool. Once cooled squeeze the garlic pulp out and discard skins. Set aside until ready to use. If doing this the day before store in the fridge.
Increase oven to 400 degrees.
Brown sausage in a large pot (I use a pot for this as later in the recipe everything gets added into the pot.) over medium heat until browned, stirring and crumbling as it cooks. Remove sausage from pot and set aside.
Melt butter in the same pot you used for the sausage over medium heat, add the flour to the melted butter and stir with a whisk. Gradually add the milk and cook until thickened about ten minutes. Add the roasted garlic, cheeses, salt, pepper and nutmeg. Once everything is well combined remove from heat and add the cooked pasta into the sauce along with the sausage, mix well until combined.
Spoon pasta mixture into a prepared 9×13 inch baking dish. Bake 400 degrees for 15 minutes. The sauce will thicken a little more during this cooking time. When heated through remove from heat and serve warm.
Enjoy!


This recipe has been handed down from my Grandmother Anne and is an all time family favorite. This recipe gets made only a couple times a year as it does take some time and labor but it’s worth every bit of it. This recipe is not filled with chicken or vegetables it’s literally chicken broth and hand made and hand cut noodles. That’s it! Sounds simple right? Well, it’s taken me a number of times to get this recipe just as I remember! The first time I made it I cut my noodles far too big so it is important to take the time to cut the noodles smaller than you think as they expand when they are being cooked.
Recently our Daughter Amanda was not feeling well and all she could think about was this chicken noodle soup and since she lives ten hours away and I can’t just run some over to her so I told her I would show her and her Husband Steve how to make it. Needless to say she is looking forward to our next visit.
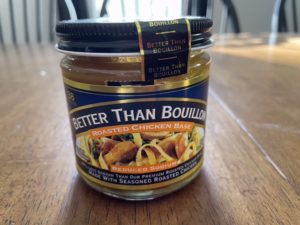
It takes me two days to make this soup as I make the broth the night before in my crockpot. You can cheat and use store bought broth and add a little bit of “Better than Bouillon “. You could also use a turkey broth if you have that on hand.
INGREDIENTS FOR THE CHICKEN BROTH
1 chicken carcass with most of the meat removed and cleaned off
1 onion quartered
3 carrots roughly chopped
3 celery roughly chopped
1 full garlic head, skin removed
2 bay leaves
1-2 Tablespoons apple cider vinegar
Cold water
Chicken base to taste
6 chicken wings-optional. If my store has chicken wings I will add 6 uncooked wings right into the slow cooker with the other ingredients.
Cheese cloth to strain
DIRECTIONS FOR THE CHICKEN BROTH
Turn your slow cooker on low and add all of the ingredients except the chicken base. You are going to add enough cold water into the crockpot to fill it to the top. Cover and let cook on low for 18-24 hours. Shut the slow cooker off and let cool.
Once cooled enough to handle its time to strain the broth into a large pot. I place a strainer that I have lined with the cheese cloth and strain all of the liquid through the cloth into the pot. This is the time to add the chicken base. I add this in small amounts at a time stirring it in and tasting as I go as this will make your broth too salty if you are not careful.
I then divide the broth up into mason jars, store in the fridge and use as needed.
INGREDIENTS FOR THE NOODLES
NOTE-This makes one batch but we typically double it.
2 cups of flour
2 eggs
1/3 cup of water more or less. Enough to pull the dough together.
Extra flour for rolling
1/2 stick of butter, melted
DIRECTIONS FOR MAKING THE NOODLES
Add the flour, eggs and water into your stand mixer with a dough paddle attachment. Mix until combined. Remove dough from the mixer and divide it into 3 parts. Let the dough rest for 30 minutes with a clean towel covering the dough.

Bring a large pot of water to a boil. Add salt when the water comes to a boil.
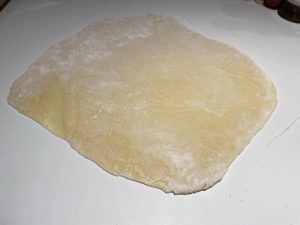
Lightly sprinkle your surface with flour to roll the dough. Using one dough ball at a time roll out the dough just as you would making a pie dough. You want this dough to be a little thinner than a pie crust.
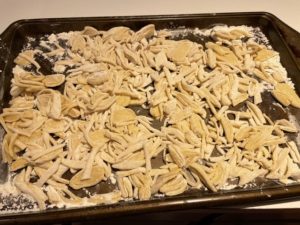
When the dough is rolled out you now want to roll the dough up loosely so it’s one big roll. Cut the noodles on an angle from each side of the roll. Spread the noodles apart to prevent them from sticking together, I put them on a flour dusted baking sheet. Do this for each of the dough balls.
In batches boil the noodles for 10-12 minutes. The noodles will come to the top and you will notice they will change color just slightly. I use a spider scoop to Drain the noodles and add them into a container with melted butter and toss.
When you are ready for a bowl, add the noodles into a bowl and add your desired amount of broth. Add salt and pepper if desired and re heat in the microwave if needed.
Enjoy!
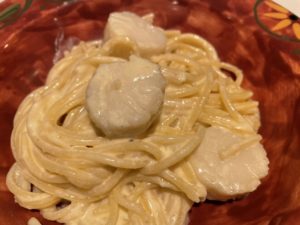
I mentioned a while back that I was working on putting a book together, well…I asked all of my family what recipes they wanted to be sure made it in the book. The recipes this week were both must haves. The recipe today I have been making for many years. When our kids were little we had a travel trailer we would travel in the summer and vacation all over New England and we were always somewhere near water. Spending time near the ocean meant a seafood dish! This scallop dish made a showing on almost every trip and no matter who we were camping with this was a favorite dinner for all. I usually serve this with a salad and sometimes garlic bread or both!
NOTE-you can pan sear the scallops in a little bit of butter if you want a little more texture OR toast up some crumbled ritz crackers with some melted butter and add on top of the dish when completed and zest some lemon over the top of the crackers!
INGREDIENTS
1 1/2 pounds sea scallops
1 stick of butter
Chopped garlic to taste
1 1/2 cups heavy cream
1 cup Asiago cheese
1/4 teaspoon nutmeg
Pinch of salt
Pinch of pepper
3/4 package of pasta, I use Rao’s spaghetti. Fettuccine would be fine too
DIRECTIONS
Bring a large pot of water to a boil. When the water is boiling add your pasta and cook until al dante.
Meanwhile in a large Large saucepan, (I use my enamel pot for this) melt butter over medium heat, add garlic and cook until the garlic is soft then lower the heat just a touch and add cream, cheese, nutmeg, salt and pepper. Stir until combined.
When your pasta is done add it into the sauce mixture using tongs but DO NOT drain the boiling water!
Add the scallops to the pasta water and cook for 3-4 minutes or until the scallops turn a milky white. Remove the scallops from the water and add into the pasta and sauce.
Serve warm.
Enjoy!
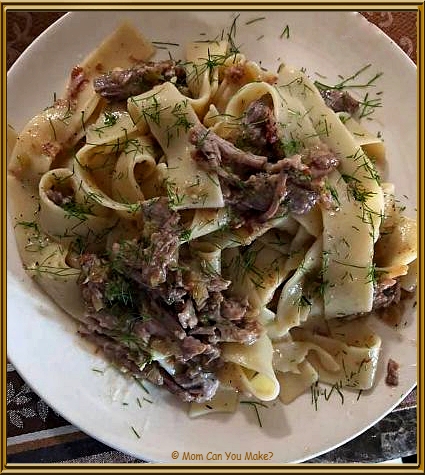
This recipe comes to you from a good friend of mine who is an amazing chef! Ann said this recipe is one of the best recipes she has tried in some time. Now that says a lot as Ann makes some amazing dishes. This recipe does take a little bit of time but it’s most definitely worth it!
Serves 4-6 Total cooking time 2 3/4 hours
INGREDIENTS
- 4 ounces pancetta, chopped
- 1 large onion, chopped fine
- 1 large fennel bulb, 2 Tablespoons finely chopped, stalks discarded, bulb halved, cored and chopped fine
- 4 cloves garlic, minced
- 1 1/2 teaspoons salt or kosher salt as Ann used (plus salt for pasta water)
- 1 teaspoon pepper
- 2 teaspoons minced thyme
- 1/3 cup heavy cream
- 1 (1 1/2 pound) boneless pork butt roast, well-trimmed and cut in half across the grain. You can have your butcher do this if you are unsure how.
- 1 1/2 teaspoons grated lemon zest plus 1/4 cup juice, 2 lemons
- 12 ounces pappardelle
- 2 ounces pecorino Romano cheese, grated, plus extra for serving
DIRECTIONS
Adjust oven rack to middle position and heat oven to 350 degrees. Cook pancetta and 3/4 cup water in a Dutch oven over medium-high heat, stirring occasionally until water has evaporated and dark fond forms on the bottom of the pot, 8-10 minutes. Add onion and fennel bulb, cook stirring occasionally until vegetables are softened and start to brown 5-7 minutes. Stir in garlic, salt, thyme, and pepper. Cook until fragrant, about 30 seconds.
Stir in cream and 2 cups water scraping up any brown bits on the bottom of the pan. Add pork and bring to a boil over high heat, cover and transfer to your oven and cook until the pork is tender. About 1 1/2 hours.
Transfer pork to a large plate and let cool for 15 minutes. Cover pot so fond will steam and softened. Using spatula scrape brown bits from sides of the pot and stir into sauce. Stir in lemon zest and juice.
While pork cools, bring 4 quarts of water to a boil in a large pot. Using two forks shred pork into bite-size pieces discarding any large pieces of fat or connective tissue. Return pork and any juices to Dutch oven.
Add pasta and one Tablespoon of salt to boiling water cook stirring occasionally until cooked al Dante. Reserve two cups of cooking water then drain pasta and add to the Dutch oven. Add pecorino and 3/4 cup of the reserved cooking water and stir until the sauce is slightly thickened and cheese is fully melted – 2-3 minutes. If desired stir in remaining reserved cooking water 1/4 cup at a time to adjust the sauce consistency. Season with salt and pepper to taste and sprinkle with fennel fronds. Serve warm.
Enjoy!
This recipe comes from Cooks Illustrated.
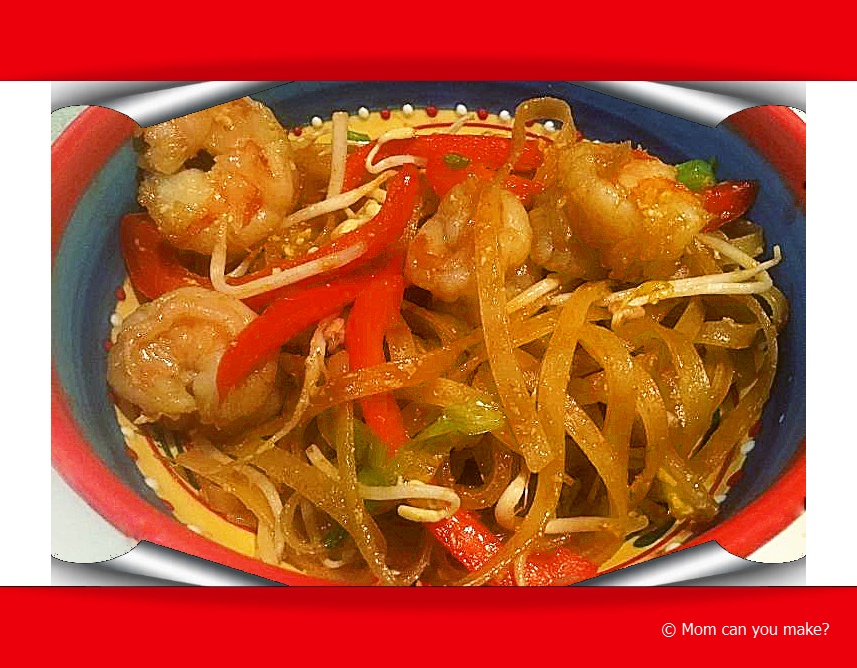
We love Thai food and one of the dishes my husband gets most often is Pad Thai. I don’t cook many Thai dishes but decided to give Shrimp Pad Thai a try and I’m so glad I did. It was so easy and we really love the sauce in this recipe. This is great for a busy week night dish as it comes together very fast once the noodles have soaked.
INGREDIENTS
- 8 Oz. Rice noodles
- 3 Tablespoons garlic infused olive oil
- 1 pound uncooked medium or large shrimp, peeled and deveined
- 1 red bell pepper, sliced into strips
- 1/4 cup fish sauce
- 1/4 cup white sugar
- 2 Tablespoons rice vinegar
- 1 Tablespoon ground paprika
- 1 large egg, beaten
- 2 teaspoons reduced sodium soy sauce
- 2 scallions, sliced
- 1 cup fresh bean sprouts
Soak the rice noodles in cold water for 40 minutes. The noodles will soften but will still be firm to the touch. They will continue to cook and soften when added to the hot skillet. After 30 minutes drain and set aside.
Heat a large skillet over medium-high heat. Add oil and shrimp. Stir fry for about 3 minutes, add noodles and bell pepper slices and continue to cook until noodles are translucent, about 5 more minutes.
Add fish sauce, sugar, vinegar and paprika. Stir until well mixed. Create a well by pushing the noodle mixture to the sides of the skillet. Add the beaten egg into the well and let cook until the egg just starts to set then stir the cooked egg into the rest of the noodle mixture. Add soy sauce, scallions and bean sprouts stir to mix. Serve warm.
Enjoy!
Stay In Touch


Follow me!
Recent Pins


