Party food
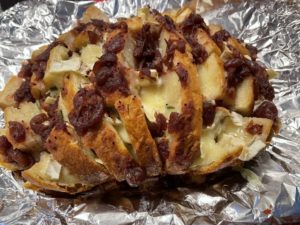
This Cranberry Brie pull apart bread is simply amazing! The first time I made this we were camping with friends, Since then I have made it a couple more times as it’s always a huge hit with everyone that tries it. The first time I made this I made it on the grill, most recently when we had some friends and neighbors over for Halloween I baked it in the oven.
This pull apart bread is perfect for the upcoming Holidays, your friends and family will love this cheesy, tart bite!
INGREDIENTS
1 Large round sourdough bread
1 stick of butter
1 teaspoon dried thyme
1 teaspoon dried rosemary
1 (16 ounce) wheel of Brie, cubed
1 1/2 cups whole berry cranberry sauce
Pinch of salt
DIRECTIONS
Pre heat oven to 350 degrees.
Slice bread horizontally and vertically without cutting all the way through. You are creating one inch cubes.
Melt the butter and herbs. Place the bread on a tin foil lined baking sheet and butter the inside of the bread squares.
Put a piece of Brie cheese inside each space you created in the bread. Add the cranberry sauce into the squares as well.
Cover the bread with foil and bake for 20 minutes or until the cheese is melted.
Serve warm.
Enjoy!


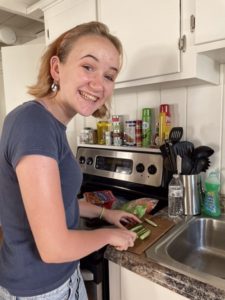
Say Hello to Samantha everyone! Samantha is the beautiful daughter of our dear friends Rick and Ann Marie. You may remember Rick and Ann Marie from an earlier post I wrote about Brunch at the Bedford Village Inn.
Rick and Ann Marie along with all three of their kids, Samantha, Nick and Shaun rented a beach home in Wells, Maine a couple weeks ago. Jim and I crashed their vacation for a couple of days as we were staying about a mile away in our motorhome.
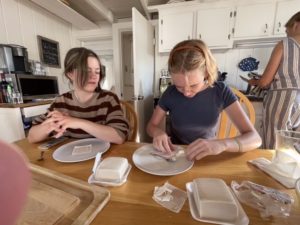
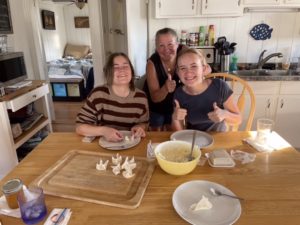
While spending a little bit of time with Samantha last summer, I learned that she loves being in the kitchen and learning new recipes. She was telling me that she had been learning to make spring rolls and crab Rangoon’s from one of her friends Mom. When I said I love crab Rangoon’s but have never made them, That’s when we started planning a day and Sam would be teaching me how to make some of the things she had been learning! Needless to say I was thrilled to be in the kitchen with Samantha and another one of her friends Ashley!
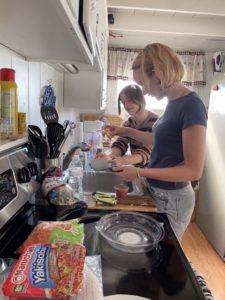
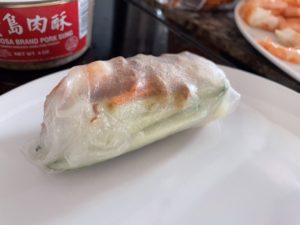
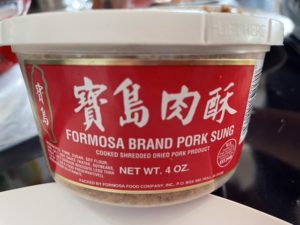
Samantha and Ashley were terrific in the kitchen together, they worked tirelessly chopping, rolling and pinching making these delicious dishes together! I was right there next to them learning, watching and laughing with them in the kitchen! The first dish the girls made were the spring rolls. They used cucumbers, carrots, Asian slaw mix, cooked shrimp, cooked shredded pork (found in Asian markets) and some of them had cooked teriyaki noodles in them for a fun twist. They mixed and matched the filling ingredients and rolled them in rice paper wrappers that were softened in warm water.
The girls were free spirits in the kitchen, adding whatever they wanted using however much they wanted, no measurements were used! The spring rolls were terrific and having each one made a little different made an exciting bite!
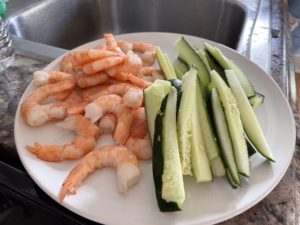
One of the things Samantha did that I thought was brilliant was to buy a ring of shrimp cocktail and use how ever many of the shrimp she needed and her family could still enjoy the shrimp ring and cocktail sauce at another meal! All of the work was done for her by doing this, no peeling ,deveining or cooking the shrimp it was all done!

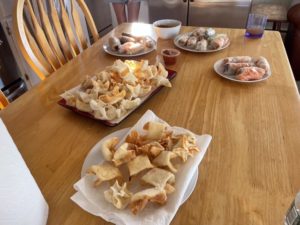
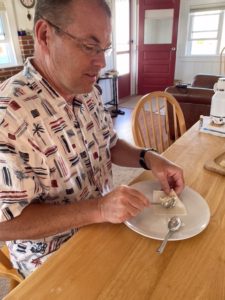
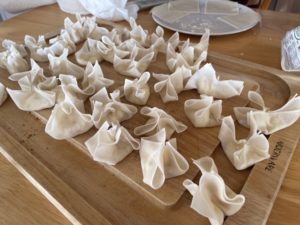
Next up we made the Crab Rangoon’s! This dish just like the last there was no measuring involved but I’ll give an approximate amounts! We made easily 4 dozen Rangoon’s, you can half the recipe but feeding this group we definitely needed that many! Samantha used wonton wrappers, 2 blocks of softened cream cheese and about 3/4 to a cup of onion, celery and imitation crab meat(diced).


One of the biggest tips I took away from Samantha was after she diced the celery she put it in a dish towel and squeezed as much of the liquid out of it she could, I was amazed at how much really came out! I think that may have been Sam’s workout for the day as she get every last drop out of the celery she could! Once the diced, onion, celery and imitation crab were well incorporated into the softened cream cheese it was time to make the Rangoon’s! This is where many hands come in handy! Sam showed each of us how to pinch the filled wontons together just right but she also joked that when her brothers help they make them in all kinds of weird shapes!
While Samantha, Ashley , myself and even Jim made the Rangoon’s Sam’s Mother Ann Marie heated about 3-4 inches of oil (peanut oil or vegetable oil work well) in a large pot, the oil should be heated to just under 350 degrees. These can also be baked or air fried!
As we made them Ann Marie fried them in Batches just until the crab Rangoon’s turned golden brown on the edges.
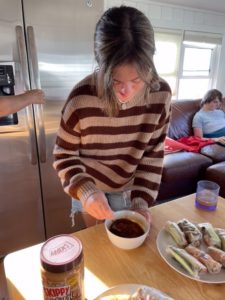
While the Rangoon’s were frying up Samantha and Ashley made the dipping sauce. Again no measurements, Sam did this all by sight and taste! Hoisin sauce and about 2 dollops of Peanut butter mixed well!
Everything that Samantha and Ashley made was phenomenal! Everyone was quick to get to the table and just like that dinner was devoured and loved by all!
A HUGE Thank You to Samantha , Rick, Ann Marie, Shaun, Nick and Ashley for letting us crash your vacation and make some delicious food!
As soon as I saw this recipe on Pinterest I knew Robby would love it and boy was I right! This is made gluten and dairy free, but I’m sure you could make it with dairy ingredients and it would be just as tasty!
I used a boxed gluten free brownie mix from stonewall Kitchen as that’s the best we have found but use your favorite brownie mix.
This takes time to cool so it’s a perfect make ahead dessert.
I found this recipe at www.thenomadicfitzpatricks.com
INGREDIENTS
1 box of gluten free/ dairy free brownie mix along with ingredients listed on the box to make the brownies.
1 package gluten free Oreo’s
8 ounce container of dairy free cream cheese
1/4 cup dairy free sour cream
1/4 cup granulated sugar
1/2 teaspoon vanilla extract
2 eggs, lightly beaten for the cheesecake layer
INSTRUCTIONS
Preheat oven to 325 degrees. Grease an 8×8 pan or 9×9 pan and set aside.
Prepare the brownie mix according to the package BUT DO NOT BAKE! Once mixed pour the batter into the prepared pan. On top of the brownie mixture add a layer of the Oreo’s , about 16. You can also cut some of the Oreo’s in half to fill in any gaps. That is the Oreo layer.
In a separate bowl whisk the dairy free cream cheese, dairy free sour cream, sugar and vanilla. This will be thick. Whisk the two eggs in a bowl and add those to your cream cheese mixture and stir until smooth.
Pour this mixture over your Oreo layer and spread evenly with a spatula, thus is your cream cheese layer.
Lastly crush 4 Oreo cookies and sprinkle them over the top of the cheesecake layer.
Bake for 40-45 minutes or u til edges are slightly golden brown. Cool the brownies to room temperature for about an hour then chill in the fridge for an additional 2 hours before slicing and serving.
Keep stored in the fridge.
Enjoy!
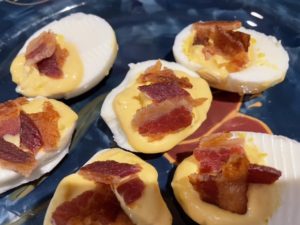
Robby recently went to Georgia to be with some friends and they went to Chik-Fil-A a few times And robby just raved about the sauce, he could not get enough of it. We don’t have Chick-Fil-A near us but luckily they sell their sauce at the grocery store. Needless to say I picked up a couple bottles for robby to have on hand. I have to admit we all love this sauce! (The original sauce) . It’s creamy and a little Smokey perfect for dipping, on a burger but I thought why not deviled eggs? Let me say these eggs were gone within five minutes of me finishing them! I’m not sure I will be allowed to make another deviled egg recipe!
These would be great for any of your summer picnics or just because! These may not be pretty but they are beyond tasty!
Recipe Can easily be doubled.
INGREDIENTS
5 hard boiled eggs
1/4 cup mayonnaise
1/4 cup Chik-Fil-A original sauce
Pinch of salt
Pinch of pepper
2 slices of cooked bacon, crumbled
DIRECTIONS
Slice your hard boiled eggs in half and remove the cooked yolks into a small bowl. When you have all of the yolks in the bowl I like to mash them with a fork until they are well broken up. I like my filling on the smooth side so I mash them well but it’s totally up to you. Once the yolks are mashed add the mayonnaise and the sauce. Add a pinch of salt and pepper and mix well. Using a piping bag or simply a zip lock bag as I do add the filling to the bag, snip the bottom if using a zip lock bag and fill the egg whites and top with crumbled bacon.
Enjoy!
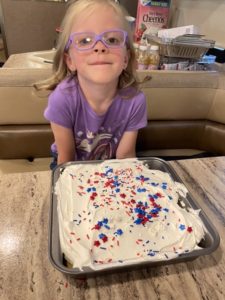
We were spending some time in New York with Amanda, Steve and our twin Grandchildren Luna and Aksel. Before we left home in the motorhome I was thinking of what I could make with Luna for a fun dessert for everyone. We celebrate a number of holidays in July so I remembered a no bake dessert that was VERY popular way back in our flight school days……late 80’s! I have just aged us but I thought this was the absolute perfect dish for Luna to make…..it’s no bake with super simple ingredients that everyone will love! Luna made this with strawberries but we all agreed adding some sliced bananas would be great! I did absolutely nothing to make this dish with the exception of giving Luna the ingredients and give her slight direction. If you have a budding young baker or chef in the making this is the perfect dish to start out with!
I had a 9×9 pan in the motorhome so that is what we used. We had a touch of open space with it but no one seemed to mind. An 8×8 would be a little better. You can also make your pudding or use store bought as we did. Luna LOVED each layer and insisted on trying each layer including the strawberries….I was not sure we would have enough for the cake but that’s what this is about. Spending time with loved ones , licking spoons and adding enough sprinkles to cover a rainbow!
INGREDIENTS
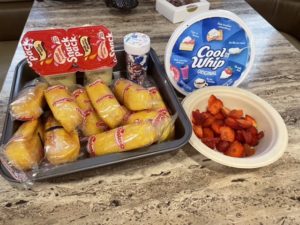
1 box of twinkies, enough to cover whatever pan size you use. We used 9×9 and used all the twinkies. I suggest an 8×8 pan.
Vanilla pudding, we used pre made store bought. I used all 4 single serve size.
8 ounces of cool whip, thawed
Fresh sliced fruit. We used strawberries but would add bananas.
Decorative sprinkles of your choice.
DIRECTIONS
Simply lay all of the unwrapped Twinkies on the bottom of your pan, filling as much as you can. Add the desired amount of pudding in an even layer over the twinkies.
Add your sliced fruit on an even layer over the pudding and spread your thawed cool whip over the top coving the fruit layer.
Add sprinkles of your choice, cover and refrigerate for an hour or more. When ready to serve simply slice and enjoy!
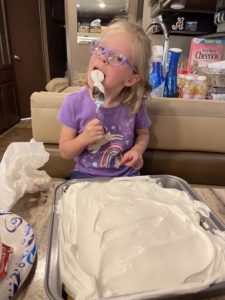
Be a Luna and try each and every layer more than once!
Stay In Touch


Follow me!
Recent Pins


